How do you draw a pointing hand?
Short answer
Drawing a pointing hand involves simplifying the complex anatomy of the hand into basic geometric shapes. By establishing the palm as a square and the fingers as cylinders, you can accurately map the index finger’s extension while tucking the remaining digits into a fist to create a clear, directional gesture.
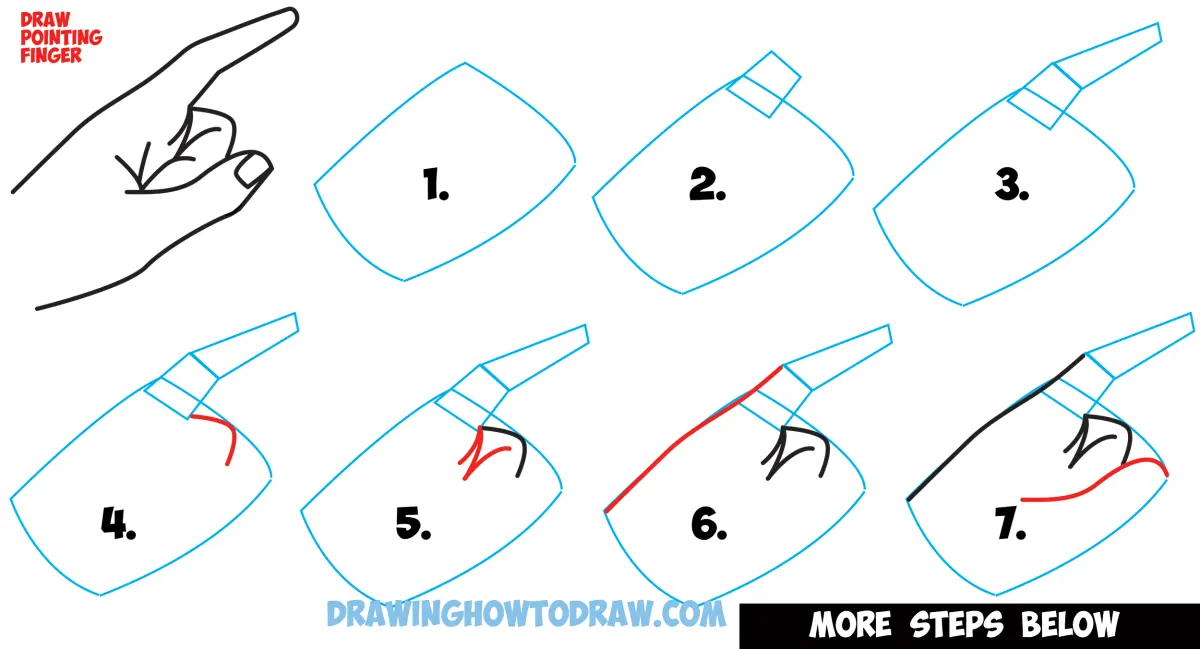
On this page
How to structure a pointing hand
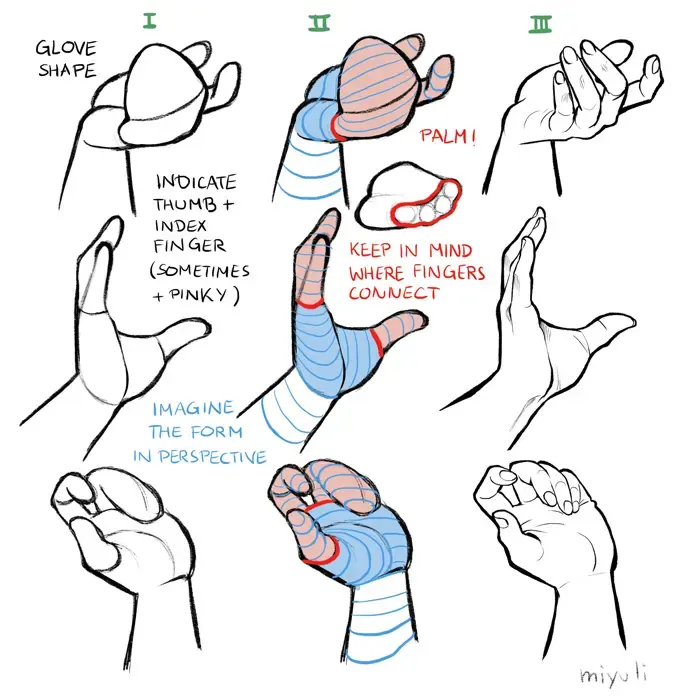
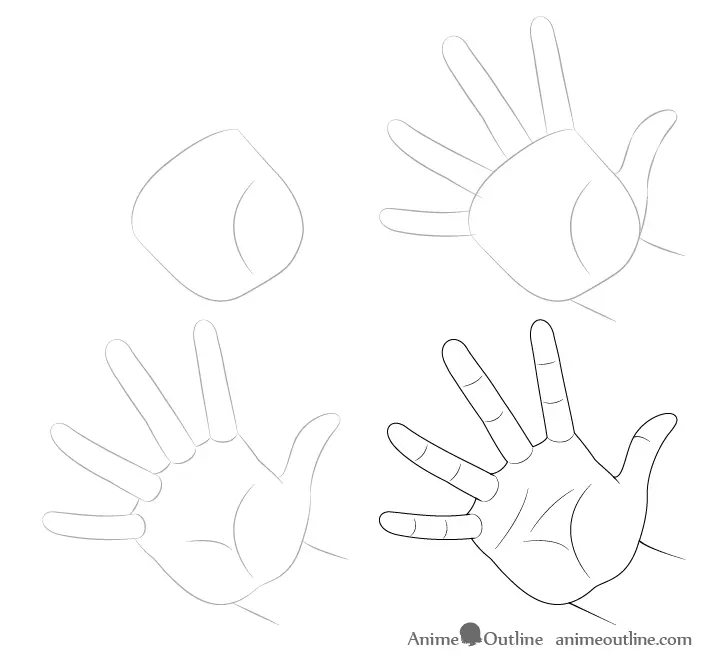
The most effective way to draw a hand is to treat it as a collection of simple volumes rather than individual muscles or bones. Start by drawing a trapezoid or a square to represent the palm. This shape provides the foundation for the wrist and the attachment points for the fingers. Once the palm is established, draw a slightly curved line extending from the top corner to indicate the path of the index finger.
To maintain correct proportions, remember that the middle finger is generally the longest, while the index finger should be roughly equal in length to the palm itself. Use light, sketchy lines to build these volumes, as you will refine them later. Focusing on the underlying structure prevents the hand from looking flat or disjointed. By establishing these geometric relationships first, you ensure that the final drawing remains anatomically plausible regardless of the specific angle you choose to depict.
Steps for drawing the index finger
The pointing gesture relies entirely on the isolation of the index finger. Once your palm structure is set, you can follow these steps to define the extension of the digit:
- Draw a long, thin cylinder extending from the top-right corner of your palm square.
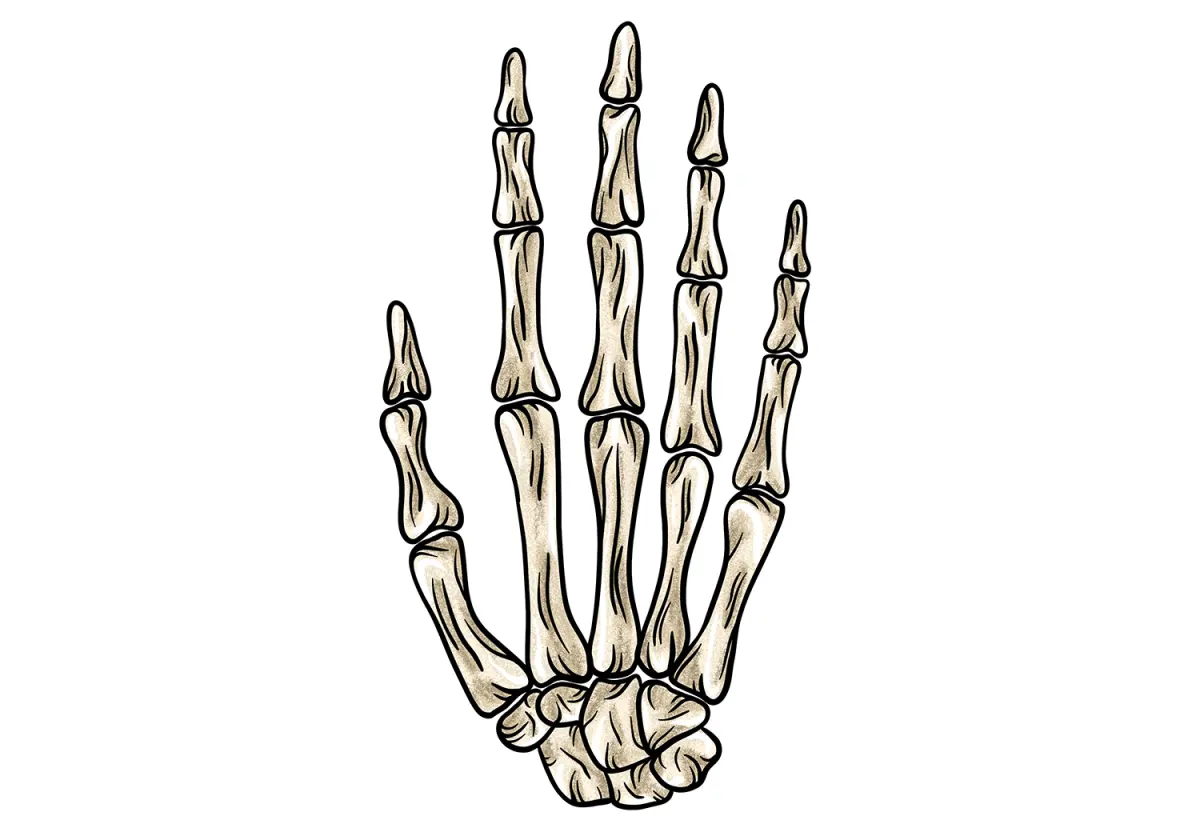
- Divide this cylinder into three distinct segments to represent the proximal, middle, and distal phalanges.
- Add a slight curve to the joints to suggest natural movement rather than a rigid, mechanical stick.
- Taper the cylinder slightly toward the tip to account for the narrowing of the finger near the nail.
Avoid making the finger perfectly straight, as human anatomy rarely features rigid, locked joints. A subtle bend at the knuckle and the first interphalangeal joint adds life to the drawing. By segmenting the finger into these three parts, you create a realistic sense of articulation that makes the pointing action feel intentional and dynamic.
How to draw the remaining fingers
When one finger points, the other three fingers typically curl into the palm to form a partial fist. To draw these, sketch three smaller, overlapping cylinders that tuck behind the index finger. Because these fingers are partially obscured, you do not need to draw every detail. Focus on the knuckles and the visible curves of the fingers as they fold toward the base of the thumb.
- Draw the middle finger slightly shorter than the index finger.
- Place the ring and pinky fingers behind the middle finger to create a sense of depth.
- Use overlapping lines to indicate that the fingers are resting against the palm.
The thumb should be drawn as a separate, thicker shape resting against the side of the index finger or the palm. It provides the necessary counter-balance to the pointing finger. By keeping the non-pointing fingers simplified, you ensure that the viewer's eye remains focused on the index finger as the primary directional element.
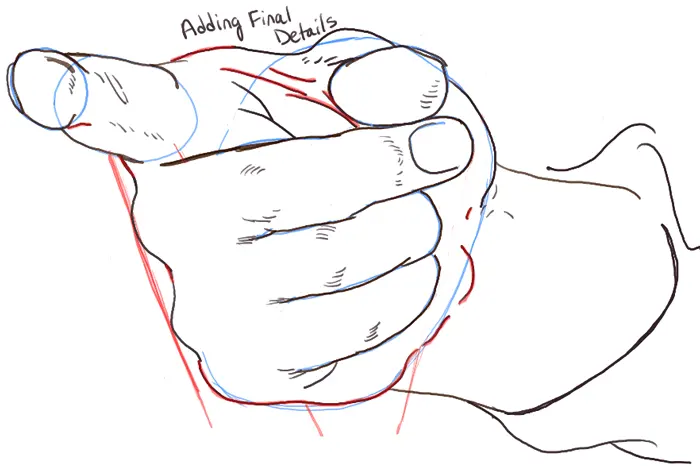
Common mistakes when drawing hands
One of the most frequent errors is drawing the fingers as uniform, sausage-like shapes without considering the tapering of the skin. Beginners often make the fingers too short or too thick, which results in a "mitten" appearance. Always check your proportions against the palm; if the fingers are shorter than the palm, the hand will look stunted. Another common issue is failing to account for the wrist’s connection to the arm, which can make the hand appear as if it is floating.
Another mistake is ignoring the perspective of the joints. Even in a simple pointing gesture, the skin bunches up at the knuckles. If you draw the fingers as perfectly smooth tubes, the hand will look artificial. Instead, add small, subtle lines at the joints to imply the presence of skin folds. This attention to detail elevates a basic sketch into a professional-looking illustration that conveys weight and movement.
Best techniques for improving hand drawings
Practice is the only way to master the complexities of human anatomy. Start by observing your own hand in a mirror while holding a pointing gesture. Take note of how the light hits the knuckles and how the skin stretches across the back of the hand. You can also use a reference photograph to trace the underlying shapes, which helps you internalize the proportions of the fingers and palm.
- Use a soft graphite pencil to allow for easy erasing and refinement.
- Practice drawing hands from multiple angles, including top-down and side views.
- Keep a sketchbook specifically for gesture drawing to improve your speed and accuracy.
Consistency is vital; try to draw at least one hand per day to build muscle memory. Over time, you will find that you no longer need to sketch the geometric base shapes as heavily, as your brain will begin to intuitively understand the volume and placement of the fingers. By combining anatomical study with daily practice, you will eventually be able to draw a pointing hand with confidence and precision.
Key facts
- Start by drawing a simple mitten shape to establish the overall gesture and direction of the hand.
- Use a cylinder for the index finger and a slightly curved rectangle for the palm to maintain anatomical proportions.
- The index finger should be roughly the same length as the width of the palm.
- Place the thumb on the side of the palm, slightly overlapping the base of the index finger.
- Keep the remaining three fingers curled into the palm to emphasize the pointing action.
- Use light construction lines to map out the knuckles before refining the final contours of the skin.
The bottom line
Drawing a convincing pointing hand requires breaking the complex anatomy down into simple geometric shapes like cylinders and blocks. By prioritizing the correct placement of the thumb and the proportional length of the index finger, you can create a clear gesture. Practice by observing your own hand, focusing on how the knuckles and curled fingers interact to form a natural, expressive shape that directs the viewer's eye.
People also ask
How do I make the hand look less like a claw?
Focus on the curvature of the knuckles and ensure the curled fingers have a soft, rounded appearance rather than sharp angles. Adding a slight overlap between the fingers creates depth and prevents a flat, stiff look.
Should the index finger be perfectly straight?
A slight, natural bend in the index finger often looks more realistic than a perfectly rigid line. Observe your own hand to see how the joints create subtle variations in the finger's silhouette.
How do I draw the fingernail correctly?
Draw the nail as a shallow curve that follows the contour of the fingertip rather than a flat shape. It should occupy about one-third of the top segment of the finger.
What is the most common mistake when drawing a pointing hand?
Beginners often make the thumb too short or position it on the wrong side of the palm. Always verify that the thumb originates from the base of the palm near the wrist.
How do I add shading to the hand?
Identify a single light source and apply shadows to the underside of the fingers and the palm. This creates a three-dimensional effect that helps the hand stand out from the background.
Can I use a reference photo for help?
Using a reference photo is highly recommended for capturing complex foreshortening or specific angles. You can photograph your own hand in the desired position to study the light and shadow patterns.
This answer was created with the help of AI research tools and reference sources. Spotted an error? Let us know — we correct mistakes quickly. See our editorial policy.