How do you draw a palm tree step by step?
Short answer
Drawing a palm tree involves sketching a textured, slightly curved trunk topped with a series of long, drooping fronds. By focusing on the rhythmic pattern of the leaves and the segmented bark of the trunk, you can create a realistic representation of this iconic tropical plant using simple geometric shapes.
On this page
How to draw a palm tree step by step
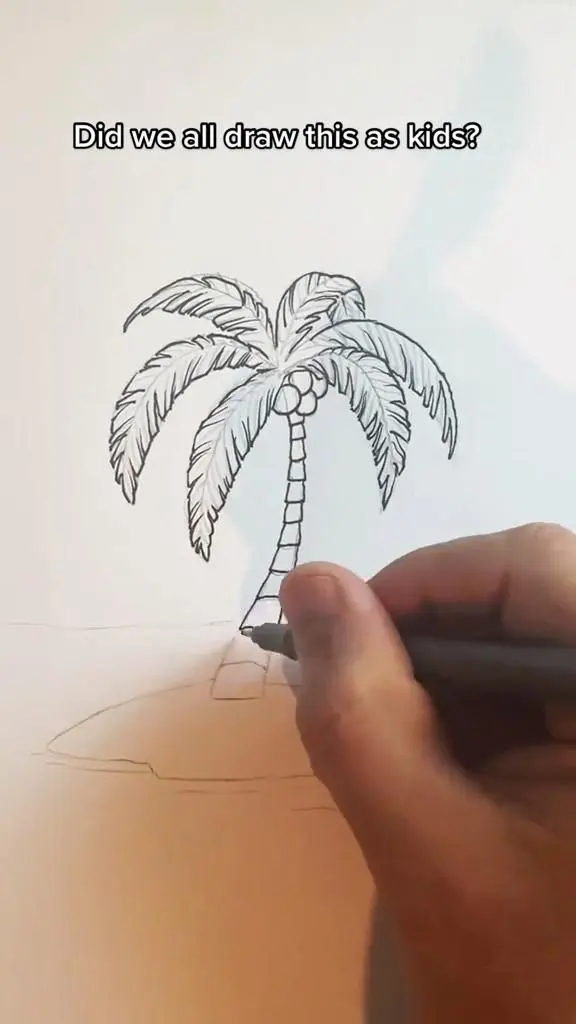
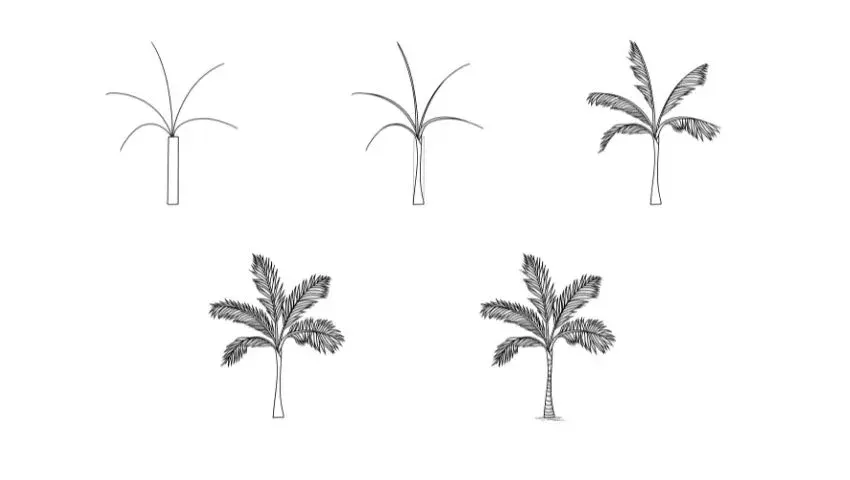
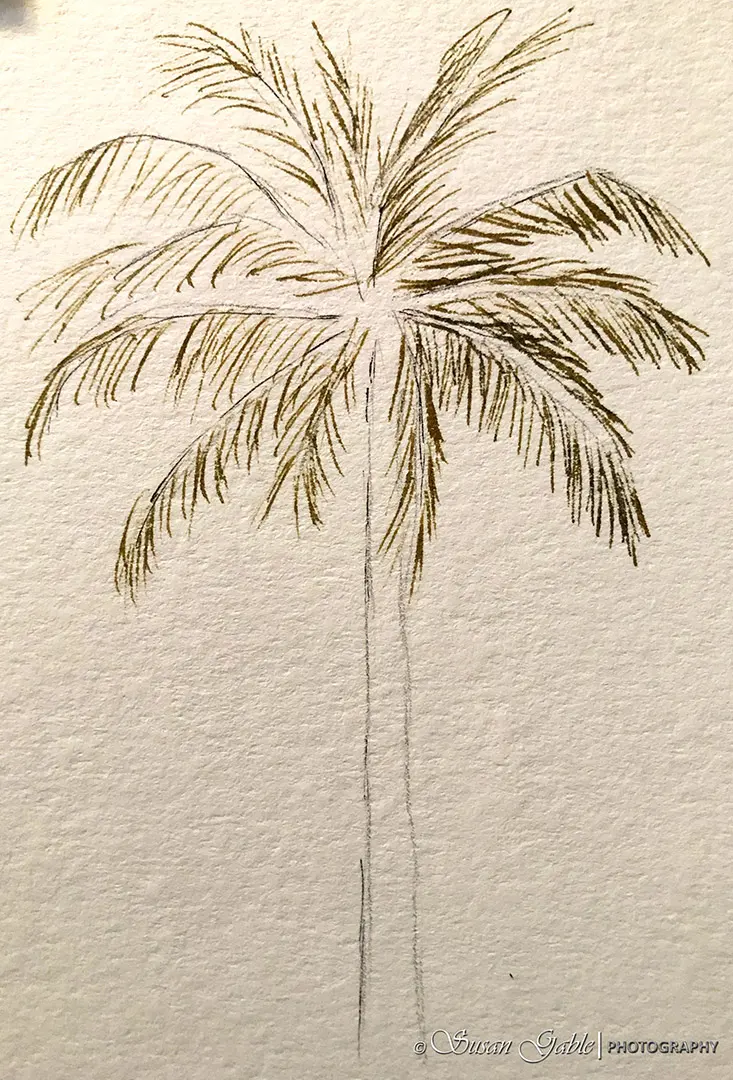
To begin your drawing, start by sketching the trunk. Most palm trees, such as the coconut palm, feature a slightly curved, tall cylinder that tapers slightly toward the top. Use light pencil strokes to establish the overall height and lean of the tree before committing to darker lines. Once the trunk is in place, draw a small circle or oval at the very top to serve as the anchor point for the fronds.
The leaves, or fronds, are the most recognizable feature of the tree. From your anchor point, draw several long, sweeping lines that curve downward like an umbrella. These lines act as the central spine for each leaf. Once you have established the main structure, add smaller, thin lines extending from these spines to create the leaflets. Keep your strokes loose and rhythmic to mimic the natural, organic flow of palm foliage in the wind.
Best tools for drawing palm trees for beginners
For those just starting, a standard HB graphite pencil is the most versatile tool. It allows you to create light guidelines that can be easily erased, as well as darker, more defined textures for the trunk. Consider using a kneaded eraser, which can be molded into specific shapes to lift graphite from the paper without damaging the surface. This is particularly useful when you need to create highlights on the trunk or thin gaps between the leaflets.
If you want to add depth, a set of drawing pencils ranging from 2H to 4B will provide a wider spectrum of tones. Use the harder 2H pencils for the initial structure and the softer 4B pencils to add shadows underneath the fronds. A smooth-surfaced sketchbook or Bristol board is also recommended, as it prevents the graphite from catching on paper texture, allowing for cleaner lines and more precise detail work on the intricate leaf patterns.
How to add texture to a palm tree trunk
The trunk of a palm tree is rarely smooth; it usually features a rough, segmented pattern caused by old leaf bases. To replicate this, avoid drawing a perfectly straight or smooth column. Instead, draw horizontal, slightly curved lines across the trunk at irregular intervals. These lines should be thicker on one side to suggest shadows, giving the trunk a three-dimensional, cylindrical appearance that looks grounded and sturdy.
You can enhance this texture by following these steps:
- Draw light, horizontal bands across the trunk to mark the segments.
- Use short, jagged "V" or "U" shapes within these bands to represent the woody remnants of fallen fronds.
- Apply a darker shade of graphite to one side of the trunk to establish a consistent light source.
- Add small, dark dots or cross-hatching between the segments to create deep shadows and visual interest.
Common mistakes when drawing palm trees
One of the most frequent errors is making the fronds too rigid or symmetrical. Palm trees in nature are asymmetrical and often messy, with leaves drooping at different angles due to age and environmental factors. Avoid drawing every single leaflet as a perfectly straight line; instead, vary the length and curvature of the leaflets to create a more natural, wild appearance. If the leaves look too uniform, the tree will appear artificial rather than organic.
Another common mistake is neglecting the weight of the fronds. Because palm leaves are heavy, they should arch downward from the center point rather than standing straight up like a fan. Ensure the base of each frond is securely attached to the top of the trunk. If the leaves appear to be floating or disconnected from the central anchor point, the drawing will lose its structural integrity and fail to reflect the realistic anatomy of the plant.
How to shade a palm tree for realism
Shading is the final step in bringing your tree to life. Since palm fronds are layered, they naturally cast shadows on one another. Identify which direction your light source is coming from and shade the underside of the fronds accordingly. Use a blending stump or a soft tissue to smudge the graphite slightly, creating a smooth transition between the light and dark areas of the leaves. This adds volume and prevents the fronds from looking like flat, two-dimensional shapes.
To complete the shading process, follow these guidelines:
- Darken the area where the fronds meet the trunk to create a focal point of depth.
- Use light, flicking motions with your pencil to suggest the fine, hair-like texture of the leaflets.
- Leave small white spaces between groups of leaves to represent light passing through the canopy.
- Ensure the trunk has a clear highlight on one side to emphasize its roundness, while keeping the opposite side in shadow.
By consistently applying these techniques, you will achieve a professional-looking result that captures the essence of a tropical palm tree.
Key facts
- Palm trees are monocots, meaning they do not have true bark or rings, which is why their trunks often appear textured with old leaf scars.
- Start your drawing by sketching a slightly curved vertical line for the trunk, adding a second line parallel to it to create thickness.
- Use a "V" shape or a series of radiating lines at the top of the trunk to establish the structure for the fronds.
- Draw long, thin, tapered ovals or jagged lines extending from the central stem of each frond to mimic the look of leaflets.
- Add small, overlapping horizontal dashes or "X" shapes along the trunk to realistically represent the remnants of fallen leaves.
- Avoid drawing perfectly symmetrical leaves, as organic palm fronds naturally droop and vary in size due to wind and age.
The bottom line
Drawing a palm tree is an exercise in capturing organic movement rather than rigid geometry. By focusing on a curved, textured trunk and radiating, drooping fronds, you can create a convincing tropical silhouette. Remember to prioritize asymmetry, as natural trees rarely possess perfect balance. With practice, layering these simple shapes will allow you to depict various palm species, from the tall coconut variety to smaller fan palms.
People also ask
Why do palm tree trunks often look like they have a diamond pattern?
This pattern is caused by the scars left behind when old fronds drop off the tree. As the tree grows upward, these scars remain on the trunk, creating a distinct, textured geometric design.
How many fronds should I draw on a typical palm tree?
A healthy mature palm tree can have dozens of fronds, but for a drawing, five to seven main fronds are usually sufficient to create a full, realistic appearance.
Should I use a ruler to draw the trunk?
No, palm trunks are rarely perfectly straight. Using a slight, natural curve makes the tree appear more organic and lifelike.
What is the best way to color a palm tree?
Use a mix of browns and grays for the trunk to show depth, and layer different shades of green on the fronds to indicate sunlight hitting the leaves.
Can I draw coconuts on my palm tree?
Yes, you can add small circles in clusters near the top of the trunk where the fronds meet. These represent the fruit often found on coconut palm varieties.
Why do my palm leaves look like stiff sticks?
This happens if the leaflets are drawn too straight or rigid. Try curving the lines of the leaflets slightly downward to mimic the natural gravity-induced droop of real palm foliage.
This answer was created with the help of AI research tools and reference sources. Spotted an error? Let us know — we correct mistakes quickly. See our editorial policy.