How do you draw a mouse?
Short answer
Drawing a mouse involves simplifying its anatomy into basic geometric shapes like circles and ovals. By sketching a large oval for the body and a smaller circle for the head, you establish proportions. Add triangular ears, a long thin tail, and whiskers to refine the form and capture the animal's distinct character.
On this page
How to draw a mouse step by step
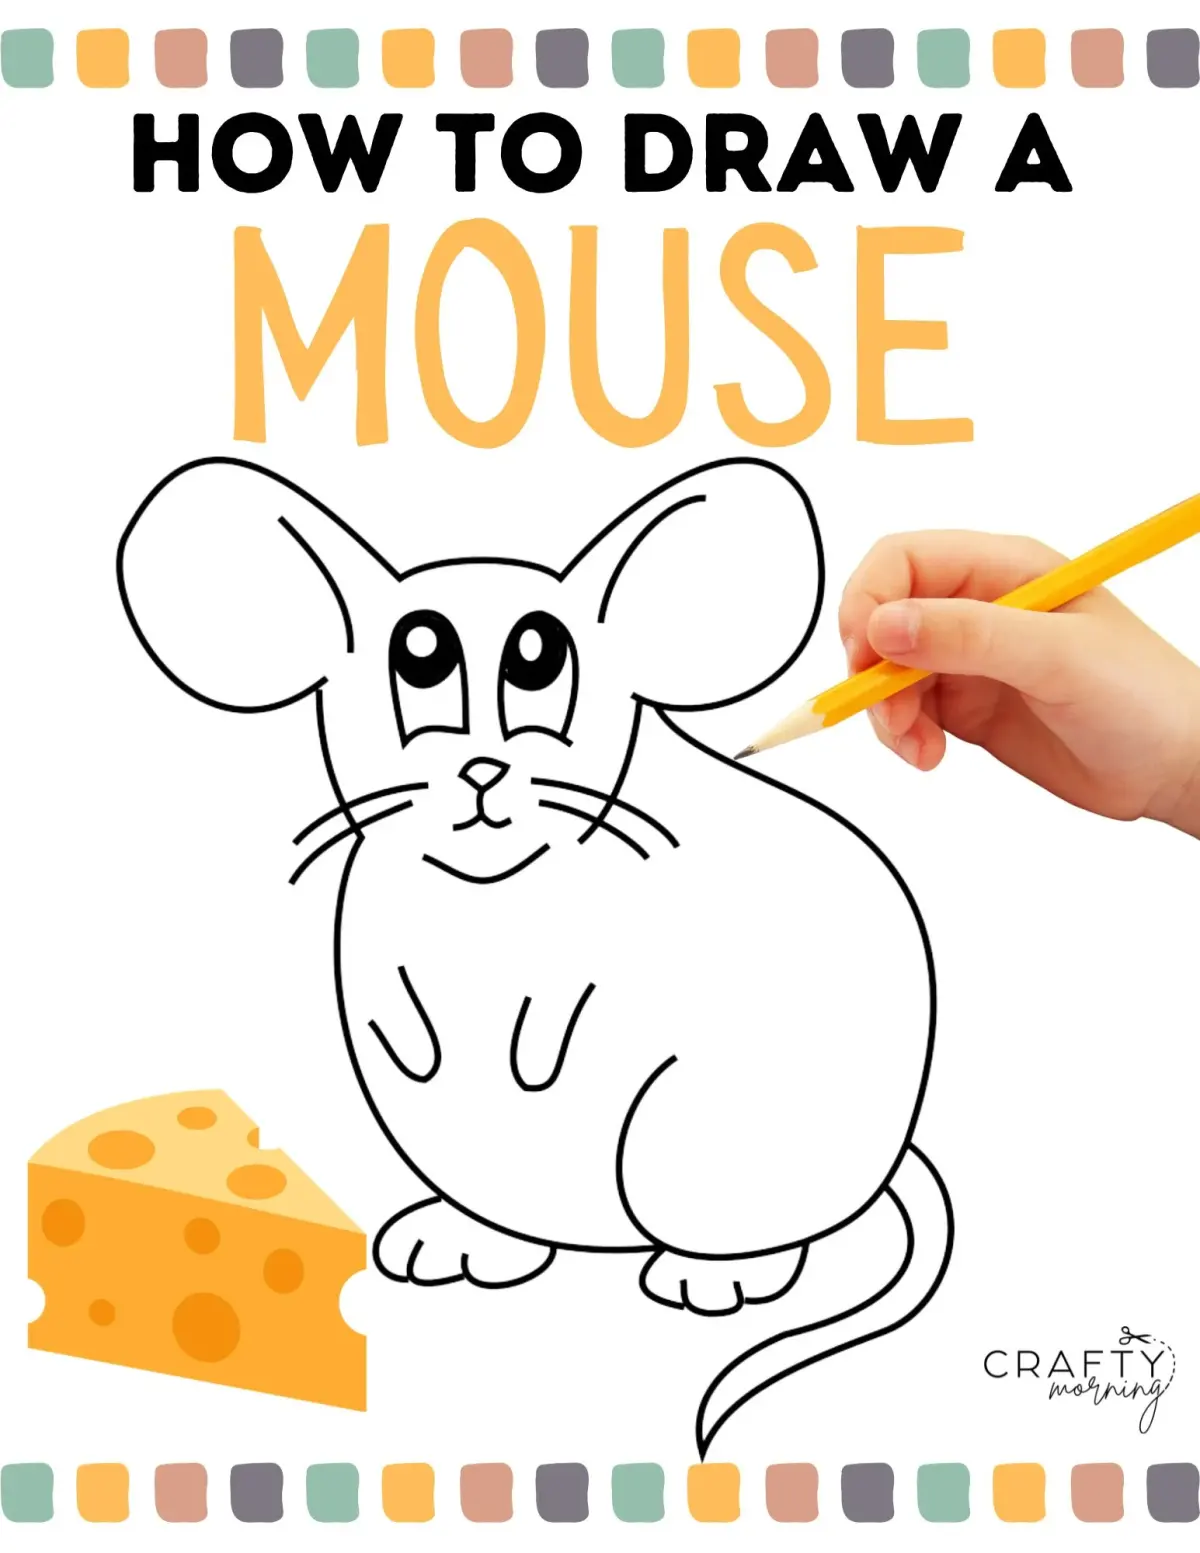
To begin your drawing, focus on the fundamental structure of the mouse. Start by sketching a horizontal oval to serve as the main body mass. Position a smaller circle slightly overlapping one end of the oval to act as the head. Connect these shapes with a curved line to create the neck and back, ensuring the transition looks natural rather than rigid.
Once the frame is set, add the limbs and facial features. Place two large, rounded triangles on top of the head for the ears and a long, tapering line extending from the rear for the tail. Use these steps to build the foundation:
- Draw the primary oval and circular head shape.
- Add two large, semi-circular ears at the top of the head.
- Sketch four small, rounded feet at the base of the body.
- Extend a thin, curved line from the back to represent the tail.
- Add a small triangle for the nose and two dots for the eyes.
Best drawing tools for beginners
For those just starting, graphite pencils are the most forgiving medium. A standard HB pencil allows for light initial sketching, which can be easily erased if adjustments are needed. Using a 2B pencil later in the process helps add darker values, giving the drawing depth and contrast. Always keep a soft vinyl eraser nearby to clean up construction lines.
Paper choice also impacts the quality of your work. A medium-weight sketchbook with a slight tooth, or texture, provides enough grip for the graphite to adhere well without smearing. Avoid glossy or extremely smooth paper, as it can make it difficult to build up layers of shading. Consider these essential items:
- HB and 2B graphite pencils for varying line weights.
- A kneaded eraser to lift graphite without damaging the paper.
- A blending stump to smooth out shadows and fur textures.
- A sharpener to maintain precise points for fine details like whiskers.
How to capture mouse anatomy accurately
Mice are defined by their compact bodies and oversized features relative to their size. When drawing, pay close attention to the scale of the ears and the length of the tail. The ears should be large and thin, often appearing slightly translucent in real life, while the tail is usually as long as the entire body and hairless.
Refining the silhouette is crucial for realism. Instead of drawing a perfectly smooth outline, use short, quick strokes to suggest the texture of fur. Keep the snout pointed and the eyes relatively small and dark, positioned on the sides of the head. By observing these anatomical proportions, you ensure the drawing remains recognizable as a mouse rather than a generic rodent or cartoon creature.

Common mistakes when drawing mice
A frequent error is making the legs too thick or long. Mice are small creatures that keep their limbs close to their bodies, so keep the legs short and sturdy. Another common mistake is failing to taper the tail; a tail that remains the same thickness from base to tip looks unnatural. Always ensure the tail narrows significantly toward the end.
Proportion issues often arise when the head is drawn too large or too small for the body. If the head is oversized, the mouse may look like a caricature; if it is too small, the animal loses its characteristic inquisitive appearance. Follow these tips to avoid common pitfalls:
- Avoid drawing perfectly straight lines, as natural forms are curved.
- Do not make the eyes too large, as this creates a doll-like effect.
- Ensure the whiskers are drawn with light, flicking motions rather than heavy, dark lines.
- Check that the feet are placed symmetrically to provide a sense of balance.
How to add detail and texture
Once the basic form is complete, focus on shading to create a three-dimensional effect. Identify a light source and shade the opposite side of the mouse's body to create volume. Use cross-hatching or light, directional strokes to mimic the appearance of fur, moving from the head toward the tail to follow the natural growth pattern of the coat.
Finally, add the finishing touches that bring the drawing to life. Whiskers should be added as long, delicate lines radiating from the snout area. Use a sharp pencil to add a tiny white highlight in the eye, which creates a sense of moisture and vitality. By layering these details carefully, you transform a simple geometric sketch into a nuanced representation of the animal. Focus on subtle variations in tone to distinguish between the soft fur and the smooth, hairless skin of the ears and tail.
Key facts
- Start by sketching two overlapping circles: a large one for the body and a smaller one for the head.
- Use a simple "teardrop" shape for the ears to give the mouse a distinct, recognizable silhouette.
- Keep the snout pointed and triangular, as this is the defining facial feature of a rodent.
- Draw the tail as a long, thin, S-shaped curve that tapers to a fine point at the end.
- Use light, sketchy pencil lines initially so you can easily erase guidelines once the final shape is set.
- Focus on the feet by drawing small, rounded ovals; mice have four toes on their front paws and five on their back.
The bottom line
Drawing a mouse is an exercise in simplifying complex anatomy into basic geometric forms. By mastering the teardrop ears, the slender tail, and the pointed snout, you can create a recognizable character with minimal effort. Focus on maintaining delicate proportions, as the charm of a mouse lies in its small, agile frame. With practice, these fundamental shapes will allow you to sketch mice in various dynamic poses.
People also ask
How do I make the mouse look cute rather than like a pest?
Focus on enlarging the eyes and rounding the ears. Adding a slight upward curve to the mouth creates a friendly expression that softens the animal's appearance.
Should I use fur texture or keep the drawing smooth?
For a cartoon style, keep lines smooth and clean. If you want a realistic look, use short, rapid pencil strokes along the edges to suggest soft fur.
What is the most common mistake when drawing a mouse?
Beginners often make the legs too thick or stiff. Remember that mouse limbs are very slender and should be drawn with delicate, thin lines to maintain proportion.
How do I draw the whiskers effectively?
Use a fine-tip pen or a sharp pencil to flick lines outward from the snout. Keep them irregular in length and direction to mimic the natural movement of whiskers.
Is it better to draw a mouse from the side or the front?
A side profile is the easiest way to capture the characteristic shape of the head and tail. Front-facing views are more difficult because they require complex perspective for the snout.
How do I add depth to the drawing?
Apply light shading under the belly and along the side of the body away from your light source. This simple technique prevents the drawing from looking flat.
This answer was created with the help of AI research tools and reference sources. Spotted an error? Let us know — we correct mistakes quickly. See our editorial policy.