How do you draw a library step by step?
Short answer
Drawing a library involves establishing a one-point perspective to create depth, followed by sketching rows of bookshelves, architectural details like arched windows, and furniture. By layering geometric shapes—starting with a large rectangle for the room and smaller vertical lines for shelves—you can build a realistic, inviting space with simple artistic tools.
On this page
How to set up the perspective for a library
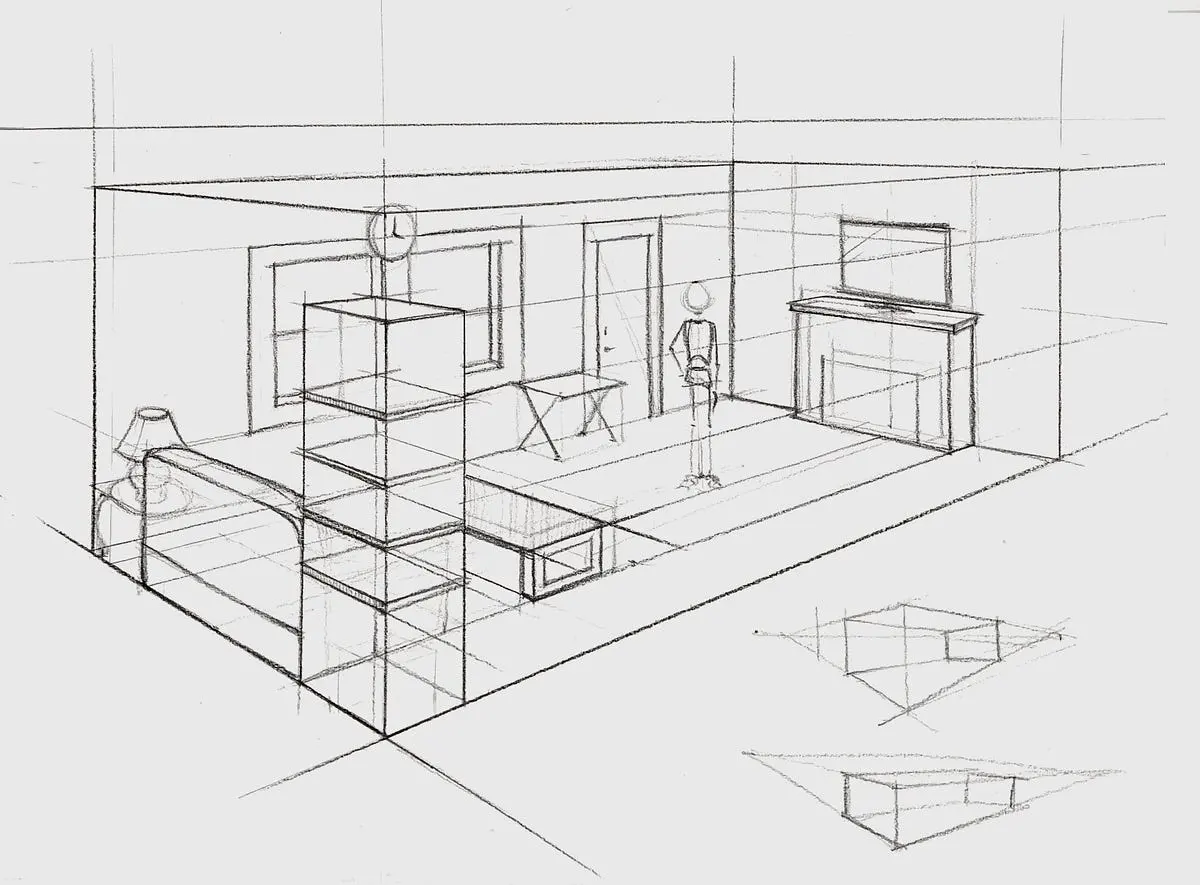
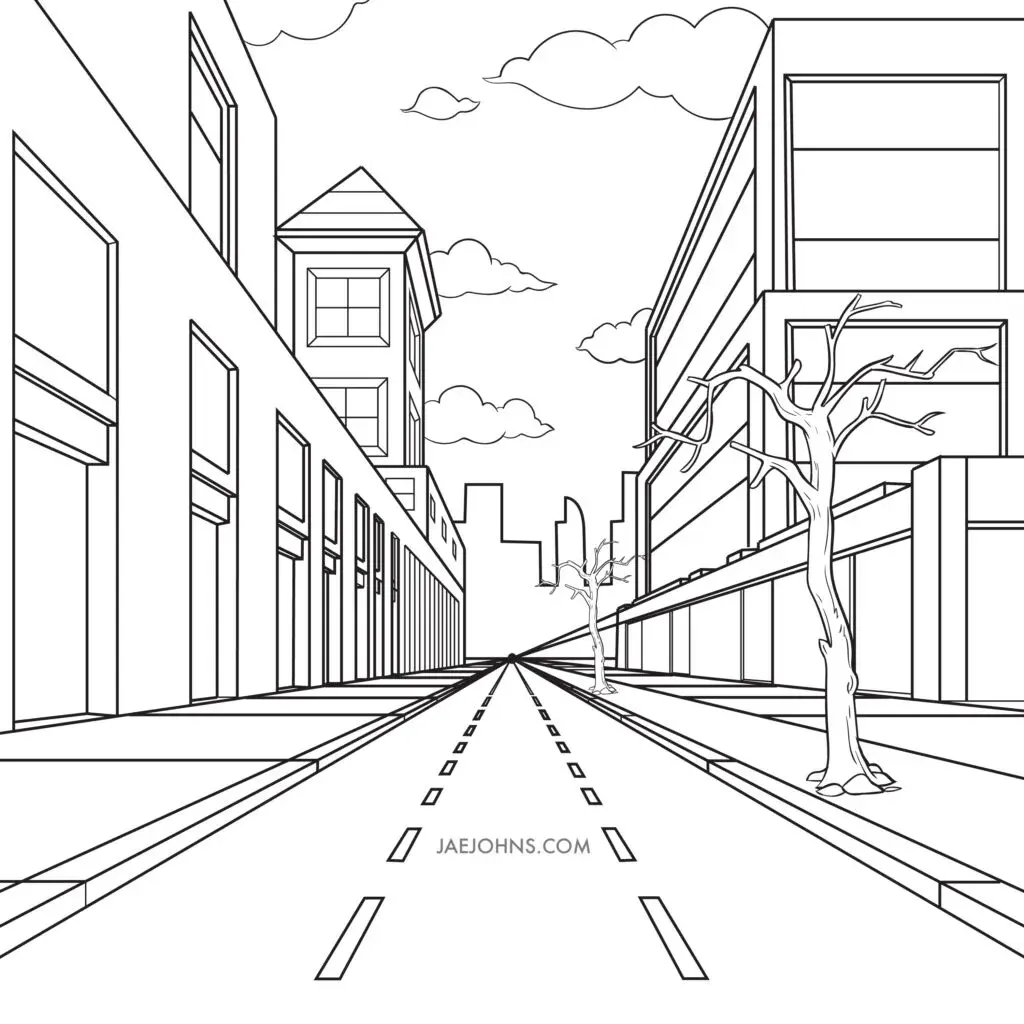
The foundation of a convincing library drawing is a solid one-point perspective. Begin by drawing a horizon line across your paper and placing a single vanishing point in the center. All horizontal lines representing the sides of bookshelves, the floorboards, and the ceiling beams must converge toward this point. This technique creates the illusion of depth, making the room appear to stretch away from the viewer.
To ensure your lines remain accurate, use a ruler for the initial draft. Start by drawing a large rectangle that encompasses the entire back wall of the library. From the corners of this rectangle, draw diagonal lines extending outward toward the edges of your paper. These lines serve as the guide rails for your shelves and furniture. Maintaining consistent angles is essential, as even slight deviations can make the room look lopsided or distorted.
How to draw bookshelves step by step
Once the perspective grid is set, you can begin adding the shelves. Bookshelves are essentially rectangular prisms that follow the vanishing point lines you established earlier. By drawing vertical lines at regular intervals, you define the width of the units, while horizontal lines connecting to the vanishing point define the depth of each individual shelf.
- Draw vertical lines along the side walls to mark the outer edges of the bookcases.
- Connect these vertical lines to the central vanishing point to create the shelf surfaces.
- Add shorter vertical lines between the shelves to represent the vertical dividers or bookends.
- Sketch small, irregular rectangles on the shelves to represent individual books of varying heights.
- Use a fine-tip pen to outline the edges, adding detail to the spines of the books.
Best drawing tools for beginners
For those new to architectural sketching, starting with basic graphite pencils is highly recommended. A 2H pencil is ideal for light construction lines that can be easily erased, while a 2B pencil provides the darker contrast needed for final outlines. High-quality smooth-surface paper prevents the pencil lead from smudging or catching on the texture, which is vital for maintaining clean, straight lines in a perspective drawing.
Beyond pencils, a clear plastic ruler is indispensable for beginners. It allows you to see the underlying grid while drawing, ensuring that every shelf and floor tile aligns perfectly with the vanishing point. If you want to add depth through shading, a blending stump or a soft eraser can help create smooth gradients on the floor or ceiling. Avoid using heavy markers until you are confident in your pencil sketch, as they are permanent and unforgiving of alignment errors.
Why perspective distortion happens
Perspective distortion occurs when the lines of your drawing do not align precisely with the vanishing point. This often happens if the vanishing point is placed too close to the edge of the paper or if the viewer tries to draw the room from an inconsistent angle. When lines meant to be parallel in reality do not converge correctly, the library will appear to tilt or collapse, ruining the sense of realism.
Another common cause of distortion is failing to account for the "eye level" of the viewer. If your horizon line is too high or too low, the perspective will feel unnatural, as if the viewer is floating or crouching. To correct this, always keep your horizon line at approximately one-third of the way up from the bottom of the page. This creates a natural, grounded perspective that mimics how a human eye perceives a room from a standing position.
Common mistakes when drawing interiors
One frequent error is overcrowding the shelves with too much detail. Beginners often try to draw every individual book spine, which can lead to a cluttered and messy appearance. Instead, focus on suggesting the presence of books through varied heights and occasional gaps, which creates a more realistic and visually appealing texture. Remember that shadows cast by the shelves are just as important as the shelves themselves for defining space.
- Neglecting to erase construction lines, which makes the final drawing look unfinished.
- Drawing furniture that does not match the room's scale, making the library look like a dollhouse.
- Using inconsistent shading, which confuses the light source and flattens the image.
- Forgetting to add architectural details like crown molding or floorboards, which ground the room in reality.
- Rushing the initial grid, which is the most common reason for structural failure in the final composition.
By taking the time to measure your proportions and respecting the vanishing point, you can create a library that feels both vast and cozy. Consistency is the key to mastering this classic architectural subject.
Key facts
- Use a vanishing point on the horizon line to ensure all horizontal lines converge correctly for one-point perspective.
- Draw tall, vertical rectangles to represent bookshelves, ensuring they get shorter as they move toward the center of the room.
- Add horizontal lines across the bookshelves at even intervals to create individual shelf tiers.
- Sketch a large, rectangular window or arched doorway on the back wall to establish a focal point for the room.
- Include a desk or table in the foreground to create a sense of depth and scale within the space.
- Use a ruler for architectural lines to maintain clean, professional edges throughout the drawing.
The bottom line
Drawing a library is primarily an exercise in one-point perspective. By establishing a clear vanishing point, you can create a realistic sense of depth that draws the viewer into the room. Focus on the structural elements—the walls, shelves, and floor—before adding smaller details like books or lamps. With practice, these simple geometric foundations will allow you to construct complex, inviting interior spaces with ease.
People also ask
Should I draw the furniture or the walls first?
Always sketch the walls and floor structure first to establish the room's perspective. Once the space is defined, add furniture to ensure the proportions remain realistic.
How do I make the bookshelves look full?
Draw small, irregular vertical lines of varying heights on the shelves to represent book spines. Adding a few tilted books or gaps creates a more natural, lived-in appearance.
What is the most common mistake when drawing a library?
The most frequent error is drawing shelves that do not follow the vanishing point, which makes the room look tilted. Always ensure horizontal shelf lines align with the room's perspective.
How can I add lighting to the drawing?
Place a lamp on a desk or draw light rays coming from a window. Use cross-hatching or shading to darken the corners of the room away from these light sources.
Do I need to draw every individual book?
No, drawing individual books is tedious and often looks cluttered. Focus on the texture of the spines and use shading to suggest the mass of books on a shelf.
How do I draw a rolling ladder?
Draw a thin, vertical pole attached to the top shelf and a small ladder frame resting against it. Keep the ladder at a slight angle to show it is leaning against the wall.
This answer was created with the help of AI research tools and reference sources. Spotted an error? Let us know — we correct mistakes quickly. See our editorial policy.