How do you photograph artwork?
Short answer
Photographing artwork requires consistent, diffuse lighting, a stable tripod, and a camera positioned parallel to the work to avoid perspective distortion. By using a low ISO, a medium aperture, and a polarizing filter, you can capture accurate color, sharp detail, and texture while eliminating unwanted glare from surfaces like oil paint.
On this page
How to set up proper lighting for artwork
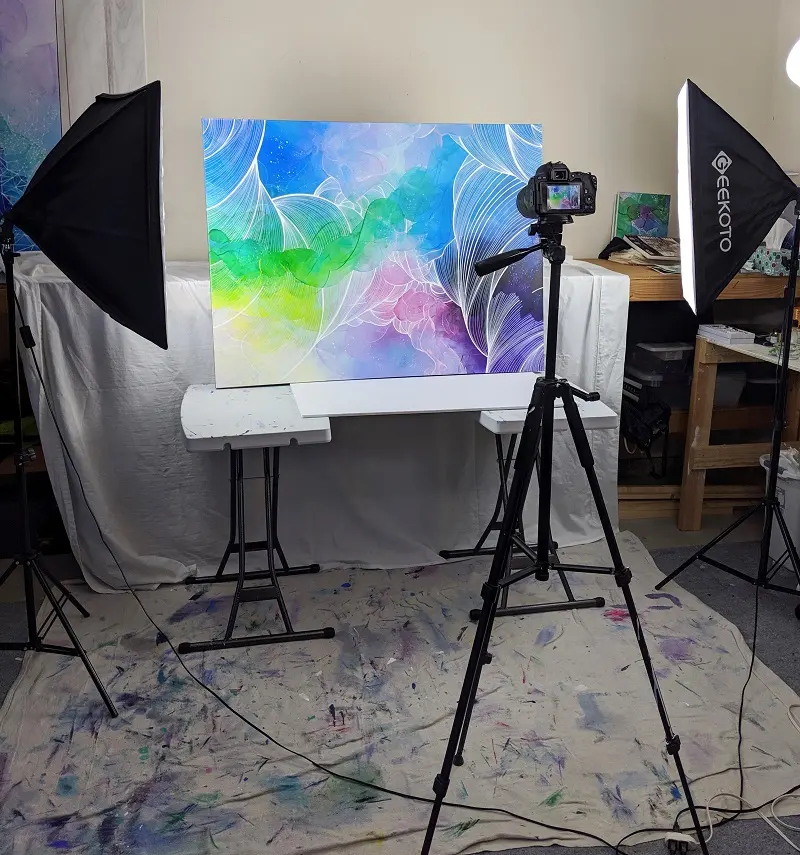
Lighting is the most critical factor in professional art reproduction. You must avoid direct sunlight or harsh overhead bulbs, which create hotspots and uneven shadows across the surface of the work. The goal is to achieve "flat" lighting that illuminates the entire piece with equal intensity, ensuring the colors appear as the artist intended.
The most effective method involves using two identical light sources, such as LED panels or studio strobes, placed at 45-degree angles to the artwork. Position these lights on either side of the piece, far enough back to ensure the light spreads evenly across the entire surface. If you are working in a home environment, you can use large pieces of white foam board to bounce light and fill in any deep shadows.
- Set your lights at equal distances from the artwork to maintain balanced exposure.
- Angle the lights at 45 degrees to prevent glare from bouncing directly back into the lens.
- Turn off all ambient room lights to prevent color contamination from mixed light sources.
- Use a light meter or your camera’s histogram to ensure the exposure is consistent from corner to corner.
Best camera settings for art photography
To achieve high-quality results, you must prioritize image clarity and color accuracy. Start by setting your camera to its lowest native ISO, typically ISO 100 or 200, to minimize digital noise. Use a medium aperture, such as f/8 or f/11, which provides the best sharpness across the entire lens and ensures the whole surface of the artwork remains in focus.
Shutter speed should be adjusted based on your light levels, but because you are using a tripod, you have the flexibility to use a slower shutter speed if needed. Always shoot in RAW format rather than JPEG. RAW files retain significantly more data, allowing you to adjust white balance and exposure during post-processing without degrading the quality of the image.
- Set your white balance manually using a gray card to ensure accurate color rendering.
- Use a timer or a remote shutter release to prevent camera shake when pressing the button.
- Disable image stabilization if your camera is mounted on a sturdy tripod to avoid sensor movement.
How to avoid perspective distortion and glare
Perspective distortion occurs when the camera is not perfectly parallel to the artwork, causing rectangular pieces to appear trapezoidal. To fix this, align the center of your lens with the exact center of the artwork. Use a spirit level on your camera or tripod to ensure the sensor plane is perfectly vertical and horizontal relative to the wall.
Glare is a common problem with glossy media, such as varnished paintings, glass-covered prints, or metallic inks. A circular polarizing filter (CPL) is an essential tool for managing these reflections. By rotating the filter while looking through the viewfinder, you can selectively block light waves reflecting off the surface, effectively "seeing through" the glare to reveal the texture and color underneath.
- Measure the distance from the lens to each corner of the frame to ensure perfect alignment.
- Attach a polarizing filter to the front of your lens.
- Rotate the filter slowly while observing the artwork on a monitor until reflections disappear.
- Check the edges of the frame to ensure no shadows are being cast by the lights.
Why color accuracy matters in art reproduction
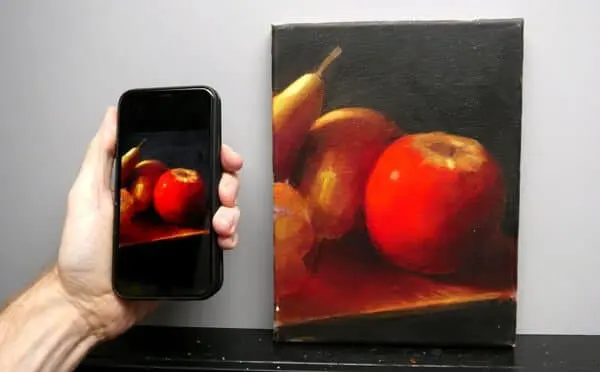
Color fidelity is the primary goal when documenting artwork for portfolios, archives, or sales. Different light sources have different color temperatures, which can make a painting look unnaturally yellow or blue. Using a color checker card, such as a X-Rite ColorChecker, is the industry standard for professional photographers to ensure the digital file matches the physical original.
Place the color checker card in the frame for your first test shot, then remove it for the final capture. During editing, you can use the color patches on the card as a reference point to calibrate your software. This process ensures that the reds, blues, and skin tones in your photograph are as close to the real-life pigments as possible, providing a reliable record for galleries and collectors.
- Always shoot in a controlled environment where the light temperature remains constant.
- Avoid using automatic white balance, as it will shift colors unpredictably based on the artwork's palette.
- Compare your digital file to the original piece on a color-calibrated monitor for final verification.
Common mistakes when photographing art
One frequent error is failing to use a tripod, which leads to blurry images and inconsistent framing. Even a slight movement during the exposure can ruin the fine details of a brushstroke. Another mistake is relying on the camera’s built-in flash, which creates harsh, localized highlights and deep shadows that flatten the work's texture and distort the intended visual impact.
Additionally, many photographers neglect to clean the artwork before shooting. Dust, fingerprints, and surface debris become magnified under high-resolution sensors, requiring tedious hours of retouching. Always inspect the surface of the piece carefully under bright light before you begin. Finally, ensure that your camera lens is clean and free of smudges, as any obstruction will significantly reduce the contrast and sharpness of your final images.
Key facts
- Use a tripod to ensure your camera remains perfectly still, preventing motion blur during long exposures.
- Position lights at 45-degree angles to the artwork to eliminate glare and avoid hot spots on the surface.
- Set your camera to a low ISO, such as 100 or 200, to minimize digital noise and maintain image clarity.
- Use a prime lens with a focal length between 50mm and 85mm to reduce barrel distortion common in wide-angle lenses.
- Set a custom white balance using a gray card to ensure colors in the photograph match the original piece.
- Turn off your camera's built-in flash, as it creates harsh reflections and uneven lighting across the artwork.
The bottom line
Photographing artwork requires precision to ensure the digital reproduction remains faithful to the original piece. By utilizing a stable tripod, diffused lighting at 45-degree angles, and a low ISO, you can eliminate common issues like glare and noise. Prioritizing parallel alignment and accurate white balance will yield professional results, allowing you to document or display your art with the clarity and detail it deserves.
People also ask
Should I use a polarizing filter when photographing paintings?
Yes, a circular polarizer is highly effective at cutting through reflections on varnished or glossy surfaces. Rotate the filter while looking through the viewfinder until the glare disappears from the artwork.
What is the best time of day to photograph art outdoors?
Overcast days provide the most consistent, diffused natural light. Avoid direct sunlight, which creates extreme contrast and deep shadows that obscure fine details.
How do I prevent the artwork from appearing distorted?
Ensure your camera sensor is perfectly parallel to the center of the artwork. Use a spirit level on your tripod to confirm the camera is not tilted up or down.
Is it better to shoot in JPEG or RAW format?
Always shoot in RAW format to capture the maximum amount of color and exposure data. This allows for precise adjustments during post-processing without degrading the image quality.
How far away should the camera be from the artwork?
Position the camera far enough back to fill the frame without using the lens's extreme edges. This distance helps maintain geometric accuracy and minimizes lens distortion.
Why does my artwork look yellow or blue in photos?
This happens because of incorrect white balance settings that fail to account for the color temperature of your light source. Always use a neutral gray card to calibrate your camera before shooting.
This answer was created with the help of AI research tools and reference sources. Spotted an error? Let us know — we correct mistakes quickly. See our editorial policy.