How do you draw a face from below?
Short answer
Drawing a face from below, known as a worm’s-eye view, requires shifting facial features upward while curving their horizontal alignment. Focus on the underside of the jaw, the nostrils, and the bottom of the ears. By arching these elements to follow the head’s spherical volume, you create a convincing sense of perspective.
On this page
How to structure the head for upward angles
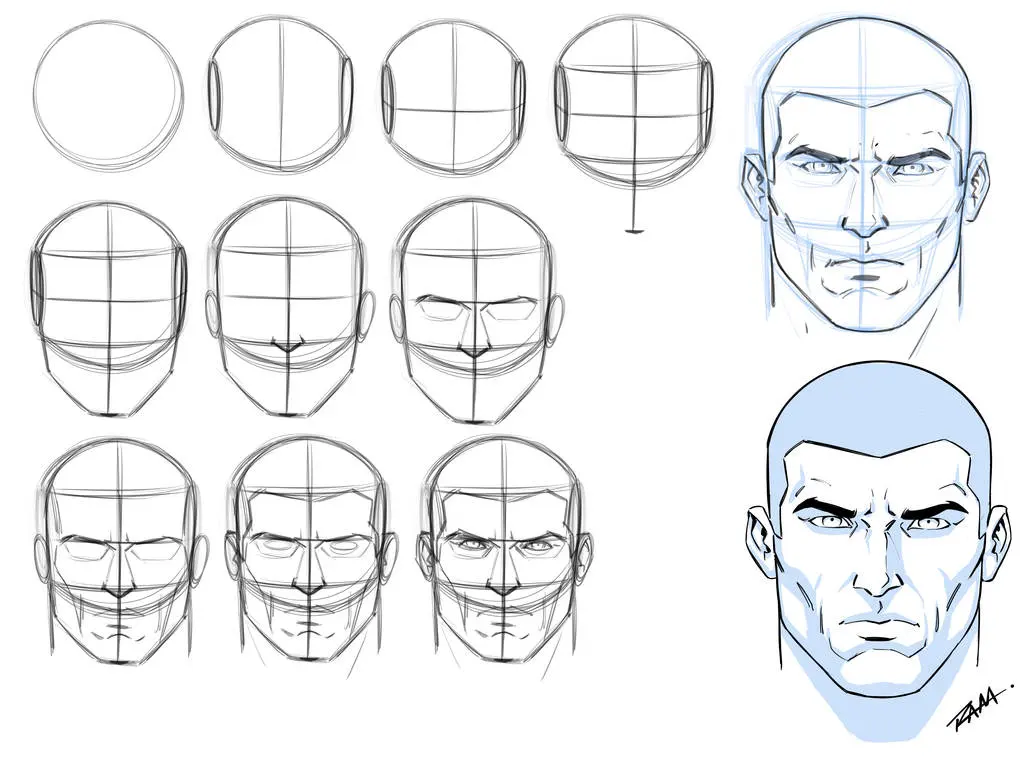
When drawing a head from a low angle, the primary challenge is adjusting the perspective of a three-dimensional sphere. Start by drawing a circle for the cranium and a slightly elongated jawline. Because the chin is tilted upward, the horizontal guidelines for the eyes, nose, and mouth will curve into upward-arching parabolas rather than straight lines. This curvature is essential to mimic the way features wrap around the skull's surface.
Visualize the head as a tilted box or sphere. The chin will appear much closer to the eyes than it would in a front-facing portrait, effectively compressing the mid-face area. To maintain accuracy, follow these structural steps:
- Sketch a circle and add a center vertical axis line that curves slightly to indicate the tilt.
- Place the horizontal brow line higher than the center of the circle.
- Draw the nose and mouth lines below the brow, ensuring they curve upward toward the ears.
- Define the jawline by connecting it to the ears, which will now appear lower on the head relative to the eyes.
Why facial features shift in perspective
The most significant change in a low-angle perspective is the visibility of the underside of the features. As the chin rises, the nostrils become the focal point of the nose, often obscuring the bridge. Similarly, the underside of the jaw becomes prominent, creating a strong shadow area that defines the neck's connection to the head. The ears also shift, appearing lower on the head because the jawline has tilted upward and away from the viewer.
You must also account for the foreshortening of the forehead. Because the top of the head is tilted back, the distance between the hairline and the eyebrows appears shorter than usual. This compression is a natural result of the angle and helps the viewer perceive the depth of the skull. If you draw the forehead too tall, the head will look distorted or flat, ruining the illusion of a three-dimensional form.
Common mistakes when drawing faces from below
One of the most frequent errors is keeping the features parallel to the horizon. Beginners often draw the eyes and mouth as straight horizontal lines, which makes the face look like it is simply tilted sideways rather than looking up. Always remember that the perspective requires a "smile" curve for every horizontal feature. If the curve is too shallow, the face will appear static; if it is too steep, the face will appear unnaturally warped.
Another common mistake involves the neck. When looking up at a person, the neck is often partially hidden by the jaw or appears much thicker due to the perspective. Avoid drawing a long, thin neck, as this contradicts the weight and tilt of the head. Instead, focus on the following:
- Ensure the neck connects to the back of the jaw rather than the front.
- Use shading to emphasize the shadow cast by the chin onto the upper neck.
- Keep the neck width proportional to the base of the skull to avoid a floating head effect.
Best tools and techniques for beginners
For those starting out, using a light graphite pencil is essential for establishing the initial guidelines. Because this perspective involves complex overlapping shapes, you will likely need to erase and adjust your lines multiple times. Using a 2H pencil allows you to lay down faint construction lines that do not leave deep indentations on the paper. Once the proportions are locked in, you can move to a darker 2B or 4B pencil to define the final features.
Practicing with a mirror or a reference photo is the most effective way to understand these shifts. When using a reference, trace the curves of the eyes and mouth with your finger to feel the arc. You can also use a simple mannequin head to experiment with lighting. By placing a light source below the head, you can see exactly how the shadows emphasize the upward tilt, providing a clear map for your shading process.
How to add depth with shading
Shading is the final step that brings your drawing to life by reinforcing the three-dimensional form. In a low-angle view, the underside of the chin, the tip of the nose, and the lower eyelids are typically in shadow. By applying consistent shading to these areas, you ground the face in space and emphasize the upward tilt. Use soft transitions between light and dark to mimic the rounded surfaces of the cheeks and jaw.
Pay close attention to the cast shadows, particularly the one created by the jawline falling onto the neck. This shadow is often the darkest part of the drawing and provides the necessary contrast to make the chin pop forward. By carefully observing where the light hits the protruding features, you can create a realistic sense of volume. Keep your strokes consistent with the curvature of the face to ensure the shading enhances, rather than flattens, the perspective you have worked so hard to establish.
Key facts
- When viewing a face from below, the ears appear lower than the level of the eyes.
- The chin and jawline become the most prominent features, often obscuring parts of the neck.
- Perspective causes the top of the head to appear foreshortened, meaning it occupies less vertical space.
- The nostrils become visible, and the nose appears to point upward toward the brow line.
- Draw the horizontal guidelines as upward-curving arcs to mimic the tilt of the head.
- Place the mouth closer to the nose than in a standard front-facing portrait to account for the angle.
The bottom line
Drawing a face from below requires shifting your focus toward the underside of the chin, nose, and jaw. By using upward-curving guidelines and compressing the forehead, you create a realistic sense of foreshortening. Always remember that the ears drop lower and the neck is partially hidden. Practice these spatial relationships to master the illusion of looking up at your subject with accurate anatomical proportions.
People also ask
How do I handle the foreshortening of the forehead?
When the head tilts back, the forehead is angled away from the viewer, making it look much shorter. Focus on compressing the space between the eyebrows and the hairline to create a convincing sense of depth.
Where should I place the ears on a tilted head?
In a low-angle view, the ears shift downward relative to the eyes. Position the top of the ears near the level of the eyes and the bottom of the ears toward the jawline.
Why does the neck look different from this angle?
The neck appears shorter and thicker because the chin overlaps the upper throat area. You should draw the jawline as a strong, curved shape that connects to the neck muscles behind it.
How do I draw the nose correctly from below?
Focus on the base of the nose, which becomes the primary focal point. You will see the nostrils clearly, so draw them as rounded shapes rather than flat lines to show volume.
What is the biggest mistake beginners make with this angle?
The most common error is drawing the features as if they were on a flat plane. You must use curved guidelines to wrap the features around the three-dimensional form of the skull.
Should I use a specific grid for this perspective?
A perspective grid is helpful, but you can simply use a "worm's-eye view" approach. Imagine the head as a tilted sphere and ensure all facial features follow the curvature of that surface.
This answer was created with the help of AI research tools and reference sources. Spotted an error? Let us know — we correct mistakes quickly. See our editorial policy.