How do you draw a flute step by step?
Short answer
Drawing a flute requires capturing its elongated cylindrical shape and precise mechanical details. By establishing a long, thin rectangle as your base and layering circular key mechanisms, you can create a realistic representation. Focus on maintaining consistent perspective and alignment to ensure the instrument appears balanced, functional, and structurally sound throughout.
On this page
How to draw a flute step by step
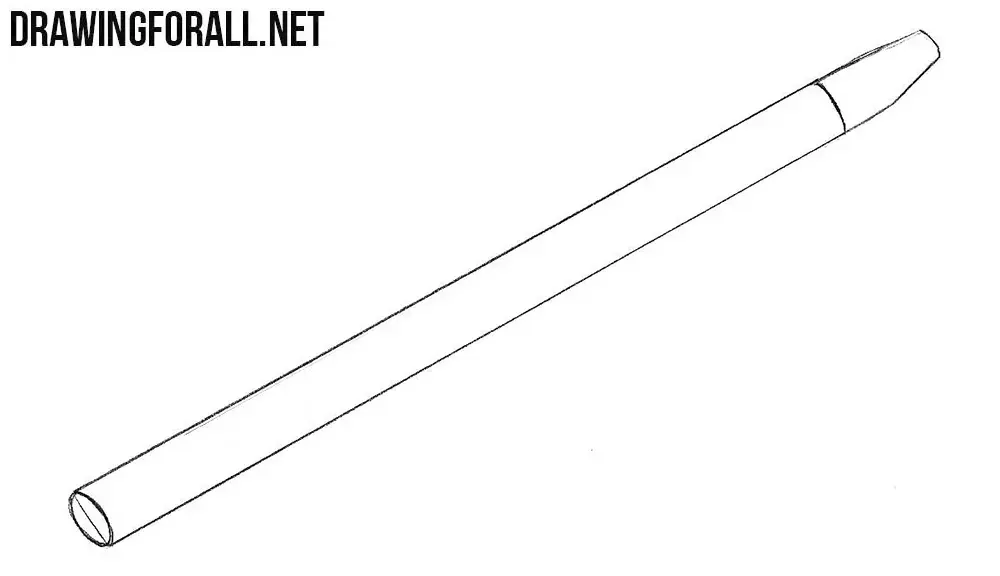
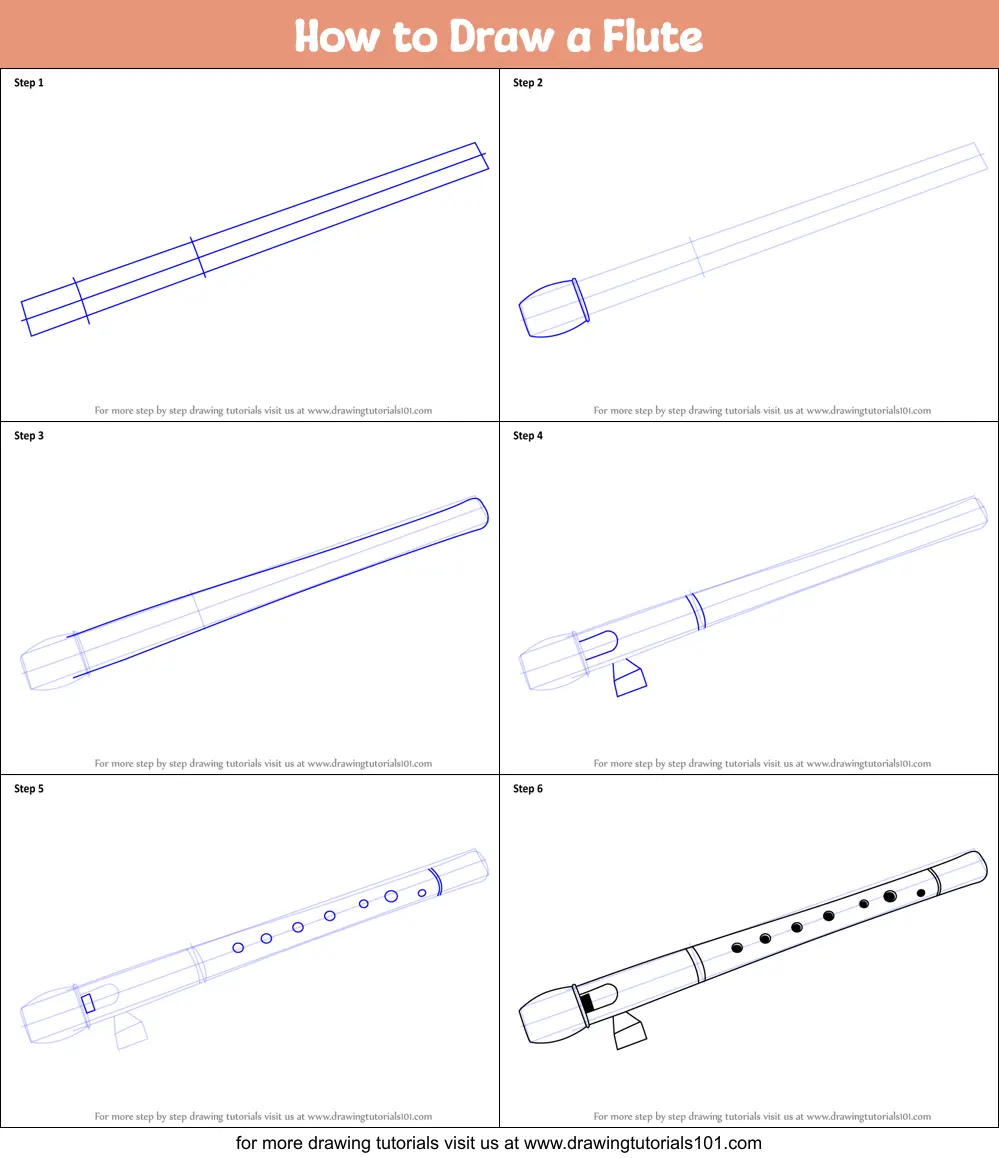
Begin by drawing a long, thin horizontal rectangle to serve as the flute's main body, known as the headjoint, body, and footjoint. Lightly sketch a center line through the middle of this rectangle to ensure your keys remain perfectly aligned along the instrument's axis. The modern Western concert flute is typically about 26 inches long, so maintain a high length-to-width ratio to reflect its slender, elegant profile.
Once the primary cylinder is established, divide the body into three distinct sections. The headjoint on the left should feature a small, oval-shaped embouchure hole near the top. Add a small cap at the far left end to represent the crown. Use these steps to build your foundation:
- Draw a long, narrow rectangle with slightly rounded edges.
- Sketch a small, horizontal oval near the top left for the embouchure hole.
- Divide the remaining length into three segments to mark where the joints connect.
- Use a ruler to ensure your lines remain parallel, as even slight curves can make the flute look distorted.
Best tools for drawing musical instruments
Precision is essential when drawing mechanical objects like a flute, so utilize tools that allow for clean, sharp lines. A mechanical pencil with 0.5mm lead is ideal for sketching the intricate keywork, as it maintains a consistent line weight without needing frequent sharpening. For the final outlines, a fine-liner or technical pen will help define the metallic sheen and the distinct edges of the keys.
If you are shading to create a realistic metallic effect, use graphite pencils ranging from 2H to 4B. The 2H pencil is excellent for light, preliminary structural lines that can be easily erased. The 4B pencil allows for deep, dark shadows that mimic the reflective surface of silver or nickel-plated flutes. A kneaded eraser is also a vital tool, as it can be molded into small points to lift graphite from tight spaces between keys.
Why flute perspective is difficult
The primary challenge in drawing a flute is maintaining the illusion of a three-dimensional cylinder on a flat surface. Because the instrument is so long and narrow, any deviation in the perspective of the keys can make the flute appear bent or flattened. Artists often struggle with "foreshortening," which occurs when the flute is angled toward or away from the viewer, causing the length to appear shorter than it actually is.
To overcome these issues, focus on the elliptical shapes of the key pads. When viewed from the side, the keys should appear as flattened ovals rather than perfect circles. As the flute recedes into the background, the distance between the keys should visually compress. Remember that the flute is a hollow tube; adding subtle highlights along the top edge of the cylinder will help define its volume and cylindrical nature.
Common mistakes when drawing flutes
One of the most frequent errors is failing to align the keys along a single, straight path. In reality, the keys are mounted on a rod system that runs parallel to the body, meaning they must follow the curvature of the cylinder. If the keys are drawn too high or too low, the instrument loses its structural logic. Always check that the center of each key pad sits directly on the axis line you drew earlier.
Another common mistake is neglecting the complex mechanical linkage that connects the keys. A flute is not just a tube with holes; it is a sophisticated system of levers, springs, and rods. While you do not need to draw every individual screw, adding a few thin lines connecting the keys will make the drawing look functional rather than decorative. Avoid these common pitfalls:
- Drawing keys that are too large, which makes the flute look like a toy.
- Forgetting the embouchure plate, which is the slightly raised area around the mouth hole.
- Creating uneven spacing between the keys, which contradicts the instrument's precise acoustic design.
- Using heavy, dark outlines for the internal mechanisms, which can make the drawing look cluttered.
How to add realistic metallic textures
The flute is traditionally made of silver, gold, or platinum, which creates high-contrast reflections. To render this, identify the light source and place your highlights accordingly. The brightest white spots should be placed on the upper curve of the tube and the tops of the key cups. Use the "subtractive" method by drawing a dark background and using an eraser to pull out the bright, reflective highlights.
Texture is achieved by varying the transition between light and shadow. A polished flute will have sharp, high-contrast transitions, while a brushed metal finish will have softer, more gradual gradients. Observe how the light wraps around the cylindrical body, creating a "hot spot" that runs the length of the instrument. By carefully placing these highlights and deep, reflected shadows on the underside of the tube, you will successfully convey the weight and luster of the metal. Finalize your drawing by adding subtle cast shadows beneath the instrument to ground it firmly in its environment.
Key facts
- A modern concert flute is typically 26 inches (67 centimeters) long and made of metal.
- The instrument consists of three main parts: the headjoint, the body, and the footjoint.
- The embouchure hole is an oval-shaped opening located near the top of the headjoint.
- Flutes feature a complex system of keys and rods that cover tone holes along the body.
- When drawing, use a long, thin rectangle as the primary guide for the cylindrical tube.
- Perspective is crucial; ensure the tone holes are drawn as ellipses rather than perfect circles to show depth.
The bottom line
Drawing a flute requires attention to its cylindrical geometry and mechanical details. By starting with a long, thin tube and adding elliptical tone holes, you establish a realistic foundation. Focus on the placement of the headjoint and the intricate key mechanism to capture the instrument's professional appearance. With careful shading and perspective, you can transform a basic shape into a convincing representation of this elegant woodwind.
People also ask
Why does the flute look like a long tube?
The flute is a woodwind instrument that produces sound through an air column vibrating inside a cylindrical body. Its elongated shape is necessary to achieve the specific pitch range required for orchestral music.
How many keys are typically found on a standard flute?
A professional-grade concert flute usually features 16 keys. These keys are operated by the player's fingers to open and close holes, allowing for the production of different musical notes.
Should I draw the flute from a side profile or an angle?
Drawing from a slight angle is recommended to show the three-dimensional nature of the keys and the embouchure hole. A flat side profile often makes the instrument look like a simple pipe rather than a complex musical tool.
What is the most common mistake when sketching a flute?
The most frequent error is drawing the tone holes as perfect circles. Because the flute is a cylinder, these holes should be drawn as ovals to accurately represent the curvature of the metal tube.
Do all flutes have the same number of parts?
Most modern Western concert flutes have three sections. However, some historical or specialized flutes, such as the piccolo or certain baroque instruments, may consist of only one or two pieces.
How do I make the metal look realistic in a drawing?
To simulate metal, use sharp highlights and deep shadows to represent reflected light. Use a blending stump or a soft pencil to create smooth gradients across the cylindrical surface of the instrument.
This answer was created with the help of AI research tools and reference sources. Spotted an error? Let us know — we correct mistakes quickly. See our editorial policy.