How do you blend soft pastels?
Short answer
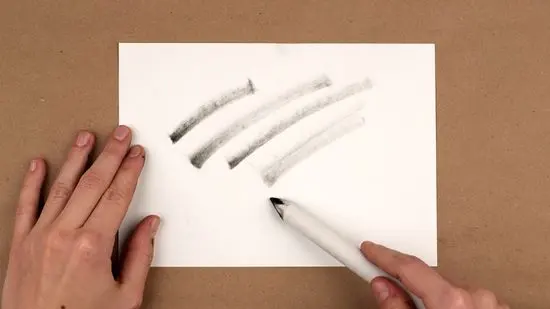
Blending soft pastels involves physically moving pigment across a textured surface using tools or fingers to create smooth transitions. You can achieve this by layering colors, using gentle pressure, and employing blending stumps, foam brushes, or your own fingertips. The goal is to soften edges and merge hues without muddying the colors.
On this page
How to blend soft pastels effectively
Blending is the process of softening the boundaries between colors to create gradients, depth, and atmospheric effects. Because soft pastels are composed of pure pigment with minimal binder, they sit loosely on the surface of the paper. You must work from light to dark to prevent dark pigments from contaminating your lighter areas.
To achieve a professional finish, consider these primary techniques:
- Finger blending: Use your index or middle finger for broad areas, though natural oils can sometimes affect the paper's tooth.
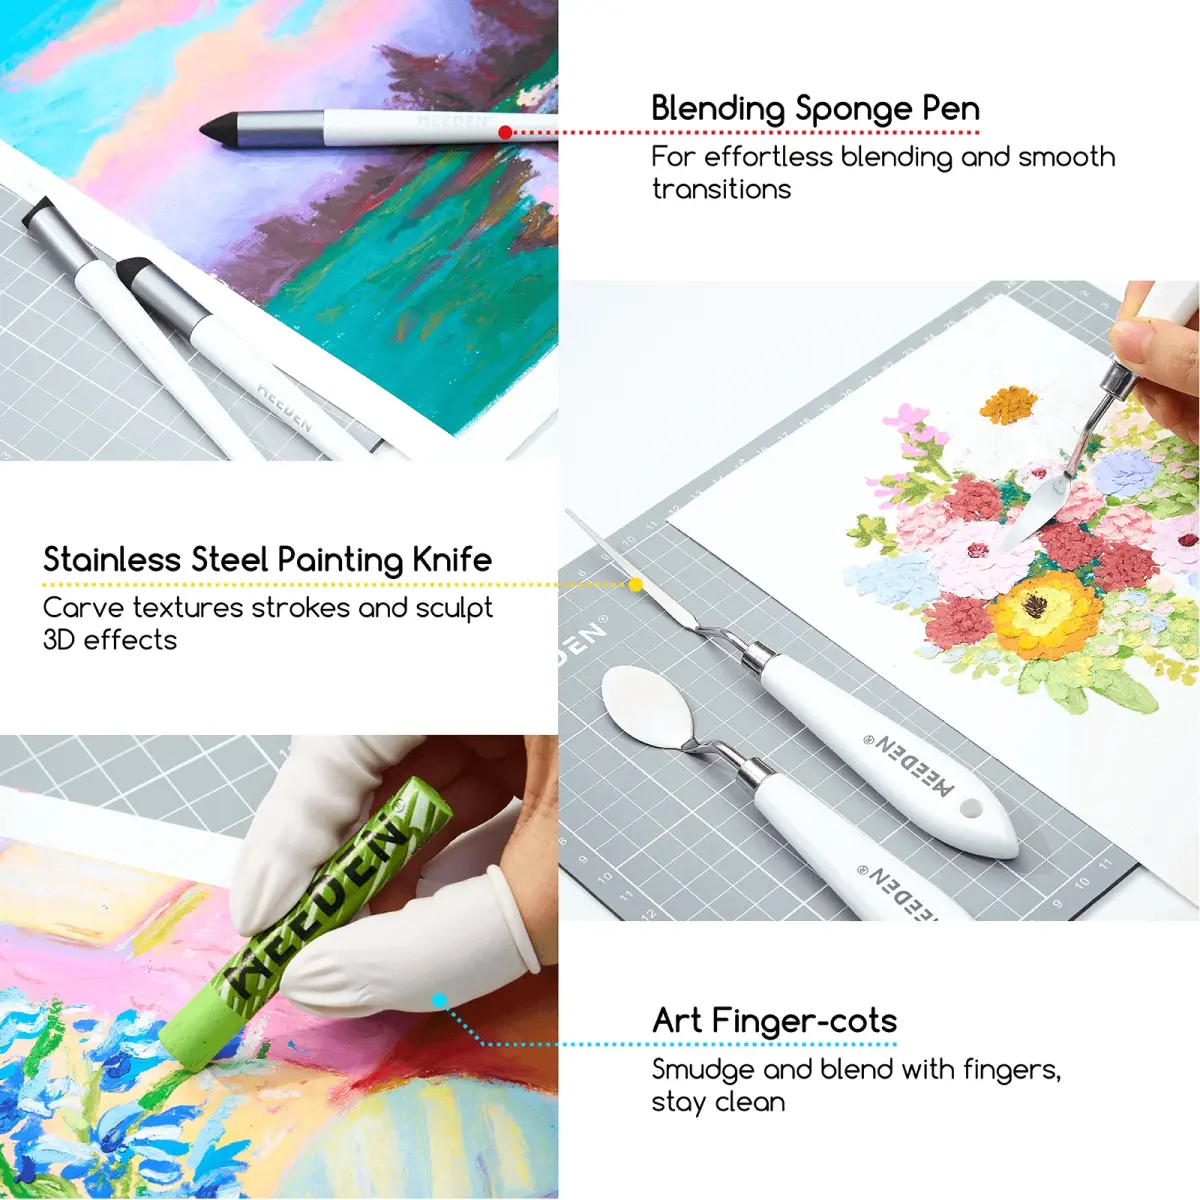
- Blending stumps: Use paper tortillons or rubber-tipped color shapers for precise control in tight corners or small details.
- Soft brushes: Use synthetic or natural hair brushes to gently push pigment into the paper's texture without overworking the surface.
- Layering: Apply colors side-by-side and gently overlap them to create a natural transition through optical mixing.
Best tools for blending soft pastels
While your fingers are the most accessible tools, specialized equipment often provides cleaner results. Professional artists frequently rely on a variety of implements to manipulate pigment without losing the vibrancy of the pastel. Choosing the right tool depends on the scale of your drawing and the desired texture.
- Tortillons: Tightly rolled paper stumps that are excellent for small, controlled areas.
- Foam applicators: Ideal for achieving smooth, even gradients over larger sections of the work.
- Soft brushes: Best for subtle, painterly blending that preserves the "tooth" of the paper.
- Chamois cloth: A traditional tool used to lift or soften large areas of color quickly.
- Glassine paper: Place this over your work to protect it while you blend underneath, preventing smudges on your hand or the paper.
Why muddy colors happen when blending
Muddy colors occur when too much pigment is applied to the paper, causing the particles to lose their individual brilliance and become a dull, brownish gray. This usually happens when an artist over-blends or forces too many layers onto a surface that can no longer hold more pastel. Once the "tooth" of the paper is filled, the pigment simply sits on top and slides around, creating a smeary mess.
To avoid this, always start with light applications and build up intensity gradually. If you find your colors becoming dull, stop blending immediately and use a kneaded eraser to lift away excess pigment. You can also use a fixative spray to lock in a layer, which restores the paper's grip for further work. Remember that soft pastels are meant to be expressive; sometimes, leaving visible strokes adds more life to a piece than a perfectly smooth, blended surface.
Common mistakes when blending pastels
Many beginners make the mistake of pressing too hard, which crushes the pigment into the paper fibers and makes it impossible to layer or correct. Another frequent error is blending in a circular motion, which can create unwanted patterns and distract from the subject matter. Always blend in the direction of the form or the light source to maintain the structural integrity of your drawing.
Follow these rules to improve your technique:
- Do not over-blend: Stop once the transition looks smooth; excessive rubbing removes the pigment.
- Avoid heavy pressure: Use a light, feathery touch to move the pastel across the surface.
- Clean your tools: Frequently wipe your blending stumps or fingers to avoid transferring dark colors into light areas.
- Work in stages: Apply a base layer, blend it, and then add final highlights or deep shadows on top without further blending.
How long does it take to master blending
Mastering pastel blending is a journey that depends on your patience and willingness to experiment with different paper types. Paper with a high "tooth," such as sanded pastel paper or textured watercolor paper, holds more layers and allows for more complex blending than smooth surfaces. Beginners often find that they can achieve basic gradients within a few hours of practice, but developing a sophisticated touch takes significantly longer.
Consistency is key when learning to manage the delicate balance of pigment. Spend time practicing on scrap paper to see how different colors react when combined and how much pressure is required to move them. As you gain experience, you will intuitively know when to use a tool and when to leave the strokes raw. By observing how light interacts with your subjects, you will eventually develop a unique blending style that enhances your artistic vision and brings your pastel works to life.
Key facts
- Soft pastels are made of pure pigment held together by a minimal amount of binder, making them highly friable and easy to blend.
- Use your fingers for direct control, but be aware that natural skin oils can darken the paper and create "dead spots" that resist further pigment.
- Soft-bristled brushes, such as hog hair or synthetic equivalents, allow you to push pigment into the paper tooth without smudging the crisp edges.
- Foam blenders or paper stumps (tortillons) are ideal for precision blending in small, detailed areas where fingers are too bulky.
- Layering is a form of blending; by applying a light color over a dark one, you create a new, softer hue through optical mixing.
- Always work from dark to light to prevent the lighter, softer pastels from becoming muddied by the darker, more intense pigments.
The bottom line
Blending soft pastels is a delicate balance of pressure, tool selection, and paper texture. By utilizing the paper's tooth and working from dark to light, you can achieve smooth gradients without losing color vibrancy. Whether you prefer the tactile control of your fingers or the precision of brushes and stumps, remember that less is often more. Practice layering to master the art of optical color mixing.
People also ask
Can I use water to blend soft pastels?
You should avoid using water with standard soft pastels because they are dry media and water can damage the paper surface or cause the pigment to clump. If you want to use water, you must specifically purchase water-soluble pastels designed for wet-to-dry techniques.
What is the best paper for blending pastels?
A paper with "tooth," or a rough texture, is essential because it holds the pigment particles in its microscopic valleys. Sanded papers or heavy-weight pastel papers are the industry standards for achieving smooth, professional-looking blends.
How do I prevent my colors from turning muddy?
Muddy colors occur when you over-blend or mix too many complementary colors together on the paper. To keep colors vibrant, apply them in distinct strokes and blend only the edges where the two colors meet.
Should I use a fixative while blending?
Do not use fixative until your work is completely finished, as it darkens the colors and fills the paper's tooth, making further blending impossible. If you must use it, apply a very light mist in a well-ventilated area to avoid ruining the texture.
How do I clean my blending tools?
Foam blenders can be cleaned by gently rubbing them on a clean piece of sandpaper or a rough cloth to remove excess pigment. Paper stumps can be sharpened by sanding the tip with a fine-grit sandpaper block to reveal a fresh surface.
Why does my pastel dust keep falling off the paper?
If the paper surface is already saturated with pigment, it can no longer hold more, causing excess dust to fall off. Use a light touch when applying layers and tap your board vertically to let loose dust fall away before continuing. ## Techniques for Professional Blending ### Manual Methods Blending with your fingers is the most intuitive method, offering immediate feedback and pressure control. For a more sophisticated finish, use a "side-to-side" motion to gently marry two colors. If you find your fingers are too oily, wrap them in a thin piece of soft chamois or a microfiber cloth to maintain control while keeping the surface clean. ### Tool-Assisted Methods When working on fine details, brushes are superior to fingers. Use a soft, flat brush to gently sweep one color into another using circular motions. This technique, often called "scumbling," creates a soft, hazy transition that is perfect for skies or skin tones. Always ensure your brushes are dry and free of previous color residue to maintain color purity.
This answer was created with the help of AI research tools and reference sources. Spotted an error? Let us know — we correct mistakes quickly. See our editorial policy.