How do you stretch a canvas?
Short answer
Stretching a canvas involves securing pre-cut fabric over a wooden frame, known as stretcher bars, using staples and tensioning tools. By pulling the fabric taut and fastening it symmetrically, you create a firm, responsive surface for painting. This process requires patience to ensure the weave remains square and free of wrinkles.
On this page
What materials do you need to stretch a canvas?
To begin stretching a canvas, you must gather professional-grade materials to ensure longevity and structural stability. The core components include four wooden stretcher bars, which should be slotted together to form a perfect rectangle or square. You will also need a roll of artist-grade canvas, typically made of cotton duck or linen, and a heavy-duty staple gun with stainless steel staples.
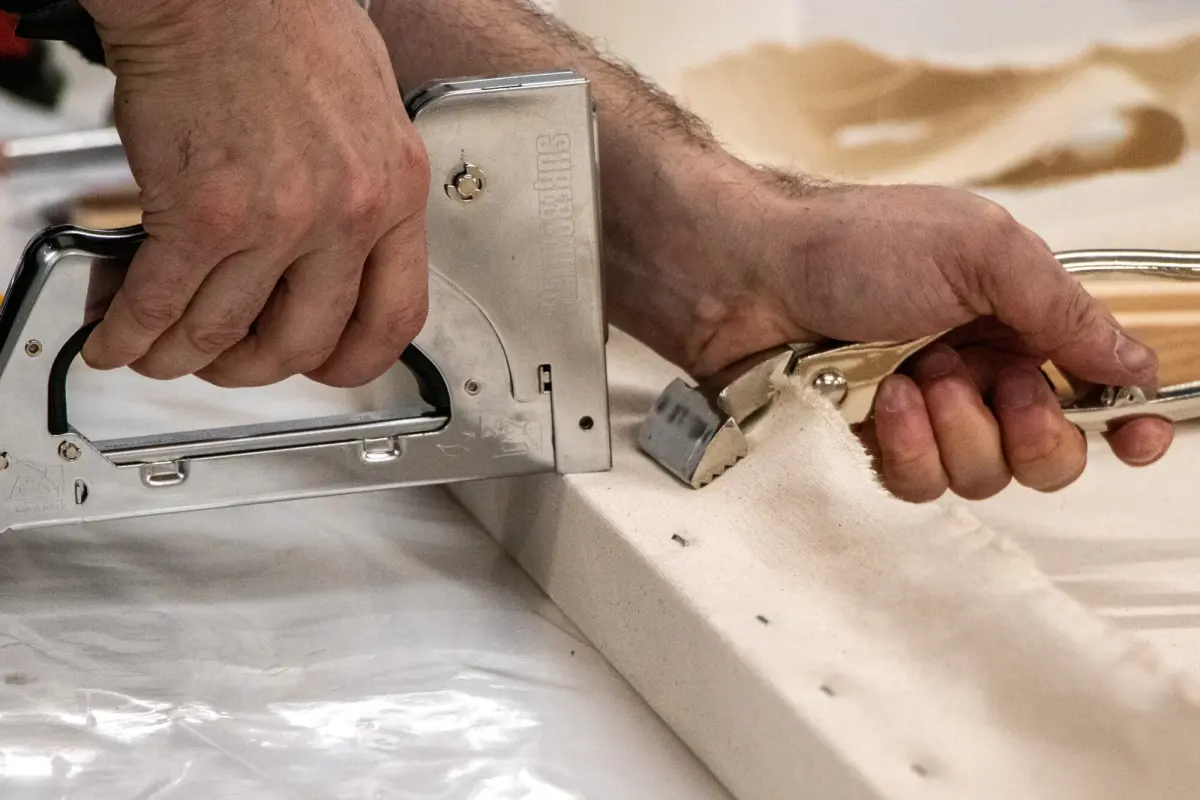
Beyond these basics, specific tools will significantly improve your efficiency and the final quality of the surface. A canvas stretching plier is essential for applying consistent tension without tearing the fabric. You should also have a sharp pair of scissors or a utility knife for trimming excess material, and a rubber mallet to tap the corners of the frame into a square alignment.
- Stretcher bars (sized to your desired dimensions)
- Unprimed or primed artist canvas
- Heavy-duty staple gun and staples
- Canvas stretching pliers
- Rubber mallet and utility knife
How to measure and cut the canvas correctly
Accuracy during the cutting phase prevents wasted material and ensures you have enough fabric to wrap around the back of the bars. Lay your stretcher bars flat on a clean surface and place the canvas over them. You must leave at least three to four inches of extra fabric on every side of the frame, as this provides the necessary grip for your pliers.
When cutting, use a straight edge to ensure your lines are parallel to the weave of the canvas. If the fabric is cut at an angle, the tension will be uneven, causing the canvas to warp or develop diagonal wrinkles once it is mounted. Always double-check your measurements before making the final cut to account for the thickness of the stretcher bars.
- Assemble the stretcher bars and check for squareness using a T-square.
- Center the frame on the canvas, ensuring the weave runs parallel to the bars.
- Cut the canvas, leaving a 3-4 inch margin on all four sides.
- Smooth the fabric flat to remove any initial folds or deep creases.
Step-by-step process for stretching a canvas
The key to a professional stretch is working from the center outward toward the corners. Start by placing one staple in the middle of each of the four bars to anchor the fabric. Once anchored, move to the sides, alternating between the left and right sides of each bar to maintain even tension across the surface.
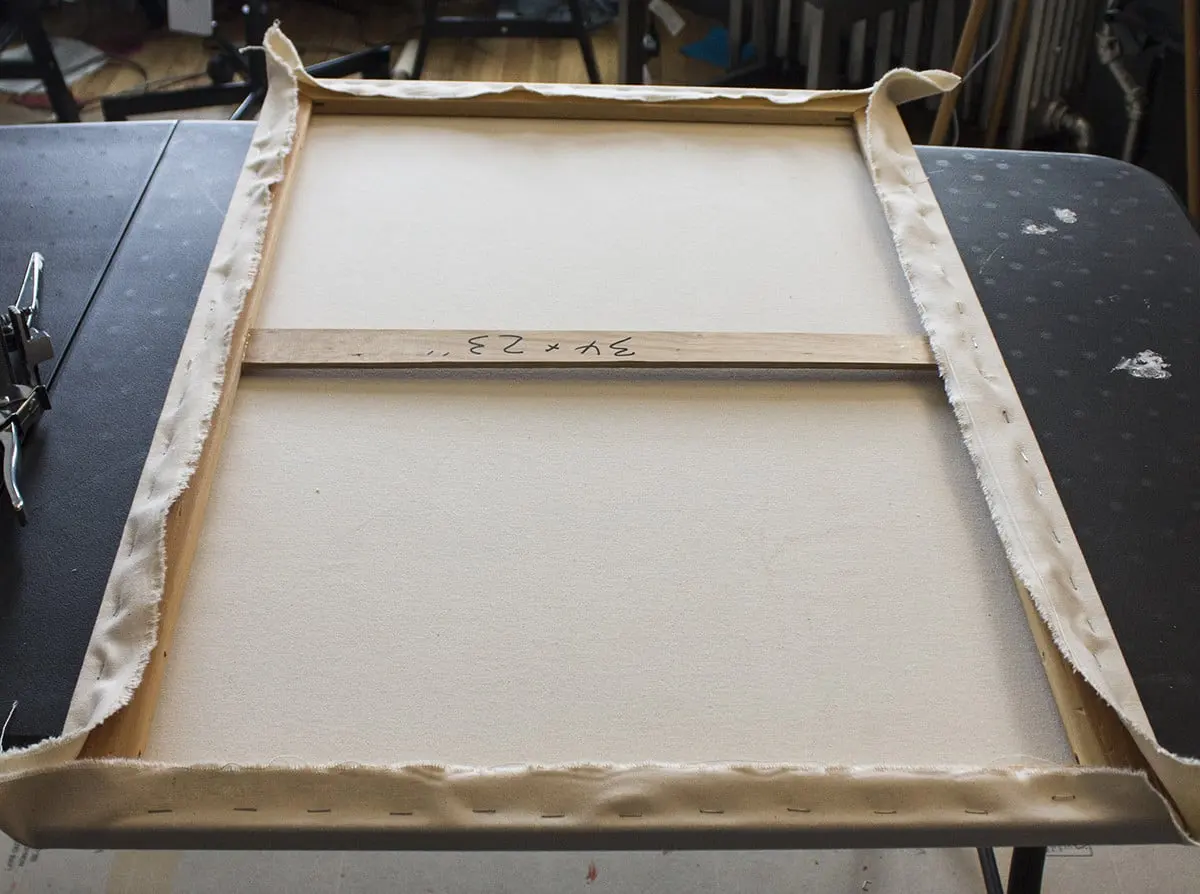
As you move toward the corners, use your pliers to pull the fabric firmly. The goal is to achieve a drum-like sound when you tap the surface with your fingers. Do not over-stretch, as this can distort the weave and make the canvas brittle over time. Leave the corners for last, as these require a specific folding technique to remain flat.
- Staple the center of each side, pulling the fabric taut.
- Work outward from the center, placing staples every two inches.
- Stop about three inches from each corner to allow for folding.
- Fold the excess fabric into a clean, triangular "hospital corner" tuck.
- Secure the final folds with two or three staples on the back of the frame.
Common mistakes when stretching a canvas
One of the most frequent errors is failing to keep the weave of the canvas square. If the vertical and horizontal threads are not aligned with the edges of the stretcher bars, the painting will appear crooked and the tension will be impossible to balance. Always inspect the weave periodically as you work, adjusting your pulling pressure if you notice the threads beginning to slant.
Another common mistake is using staples that are too short or too weak, which can lead to the canvas pulling loose over time. Similarly, applying too much tension in one area while neglecting another creates "puckering," where the fabric ripples near the staples. Avoid the temptation to pull as hard as possible; instead, focus on consistent, moderate pressure that keeps the fabric firm but not strained to the point of tearing.
- Ignoring the weave alignment, leading to a warped surface.
- Over-stretching the canvas, which can cause the frame to bow.
- Using a staple gun that does not drive the staples flush.
- Leaving the corners bulky, which prevents the frame from sitting flush against a wall.
How to maintain tension over time
Even a perfectly stretched canvas can lose tension due to changes in humidity or temperature. Most high-quality stretcher bars come with small wooden wedges, known as keys, which fit into the inner slots of the corners. If your canvas begins to sag after a few months, you can gently tap these keys into the slots with a mallet to expand the frame slightly.
This expansion pushes the bars outward, tightening the canvas without the need for restretching. Be careful to tap the keys evenly on all four corners to avoid pulling the frame out of square. If the canvas remains loose despite keying, it may have been stretched too loosely initially, or the fabric may have reached its limit of elasticity. Proper storage in a climate-controlled environment will significantly extend the life of your stretched canvas.
Key facts
- Use heavy-duty stretcher bars made of kiln-dried wood to prevent warping over time.
- Always staple the canvas in the center of each side first to ensure even tension.
- Use professional-grade canvas pliers to pull the fabric taut without tearing the weave.
- Fold corners neatly into "hospital corners" to create a clean, professional profile.
- Leave a 3-inch margin of excess canvas on all sides to allow for gripping during the stretching process.
- Apply gesso to the stretched canvas only after it is secured to the frame to prevent premature shrinkage.
The bottom line
Stretching your own canvas is a rewarding skill that offers significant cost savings and total control over your painting surface. By focusing on even tension, using proper tools like canvas pliers, and ensuring your wooden frame remains perfectly square, you create a professional foundation for your artwork. With practice, this process becomes an intuitive part of your creative workflow, ensuring your paintings remain stable for decades.
People also ask
Should I use cotton duck or linen canvas?
Cotton duck is affordable and ideal for beginners, while linen is more durable and resistant to environmental changes. Choose based on your budget and the desired texture of your painting surface.
How tight should the canvas be?
The canvas should sound like a drum when tapped with your finger. If it is too loose, the paint will crack; if it is too tight, the wooden bars may warp.
Can I reuse old stretcher bars?
Yes, provided they are not warped or damaged. Ensure they are perfectly square before attaching new canvas, as any misalignment will cause the finished piece to sit unevenly on a wall.
What is the purpose of cross-braces?
Cross-braces are essential for large canvases to prevent the stretcher bars from bowing inward under the tension of the fabric. Use them for any frame exceeding 36 inches on one side.
Do I need to prime the canvas before stretching?
No, it is standard practice to stretch the raw canvas first. Priming with gesso afterward tightens the fibers and creates a smooth, non-porous surface for your paint.
How do I fix a sagging canvas?
You can use wooden keys tapped into the corners of the stretcher bars to expand the frame slightly. Alternatively, lightly mist the back of the canvas with water, which causes the fibers to shrink as they dry.
This answer was created with the help of AI research tools and reference sources. Spotted an error? Let us know — we correct mistakes quickly. See our editorial policy.