How do you edit photos in Lightroom?
Short answer
Editing photos in Lightroom involves importing images into the Library module, then using the Develop module to adjust exposure, color, and detail. You apply global changes with sliders, use local tools for specific areas, and export your final result. This non-destructive workflow preserves your original file while creating a polished, professional look.
On this page
How to get started with Lightroom editing
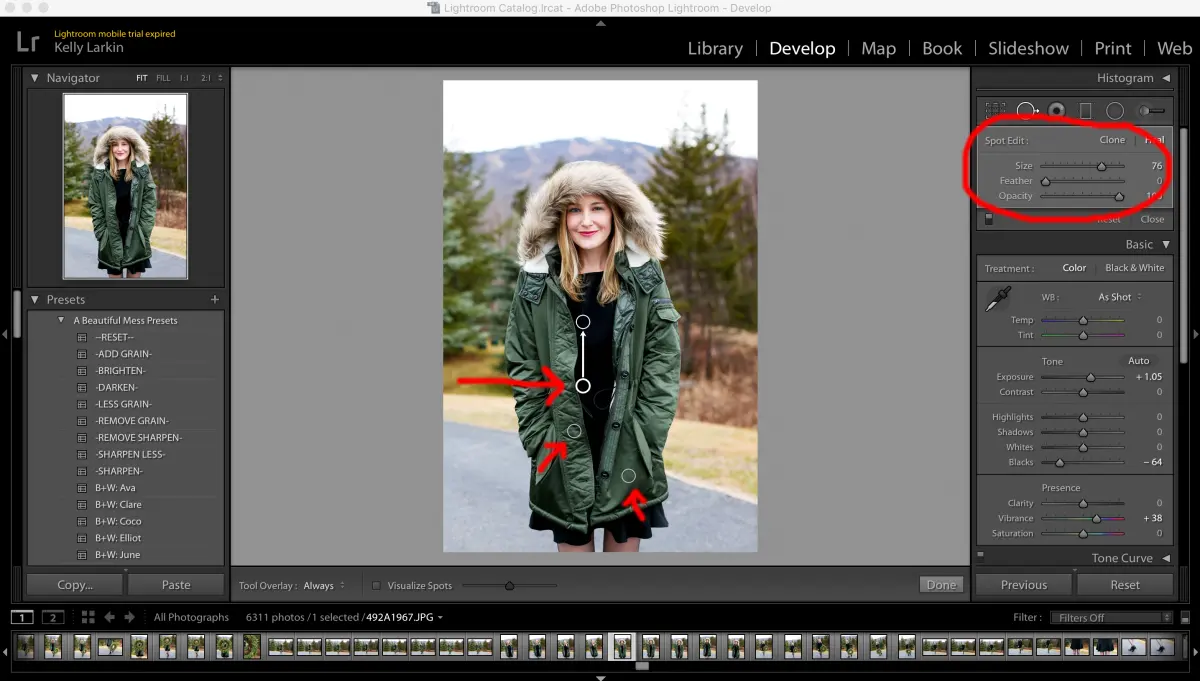
To begin editing, you must first import your images into the Lightroom catalog. Click the "Import" button in the Library module, select your source folder, and choose "Add" to keep files in their current location or "Copy" to move them to a new drive. Once imported, select an image and switch to the Develop module by pressing the "D" key on your keyboard. This interface is where all your creative adjustments occur.
The Develop module is organized into panels on the right side. The Basic panel is the most important starting point, containing sliders for exposure, contrast, highlights, and shadows. Always look at your histogram at the top of the panel to ensure you are not losing detail in the brightest or darkest parts of your image. A balanced histogram typically spans from left to right without hitting the edges.
How to adjust exposure and color balance
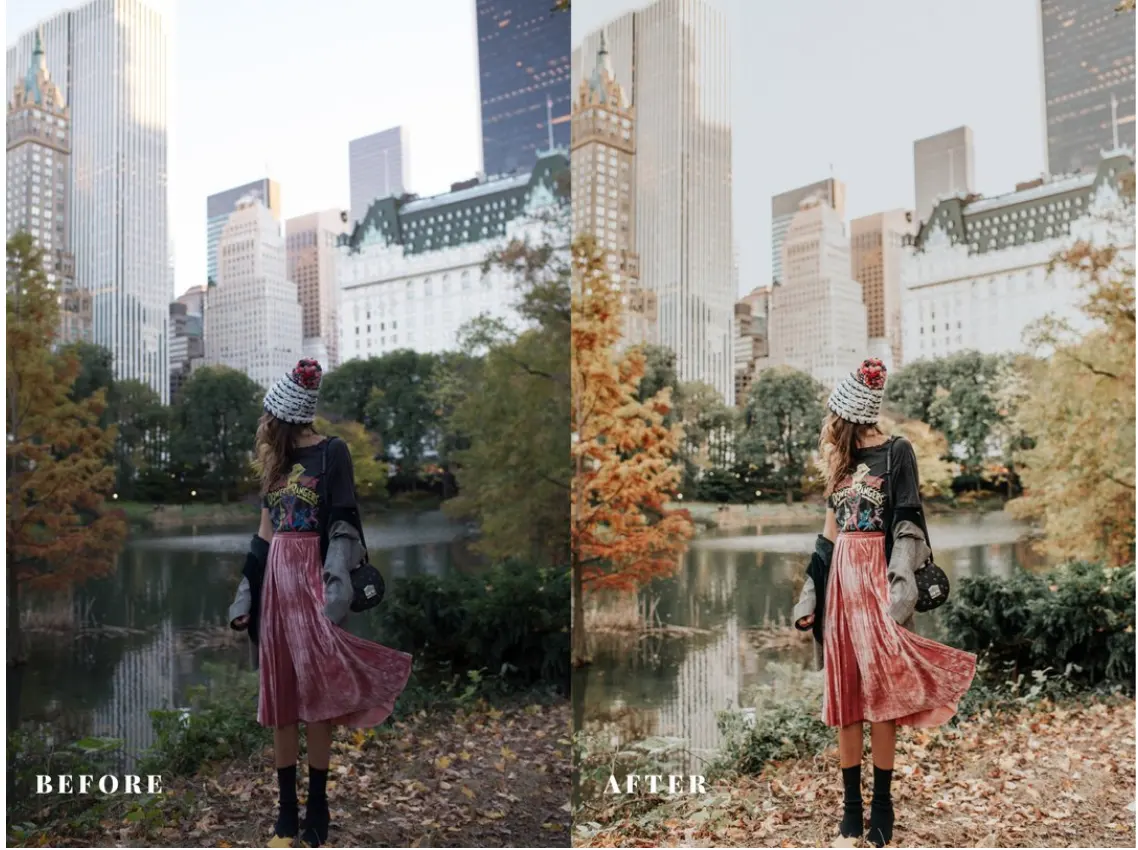
Correcting exposure is the foundation of a good edit. Start by adjusting the Exposure slider to set the overall brightness, then use the Highlights and Shadows sliders to recover lost detail. If your image looks dull, increase the Contrast or use the Whites and Blacks sliders to set the "black point" and "white point" for a punchier look.
Color adjustments are managed through the White Balance and Presence sections. Use the Temperature slider to shift colors toward blue for a cool look or yellow for warmth. The Tint slider helps remove unwanted green or magenta casts. For more advanced color control, use the HSL (Hue, Saturation, and Luminance) panel to adjust individual color channels, such as making the sky a deeper blue or skin tones more natural.
- Adjust White Balance to fix lighting inconsistencies.
- Use Exposure and Contrast to establish the tonal range.
- Fine-tune individual colors in the HSL panel for a specific mood.
Best tools for targeted photo adjustments
Sometimes global adjustments are not enough to fix specific parts of a photo. Lightroom provides local adjustment tools located just below the histogram. The Masking tool is the most powerful feature here, allowing you to select specific areas like the sky, the subject, or a background. You can then apply exposure or color changes only to those selected regions.
The Healing tool is essential for removing unwanted objects or blemishes. Use the "Content-Aware Remove" or "Clone" modes to paint over distractions. For portraits, the "Retouch" brush can smooth skin or enhance eyes by increasing clarity. Always zoom in to at least 100% when performing healing tasks to ensure the edges of your adjustments blend seamlessly with the surrounding pixels.
- Use the Linear Gradient to darken bright skies.
- Use the Radial Gradient to draw attention to a subject's face.
- Use the Healing brush to remove dust spots or sensor debris.

Common mistakes when editing photos
A frequent error is over-editing, which happens when sliders are pushed to their extremes. Excessive saturation makes colors look neon and unnatural, while pushing contrast too high creates harsh, jagged edges. A good rule of thumb is to make subtle adjustments and frequently toggle the "Before/After" view by pressing the backslash key. This helps you maintain perspective on whether your changes are actually improving the image.
Another mistake is ignoring the importance of sharpening and noise reduction. These settings are found in the Detail panel. If you sharpen too aggressively, you introduce digital artifacts and grain. If you apply too much noise reduction, the image loses its texture and looks like a plastic painting. Always view your image at 100% zoom when applying these settings to ensure you are balancing sharpness with smooth image quality.
How to export your final images
Once you are satisfied with your edits, you must export your work to create a shareable file. Go to File > Export to open the export dialog. Here, you define the file format, such as JPEG for web sharing or TIFF for high-quality printing. You can also specify the color space, with sRGB being the standard for web use and Adobe RGB often preferred for professional printing.
You should also set your image sizing and resolution requirements. For social media, a resolution of 72 pixels per inch and a long-edge dimension of 2048 pixels is usually sufficient. For printing, you generally want 300 pixels per inch at the physical size of the print. After configuring these settings, click "Export" to save your final version. Always keep your original RAW files, as they contain all the data needed to re-edit your photos in the future.
Key facts
- Lightroom uses non-destructive editing, meaning your original image file remains unchanged regardless of the adjustments you apply.
- The "Develop" module is the primary workspace where you adjust exposure, contrast, color balance, and sharpness.
- Histograms located at the top right of the interface help you monitor highlight and shadow clipping to ensure data is not lost.
- Keyboard shortcuts like "D" for Develop and "G" for Grid view significantly speed up your workflow.
- Syncing settings across multiple photos is achieved by clicking "Sync" or using "Copy" and "Paste" settings commands.
- Exporting images requires selecting a file format, typically JPEG or TIFF, and choosing a color space like sRGB for web use.
The bottom line
Mastering Lightroom requires understanding its non-destructive workflow and the importance of shooting in RAW. By utilizing the Develop module to balance exposure and color, you can transform raw captures into professional-grade images. Focus on using the histogram to protect image data and save your unique styles as presets to maintain consistency. With practice, these tools allow for precise creative control over every aspect of your photography.
People also ask
What is the difference between Lightroom Classic and Lightroom?
Lightroom Classic is desktop-focused with local storage management, while Lightroom is a cloud-based service designed for seamless access across mobile and desktop devices. Both share the same core image-processing engine.
How do I undo a mistake while editing?
Press Command+Z on Mac or Control+Z on Windows to undo your last action. You can also use the History panel on the left side to jump back to any previous state of your edit.
Should I shoot in RAW or JPEG for editing?
You should always shoot in RAW format because it preserves all the data captured by the camera sensor. This provides much greater flexibility when adjusting exposure and white balance during post-processing.
How do I make a photo black and white?
Navigate to the Basic panel in the Develop module and select the "Black & White" profile under the Treatment section. You can then refine the look using the B&W Mix sliders to adjust the luminance of specific colors.
Can I save my favorite edits to reuse later?
Yes, you can save your adjustments as a Preset by clicking the plus icon in the Presets panel. This allows you to apply the same look to future photos with a single click.
Why do my exported photos look different than in Lightroom?
This often happens if you use a wide color space like ProPhoto RGB for web viewing. Always export using the sRGB color space to ensure colors appear consistent across most web browsers and devices.
This answer was created with the help of AI research tools and reference sources. Spotted an error? Let us know — we correct mistakes quickly. See our editorial policy.