How do you take product photos?
Short answer
Taking professional product photos requires consistent lighting, a stable camera setup, and a clean background. By utilizing natural window light or softbox kits, securing your camera on a tripod, and styling your items with minimal distractions, you can capture high-quality images that effectively showcase your merchandise to potential customers online.

On this page
How to set up a product photography studio
You do not need a professional studio to capture high-quality images. A simple setup involves a table placed near a large window, which provides soft, diffused natural light. If you are shooting in a room without windows, invest in two softbox lights placed at 45-degree angles to the product to eliminate harsh shadows. A sweep—a piece of white poster board or fabric that curves from the wall to the table—creates a seamless, professional backdrop.
Consistency is the most important factor in a professional setup. Once you find a lighting arrangement that works, mark the floor or table with tape so you can replicate the exact position for future sessions. This ensures that all your product images have a uniform look, which helps build brand trust.
- Find a flat, stable surface for your product.
- Position your light source to the side to create subtle depth.
- Use a white foam board on the opposite side to bounce light back into the shadows.
- Secure your camera on a tripod to prevent motion blur.
What equipment is needed for product photography
While high-end cameras offer more control, modern smartphones are capable of producing excellent results when used correctly. If you use a camera, a 50mm lens is often preferred because it minimizes distortion and mimics the human eye's perspective. A tripod is non-negotiable for sharp images, especially when shooting in lower light conditions where slower shutter speeds are required.
Beyond the camera, consider using a remote shutter release or your camera's self-timer function. Touching the camera to take a photo often introduces micro-vibrations that soften the image. A clean microfiber cloth is also essential to remove fingerprints or dust from the product before you hit the shutter button.
- Digital camera or high-quality smartphone.
- Tripod for stability.
- Softbox lighting or natural window light.
- White bounce cards or foam boards.
- A seamless background sweep.
- Microfiber cleaning cloths.
How to style products for the best look
Styling is about directing the viewer's eye to the most important features of your product. Start by cleaning the item thoroughly; even tiny specks of dust become glaringly obvious under bright lights. If the product is clothing, use clips or pins on the back of the garment to ensure it fits the mannequin or form perfectly without wrinkles.
For lifestyle shots, include props that provide context, such as a coffee mug next to a book or a plant near a piece of furniture. However, keep the composition simple to avoid clutter. The product should always occupy at least 70 percent of the frame. If you are shooting a series of products, keep the spacing and orientation consistent across all images to maintain a cohesive visual narrative.

Common mistakes when taking product photos
One of the most frequent errors is mixing different types of light, such as using a warm yellow indoor lamp alongside cool blue daylight. This creates color casts that are difficult to correct during editing. Always turn off overhead room lights when using studio strobes or natural light to ensure your white balance remains accurate and neutral.
Another common mistake is failing to check the focus. Ensure the sharpest part of the image is the primary feature of the product, such as the logo or the texture of the fabric. Avoid using the digital zoom on your phone, as this significantly degrades image quality. Instead, move your feet to get closer to the subject. Finally, do not ignore the background; stray items or messy cables in the periphery will distract the viewer and make your brand appear unprofessional.
How to edit product photos for e-commerce
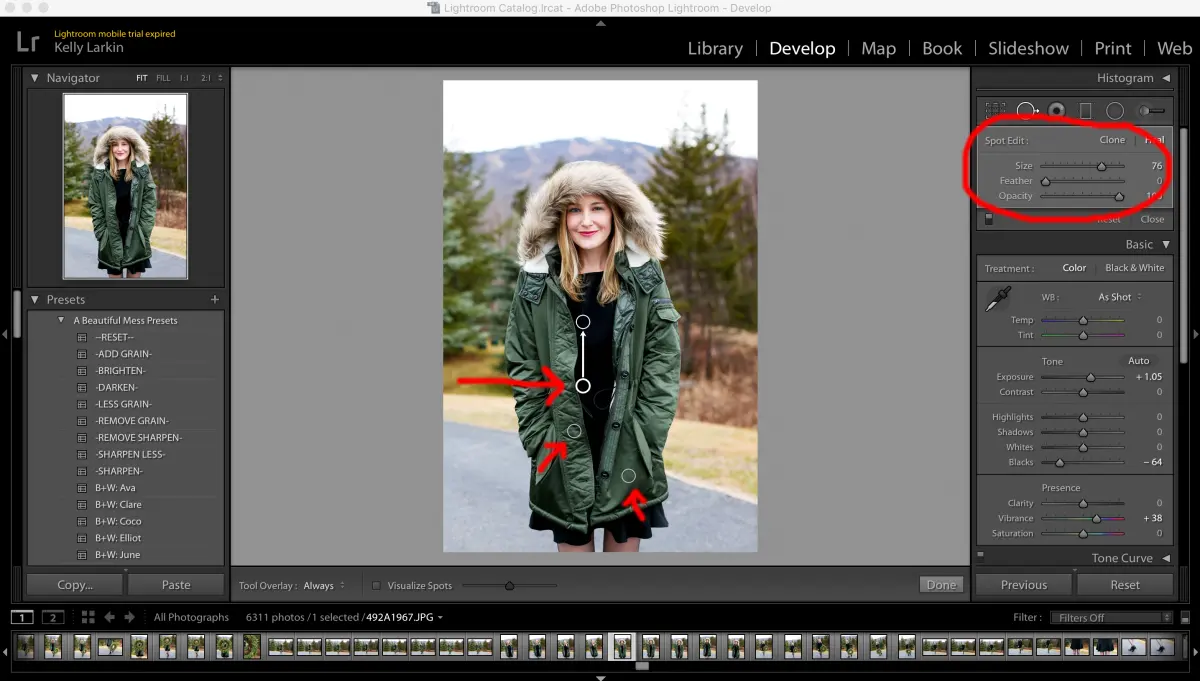
Editing is the final step in the process, serving to polish the image rather than change the product's appearance. Start by adjusting the exposure and contrast to ensure the product looks true to life. Use white balance tools to ensure that white backgrounds appear truly white rather than gray or yellow. This is critical for e-commerce, as customers expect the item they receive to match the color they saw on their screen.
Cropping is essential for maintaining a uniform look across your website. Ensure that the product is centered in every frame and that the margins are identical for every image in a category. If you have captured dust or minor blemishes, use a healing or cloning tool to remove them. Keep your edits subtle; over-processing can make an item look artificial, which often leads to higher return rates from disappointed customers.
Key facts
- Use a tripod to eliminate camera shake and ensure consistent framing for multiple products.
- Natural window light is the most cost-effective way to achieve soft, professional-looking shadows.
- Set your camera’s aperture to f/8 or higher to ensure the entire product remains in sharp focus.
- Use a white foam board as a reflector to bounce light into the shadowed side of your subject.
- Shoot in RAW format to retain maximum image data for high-quality color correction during editing.
- A neutral background, such as a seamless white sweep, prevents distractions and emphasizes the product.
The bottom line
Successful product photography relies on three pillars: steady equipment, soft lighting, and a clean, consistent background. By utilizing natural window light, a tripod, and a simple reflector, you can create professional images that highlight your product's best features. Avoid common errors like using a cluttered backdrop or shaky handheld shots to ensure your final results look polished, trustworthy, and ready for any online marketplace.
People also ask
What is the best lighting setup for beginners?
Position your product near a large window during the day to utilize soft, indirect sunlight. Avoid direct sunlight, which creates harsh, high-contrast shadows that can obscure product details.
Do I need an expensive camera to take professional photos?
Modern smartphones are capable of high-quality product photography if you have proper lighting and a steady hand. Focus on composition and staging rather than purchasing high-end equipment immediately.
How do I prevent blurry product images?
Always use a tripod or a stable surface to keep the camera perfectly still during exposure. Using the camera's self-timer function prevents the vibration caused by physically pressing the shutter button.
What is the purpose of a white sweep?
A seamless sweep creates a continuous background that eliminates the horizon line behind the product. This technique makes the subject appear as if it is floating in a clean, professional space.
How should I choose the right background color?
White or light gray backgrounds are standard because they provide a clean, neutral look that works for almost any e-commerce platform. Use darker backgrounds only if you want to create a moody or premium aesthetic for luxury items.
How can I make my product photos look consistent?
Use the same lighting setup, camera angle, and distance for every item in a collection. Consistency in your visual style helps build brand recognition and makes your online store look more organized.
This answer was created with the help of AI research tools and reference sources. Spotted an error? Let us know — we correct mistakes quickly. See our editorial policy.