How do you draw a hummingbird in flight step by step?
Short answer
Drawing a hummingbird in flight requires capturing its unique silhouette and rapid wing motion. By sketching a teardrop-shaped body, adding a long, needle-like beak, and using blurred, overlapping strokes for the wings, you can create the illusion of high-speed movement. Focus on the bird’s posture and aerodynamic shape to achieve realism.
On this page
How to sketch the basic hummingbird body shape
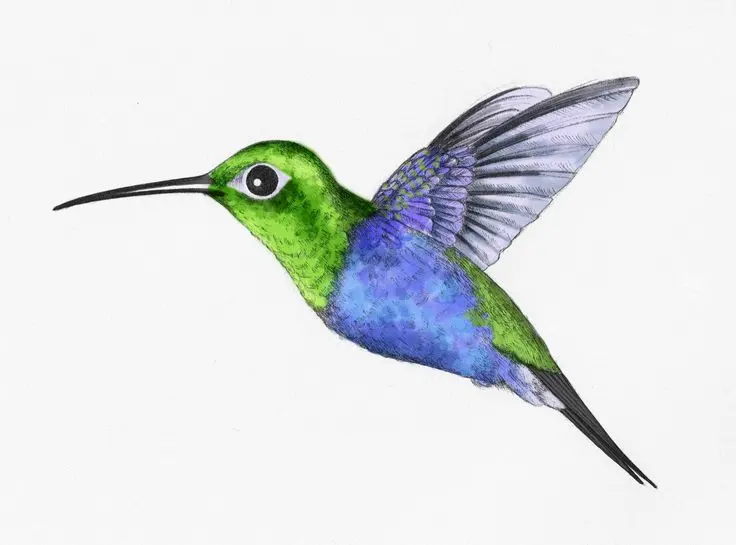
The foundation of a realistic hummingbird drawing begins with its distinct aerodynamic profile. Unlike most birds, hummingbirds possess a sleek, elongated torso that transitions seamlessly into a slender, needle-like bill. To start, draw a slightly tilted oval for the main body mass. Position the head as a smaller, rounded circle at the top of the oval, ensuring the neck area is narrow to reflect the bird’s agility.
The beak is a critical anatomical feature that defines the species. It should be roughly as long as the head and neck combined, extending outward in a straight, horizontal line. When sketching, keep your lines light so you can easily adjust the proportions. Aim for a streamlined look, as these birds are evolved for sustained hovering and rapid flight. Avoid making the body too round, as this will make the bird appear heavy rather than agile.
- Draw a teardrop shape tilted at a 45-degree angle.
- Add a small circle for the head at the thicker end.
- Extend a long, thin line from the head to represent the bill.
- Sketch a small, curved line near the bottom for the tail feathers.
How to draw hummingbird wings in flight
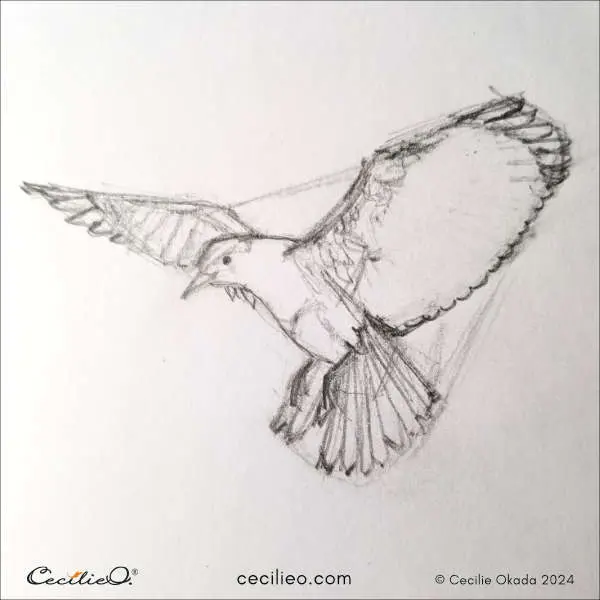
Capturing the motion of a hummingbird’s wings is the most challenging aspect of the drawing, as they beat up to 80 times per second. To represent this speed, avoid drawing static, clearly defined feathers. Instead, use a series of overlapping, translucent strokes that fan out from the shoulder area. These strokes should form a wide, blurred arc that extends above and behind the bird’s back.
The wing position should suggest a figure-eight motion, which is the natural path these birds take while hovering. By layering your marks, you create a sense of vibration and kinetic energy. Keep the base of the wing near the body dark and defined, while letting the outer edges fade into soft, wispy lines. This gradient of detail helps the viewer perceive the high-frequency movement that characterizes the hummingbird's flight.
- Use light, feathery pencil strokes to suggest rapid movement.
- Create a fan-like shape that extends from the upper back.
- Overlap the wing lines to imply a blur rather than a solid structure.
- Vary the pressure of your pencil to create depth within the wing arc.
Best techniques for adding realistic details
Once the silhouette is established, focus on the finer details that bring the drawing to life. Hummingbird eyes are small, dark, and set forward on the head, providing them with excellent depth perception. Use a sharp pencil to place a tiny, solid black dot for the eye, leaving a microscopic white space to represent a highlight. This simple reflection adds an immediate sense of vitality and focus to the bird’s expression.
Next, refine the tail feathers, which are often fanned out during flight to act as a rudder. Sketch these in a V-shape or a rounded fan, ensuring they appear slightly shorter than the wings. Add subtle, short strokes along the chest and throat to mimic the texture of iridescent feathers. These feathers, known as gorget feathers, are often the most vibrant part of the bird. By using short, rhythmic marks, you can suggest the dense, overlapping structure of their plumage without needing to draw every individual feather.
Common mistakes when drawing hummingbirds
A frequent error is making the beak too thick or curved, which detracts from the bird's sleek appearance. The beak should always be thin, straight, and sharp, resembling a needle rather than a typical songbird’s bill. Another common mistake is drawing the wings as solid, stationary shapes. If the wings look like rigid paddles, the bird will appear to be falling rather than hovering. Always prioritize the blurred, translucent effect to maintain the illusion of movement.
Proportion is equally important; beginners often draw the head too large or the tail too long. A hummingbird’s body is compact, and its power is concentrated in its chest muscles. If the chest is too small, the bird will lack the appearance of strength required for its intense metabolism. Regularly step back from your drawing to check the overall balance. If the bird looks awkward or static, check the angle of the body and the length of the beak against your reference images.
How to refine your hummingbird drawing for a professional look
To elevate your sketch, consider the interplay of light and shadow. Hummingbirds often have metallic or iridescent feathers that reflect light in complex ways. Use a soft blending stump or a piece of tissue to smooth out the transition between the dark shadows under the wings and the lighter, highlighted areas on the chest. This contrast creates a three-dimensional effect, making the bird appear to pop off the page.
Finally, add context to your scene to enhance the narrative of your drawing. A simple flower or a blurred background suggests the bird is actively feeding, which is its most common behavior. Keep the background elements out of focus to ensure the hummingbird remains the primary subject. By combining accurate anatomy with a sense of motion and environmental context, you create a compelling image that captures the essence of this remarkable creature. Ensure all lines are crisp and clean before finalizing your work to achieve a polished, professional result.
Key facts
- Hummingbirds beat their wings at an average rate of 50 to 80 times per second while hovering.
- To draw a hummingbird in flight, focus on the "figure-eight" motion of the wing stroke rather than individual feathers.
- Maintain a streamlined, torpedo-shaped body to capture the bird's aerodynamic profile.
- Use a light touch for the wings to create a blurred effect, which suggests high-speed movement.
- The beak should be drawn as a long, thin, and straight line that aligns with the bird's forward momentum.
- Always sketch the tail feathers in a fanned-out position to provide balance and stability to the composition.
The bottom line
Drawing a hummingbird in flight requires capturing the essence of speed and grace through a streamlined body shape and blurred wing motion. By focusing on the figure-eight wing pattern and keeping the torso elongated, you create a dynamic image. Remember that less detail on the wings often yields a more realistic sense of movement, allowing the viewer's eye to perceive the bird's incredible natural energy.
People also ask
Why do hummingbird wings look blurry in photographs?
Hummingbird wings move so rapidly that standard camera shutter speeds cannot freeze the motion. This blur is a natural visual indicator of their high-frequency wing beats.
Should I draw individual feathers on the wings?
Avoid drawing every feather, as this makes the bird look static and heavy. Instead, use soft, directional strokes to imply the texture and motion of the wings.
What is the most common mistake when drawing a hummingbird?
The most frequent error is making the body too round or bulky. Hummingbirds are built for speed, so keep the torso sleek and elongated.
How do I position the head relative to the body?
The head should be small and slightly rounded, connected to the body by a very short neck. Ensure the eye is placed high on the head to maintain correct proportions.
How do I show the bird is hovering near a flower?
Draw the bird at a slight angle toward the flower with its beak extended. This creates a clear narrative of the bird feeding and adds purpose to the flight posture.
What pencils are best for sketching hummingbirds?
Use a hard pencil like an H or HB for light initial outlines. Switch to a softer 2B or 4B pencil to add depth to the shadows and wing tips.
This answer was created with the help of AI research tools and reference sources. Spotted an error? Let us know — we correct mistakes quickly. See our editorial policy.