How do you draw a duck?
Short answer
Drawing a duck involves breaking its anatomy into simple geometric shapes like ovals and circles. Start by sketching a rounded body and a smaller circular head, then connect them with a curved neck. Add details like a triangular beak, a small eye, and wing feathers to bring the illustration to life.
On this page
How to sketch the basic anatomy of a duck
To begin, visualize the duck as a collection of basic forms. The main body is an elongated oval, while the head is a smaller, perfect circle positioned above one end of the body. Connect these two shapes with a curved neck, ensuring the transition is smooth rather than jagged. This foundational structure provides the necessary proportions for a realistic bird.
Once the primary shapes are in place, establish the placement of the features. The beak should be a flat, wedge-like shape attached to the front of the head circle. The eye is typically placed slightly above the center of the head. Keep your initial lines light and loose, as these are merely guides that will be refined or erased later. Focus on the overall posture, whether the duck is swimming, standing, or flying, to determine the angle of your primary ovals.
- Draw a large horizontal oval for the body.
- Sketch a smaller circle for the head above the left side of the oval.
- Connect the two shapes with two parallel, slightly curved lines for the neck.
- Add a small triangle on the head for the bill.
How to add realistic details to your drawing
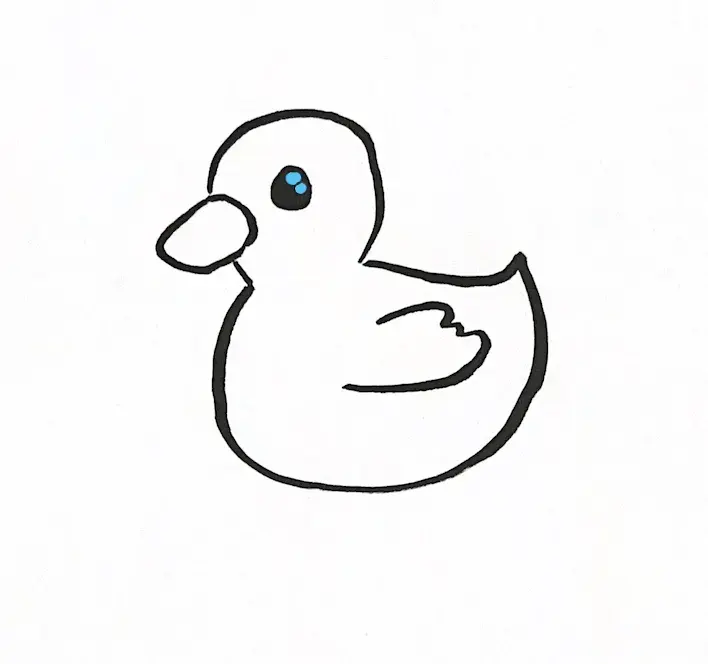
Refining the sketch requires transitioning from rigid shapes to organic, feathered lines. Start by outlining the beak, which should have a slight downward curve at the tip and a small notch for the nostrils. The eye should be a dark, solid circle with a small highlight to give it depth. Use short, overlapping strokes along the back and wings to suggest the texture of feathers rather than a smooth, solid edge.
The tail is another critical detail that defines the duck's silhouette. It typically points upward or outward from the rear of the body oval. Use soft, tapered lines to indicate the tail feathers, ensuring they look light and flexible. When drawing the wings, observe how they fold against the body; they should follow the contour of the oval you drew earlier. Avoid drawing every single feather, as this can make the drawing look cluttered and stiff.
- Use a sharp pencil for fine details around the face.
- Vary the thickness of your lines to create visual interest.
- Add a small, curved line under the eye to suggest the cheek.
- Keep the wing feathers grouped together in segments rather than drawing each one individually.
Best tools for beginners to draw ducks
For those starting out, a standard graphite pencil set ranging from HB to 2B is ideal. HB pencils are perfect for the initial layout because they are light and easy to erase, while 2B pencils provide the darker values needed for the eye and shadows. A high-quality kneaded eraser is essential, as it allows you to lift graphite off the paper gently without damaging the surface. This is particularly useful when you need to soften your guide lines before finalizing the drawing.
Paper choice also impacts the quality of your work. A smooth-surfaced sketchbook with a weight of at least 70 pounds prevents the graphite from smearing too easily. If you intend to add color later, consider using colored pencils or watercolor markers. When using color, start with light washes or layers and build up to the darker tones. This approach prevents the colors from becoming muddy and allows you to maintain the vibrancy of the duck’s natural plumage.
- Graphite pencils (HB, 2B, 4B) for layering values.
- Kneaded eraser for lifting and blending.
- Smooth drawing paper or a sketchbook.
- A blending stump or soft cloth for smooth transitions.
Why proportions often look off in duck drawings
The most common reason a duck drawing looks unnatural is an incorrect neck-to-body ratio. Beginners often make the neck too short or too thick, which makes the bird look like a cartoon rather than a living creature. Pay attention to the negative space between the neck and the body; it should form a graceful, concave curve. Another issue is the placement of the bill, which should be aligned with the center of the head circle to maintain a balanced profile.
Perspective also plays a significant role in how the drawing is perceived. If you are drawing a duck in water, remember to include the reflection and the waterline. The water line should be horizontal and cut across the lower portion of the body oval. If the duck is swimming, the body should appear slightly submerged. Failing to account for the waterline often makes the duck look like it is floating on top of the water rather than sitting within it.
- Ensure the head is not too large for the body.
- Check that the bill is not overly long or pointed.
- Verify that the eye is positioned correctly relative to the bill.
- Adjust the curve of the back to ensure it flows into the tail.
Common mistakes when drawing ducks
One frequent error is drawing the eye as a simple, flat dot. In reality, a duck’s eye has a distinct shape and depth, often surrounded by a small patch of feathers that creates a frame. Another mistake is using overly straight, harsh lines. Ducks are soft, rounded creatures; your lines should reflect this by being slightly curved and fluid. If your drawing feels stiff, try using a lighter touch and focusing on the overall silhouette rather than the individual parts.
Finally, avoid neglecting the feet if the duck is standing. Duck feet are webbed and fan out from the bottom of the body. They should be drawn as three distinct toes connected by curved webs. If you are unsure about the anatomy, look at photographs of ducks in various positions to understand how the joints bend. By studying the natural movement and structure of the bird, you will avoid the common pitfalls that lead to unrealistic or awkward-looking illustrations.
Key facts
- Ducks are defined by their oval-shaped bodies, which can be sketched using two overlapping circles or a single large horizontal oval.
- The head of a duck is typically smaller than the body and sits atop a curved, S-shaped neck.
- A duck's bill is wide and flat, often described as a rounded triangle or a shovel shape, positioned at the front of the head.
- Use simple geometric shapes like circles for the head and ovals for the body as a foundational "under-drawing" before adding details.
- Feathers are best represented by soft, overlapping curved lines rather than individual jagged strokes, which can make the bird look messy.
- Always include a small, circular eye positioned high on the side of the head to give the duck a natural appearance.
The bottom line
Drawing a duck is most successful when you prioritize basic geometric forms before refining the details. By establishing a balanced oval body and a distinct, flat bill, you create a recognizable silhouette. Avoid common errors like overly sharp beaks or stiff, unnatural necks. With practice, layering soft, overlapping lines for feathers will provide your drawing with the necessary depth and characteristic charm of the bird.
People also ask
How do I make the duck look like it is floating on water?
Draw a horizontal line across the bottom third of the duck's body to represent the water surface. Ensure the legs are hidden below this line, as ducks typically tuck them away while swimming.
What is the best way to draw duck wings?
Sketch the wing as a long, tapered oval shape pressed against the side of the body. Add a few parallel lines within the shape to suggest the texture of primary feathers.
Should I use ink or pencil for drawing ducks?
Start with a light graphite pencil to establish your basic shapes and proportions. Once you are satisfied with the outline, you can use ink to define the final contours and add shading.
Why does my duck drawing look like a chicken?
The most common mistake is drawing a short, pointed beak instead of a broad, flat bill. Ensure the bill is wide and connected smoothly to the head rather than appearing as a sharp cone.
How do I draw a duck in flight?
Position the wings in an upward or downward arc extending from the back. Tilt the body at an angle and stretch the neck forward to convey a sense of motion and speed.
How do I add color to a duck drawing?
Use light washes of color for the feathers, focusing on darker tones near the wings and tail. Refer to images of mallards or wood ducks to see how patterns and iridescent colors are distributed.
This answer was created with the help of AI research tools and reference sources. Spotted an error? Let us know — we correct mistakes quickly. See our editorial policy.