How do you burnish colored pencils?
Short answer
Burnishing is the technique of applying heavy pressure to colored pencil layers to compress the pigment into the paper’s tooth. This process creates a smooth, wax-like finish, intensifies color saturation, and eliminates white gaps. It effectively blends distinct layers into a solid, polished surface that resembles a painting rather than a drawing.
On this page
How to burnish colored pencils effectively
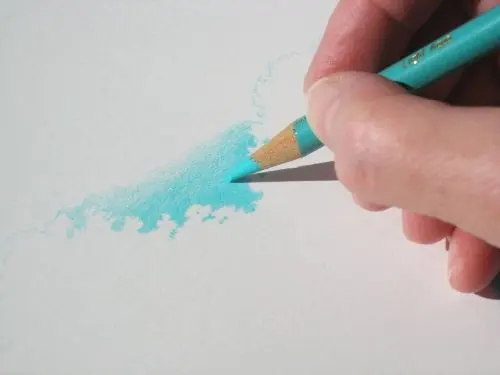
Burnishing requires a deliberate approach to layering. You should begin by applying your base colors lightly, gradually building up pigment without filling the paper’s texture entirely. Once you have established your desired depth, use a heavy, firm pressure with a light-colored or colorless pencil to force the wax binder into the paper fibers. This action flattens the peaks and valleys of the paper, creating a uniform, reflective surface.
To achieve the best results, follow these steps:
- Apply your initial colors using light, circular strokes to ensure even coverage.
- Gradually increase pressure as you layer, leaving some tooth for the final burnishing stage.
- Select a colorless blender or a very light pencil, such as cream or white, to finalize the surface.
- Apply firm, consistent pressure in small, overlapping circles to fuse the layers together into a solid mass.
Best tools for burnishing colored pencils
The choice of pencil is critical because burnishing relies on the binder within the core. Wax-based pencils, such as Prismacolor Premier, are ideal for this technique because they are soft and spread easily under pressure. Oil-based pencils, like Faber-Castell Polychromos, are harder and require more effort but offer a different, more subtle finish. Many artists also utilize dedicated colorless blenders, which are essentially pencils consisting only of the binder without pigment.
Beyond the pencils themselves, your choice of paper significantly influences the outcome. A paper with a medium tooth, such as Bristol board or high-quality drawing paper, provides enough texture to hold multiple layers of pigment before they are compressed. If your paper is too smooth, it will not hold enough wax to create a rich, burnished effect. If it is too rough, you will struggle to fill the deep indentations, resulting in a grainy, uneven appearance.
Why burnishing changes the appearance of art
Burnishing fundamentally alters the visual properties of a drawing by changing how light interacts with the surface. When you compress the wax and pigment, you reduce the amount of light scattered by the paper fibers, which increases the saturation and depth of the colors. This process often makes the colors appear darker and more vibrant, as the density of the pigment is significantly increased in a concentrated area.
The technique also creates a distinct sheen that is characteristic of high-end colored pencil work. Because the wax is forced into a smooth plane, it reflects light more uniformly than a raw, textured pencil layer. This provides a professional, finished look that is highly sought after for realistic portraits and detailed botanical illustrations. However, because burnishing seals the paper, it becomes nearly impossible to add further layers of detail or color once the surface has been fully polished.
Common mistakes when burnishing drawings
One of the most frequent errors is attempting to burnish too early in the drawing process. If you apply heavy pressure before enough pigment is layered, you will simply flatten the paper’s tooth without achieving a rich, saturated look. This can result in a muddy appearance or a surface that is too slick to accept any additional pencil marks. Always ensure you have built up sufficient color density before committing to the final burnishing pass.
Another common mistake is using an inconsistent hand pressure, which leads to streaks or uneven patches of shine. Maintaining a steady, firm grip is essential to ensure the entire area looks uniform. Additionally, beginners often use a dark color to burnish, which can inadvertently change the hue of the entire area. Stick to a colorless blender or a light-colored pencil to avoid shifting your color palette in unintended ways during the final stage of your work.
How to fix burnished pencil mistakes
If you find that you have over-burnished or made an error, your options for correction are limited due to the sealed nature of the paper. You can sometimes lift excess wax by gently dabbing the area with a kneaded eraser, though this rarely removes all the pigment. If the surface is completely saturated, you may be able to scrape away a tiny amount of the top layer using a sharp craft knife, but this risks damaging the paper fibers.
For future projects, consider working on a slightly larger scale or practicing on scrap paper to test your pressure. If you are worried about making a mistake, burnish in small sections rather than the entire drawing at once. This allows you to maintain control over the final look and ensures that you do not lose the ability to refine details in other parts of your composition. By keeping these limitations in mind, you can effectively use burnishing to elevate your artwork to a professional standard.
Key facts
- Burnishing is a technique that involves applying heavy pressure to colored pencil layers to create a smooth, polished, and wax-like finish.
- Using a colorless blender pencil or a white pencil is the most common method to fuse pigment particles together into the paper's tooth.
- Hard-wax based pencils, such as Prismacolor Premier, are generally more effective for burnishing than oil-based pencils like Faber-Castell Polychromos.
- You should always apply a base layer of color before burnishing, as the technique seals the paper and makes adding further layers nearly impossible.
- A firm, heavy-duty surface like a drawing board is essential to prevent the paper from buckling or tearing under the high pressure required.
- Burnishing significantly deepens color saturation and eliminates the visible white specks of paper grain that remain after standard shading.
The bottom line
Burnishing is a transformative technique that elevates colored pencil artwork by compressing pigment into the paper for a professional, glass-like finish. By applying firm, consistent pressure over layered colors, you eliminate white gaps and intensify saturation. While it limits further additions, mastering this final step provides a polished, vibrant look that distinguishes high-quality drawings from simple sketches, making it an essential skill for every serious artist.
People also ask
Can you burnish with a regular graphite pencil?
No, you should not use graphite pencils for burnishing colored drawings. Graphite will leave a grey, metallic sheen that muddies your colors and ruins the vibrancy of the pigment.
What is the difference between blending and burnishing?
Blending is the process of mixing two or more colors together to create a smooth transition or gradient. Burnishing is a final step that uses heavy pressure to compress those colors into a solid, glossy surface.
Does burnishing work on all types of paper?
Burnishing works best on heavy, smooth-textured paper like Bristol board or hot-press watercolor paper. Rough or toothy paper is often too fragile to withstand the intense pressure needed for the technique.
Can I use baby oil to help with burnishing?
Yes, applying a tiny amount of baby oil with a cotton swab can help dissolve wax binders and create a painterly effect. Use this sparingly, as too much oil can saturate the paper and cause permanent staining.
What happens if I burnish too early?
If you burnish before reaching your desired color depth, the paper’s tooth will be filled with wax. This prevents any additional pigment from adhering to the surface, effectively locking your drawing in its current state.
Is it possible to erase a burnished area?
It is extremely difficult to erase a burnished area because the pigment has been physically pressed into the paper fibers. You may be able to lift a small amount of color with a kneaded eraser, but the surface will remain permanently altered.
This answer was created with the help of AI research tools and reference sources. Spotted an error? Let us know — we correct mistakes quickly. See our editorial policy.