What are the different shading techniques?
Short answer
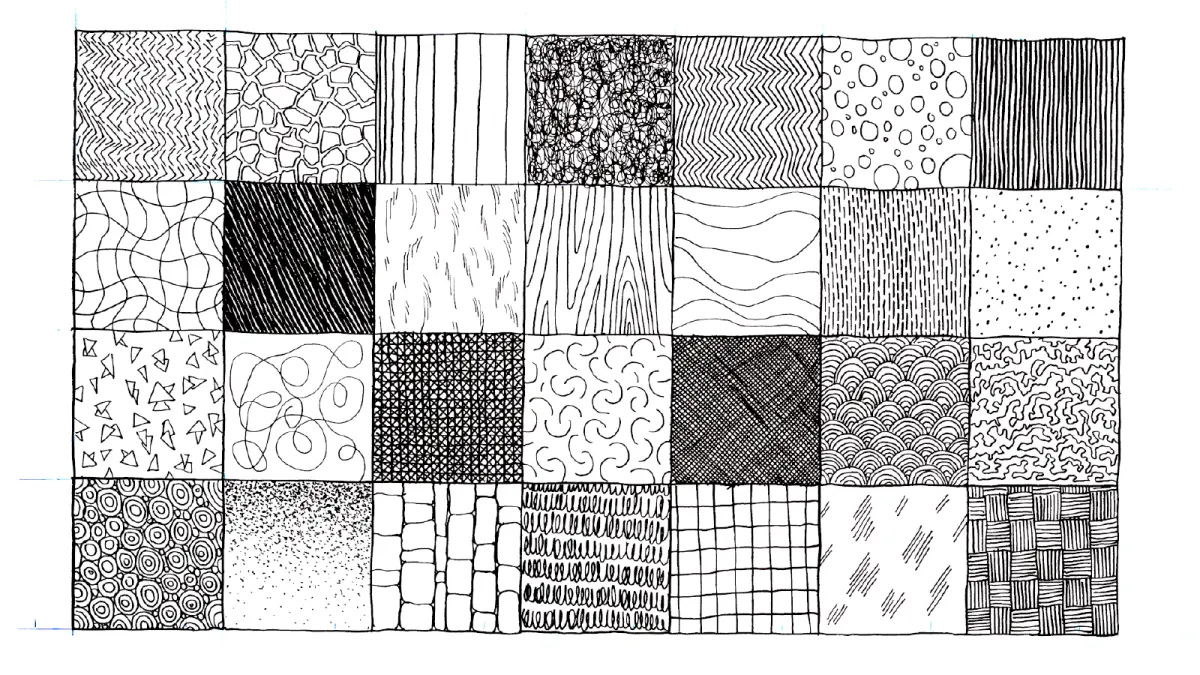
Shading techniques are methods used by artists to create the illusion of three-dimensional form, depth, and light on a two-dimensional surface. Common approaches include hatching, cross-hatching, stippling, blending, and scumbling. By varying line density, pressure, or texture, artists manipulate light and shadow to define the volume and weight of their subjects.
On this page
How to use hatching and cross-hatching
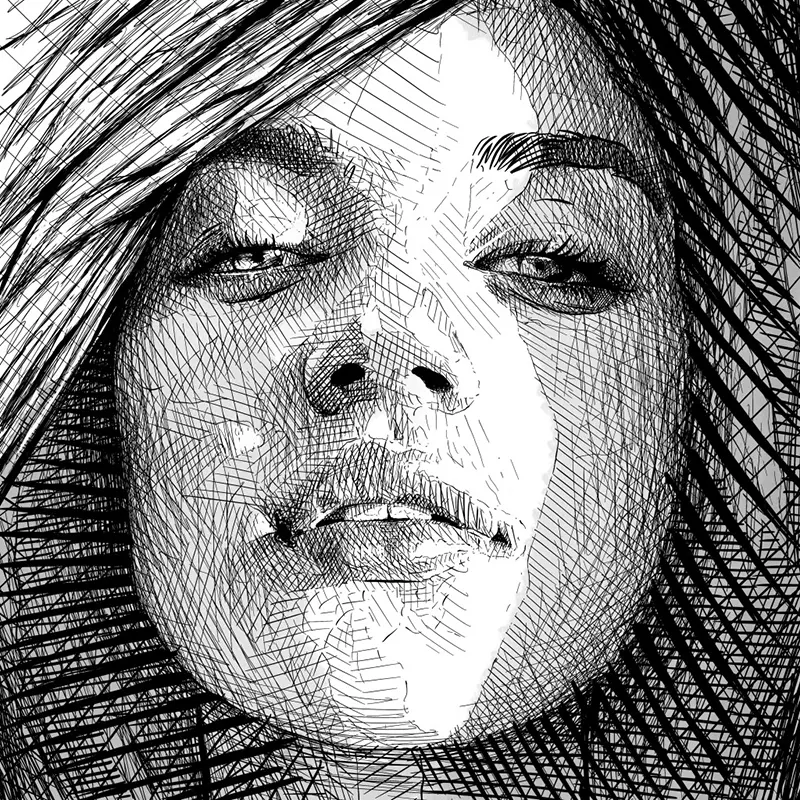
Hatching is the most fundamental shading technique, involving the application of parallel lines to create tonal values. By placing these lines closer together, the artist achieves darker shades, while wider spacing results in lighter tones. Cross-hatching expands on this by layering sets of parallel lines at different angles, typically perpendicular or diagonal to the first set. This method is highly effective for building deep, rich shadows in ink or graphite drawings.
To master these techniques, follow these steps:
- Determine the light source to identify where shadows should be darkest.
- Draw thin, uniform lines in the direction of the object's contour to suggest volume.
- Layer additional sets of lines over the initial strokes to darken specific areas.
- Vary the pressure of your pen or pencil to create subtle transitions between light and shadow.
A frequent error is drawing lines that are too thick or uneven, which can make the shading look messy rather than structural. Maintain a consistent distance between lines to ensure a smooth gradient.
Best shading techniques for beginners
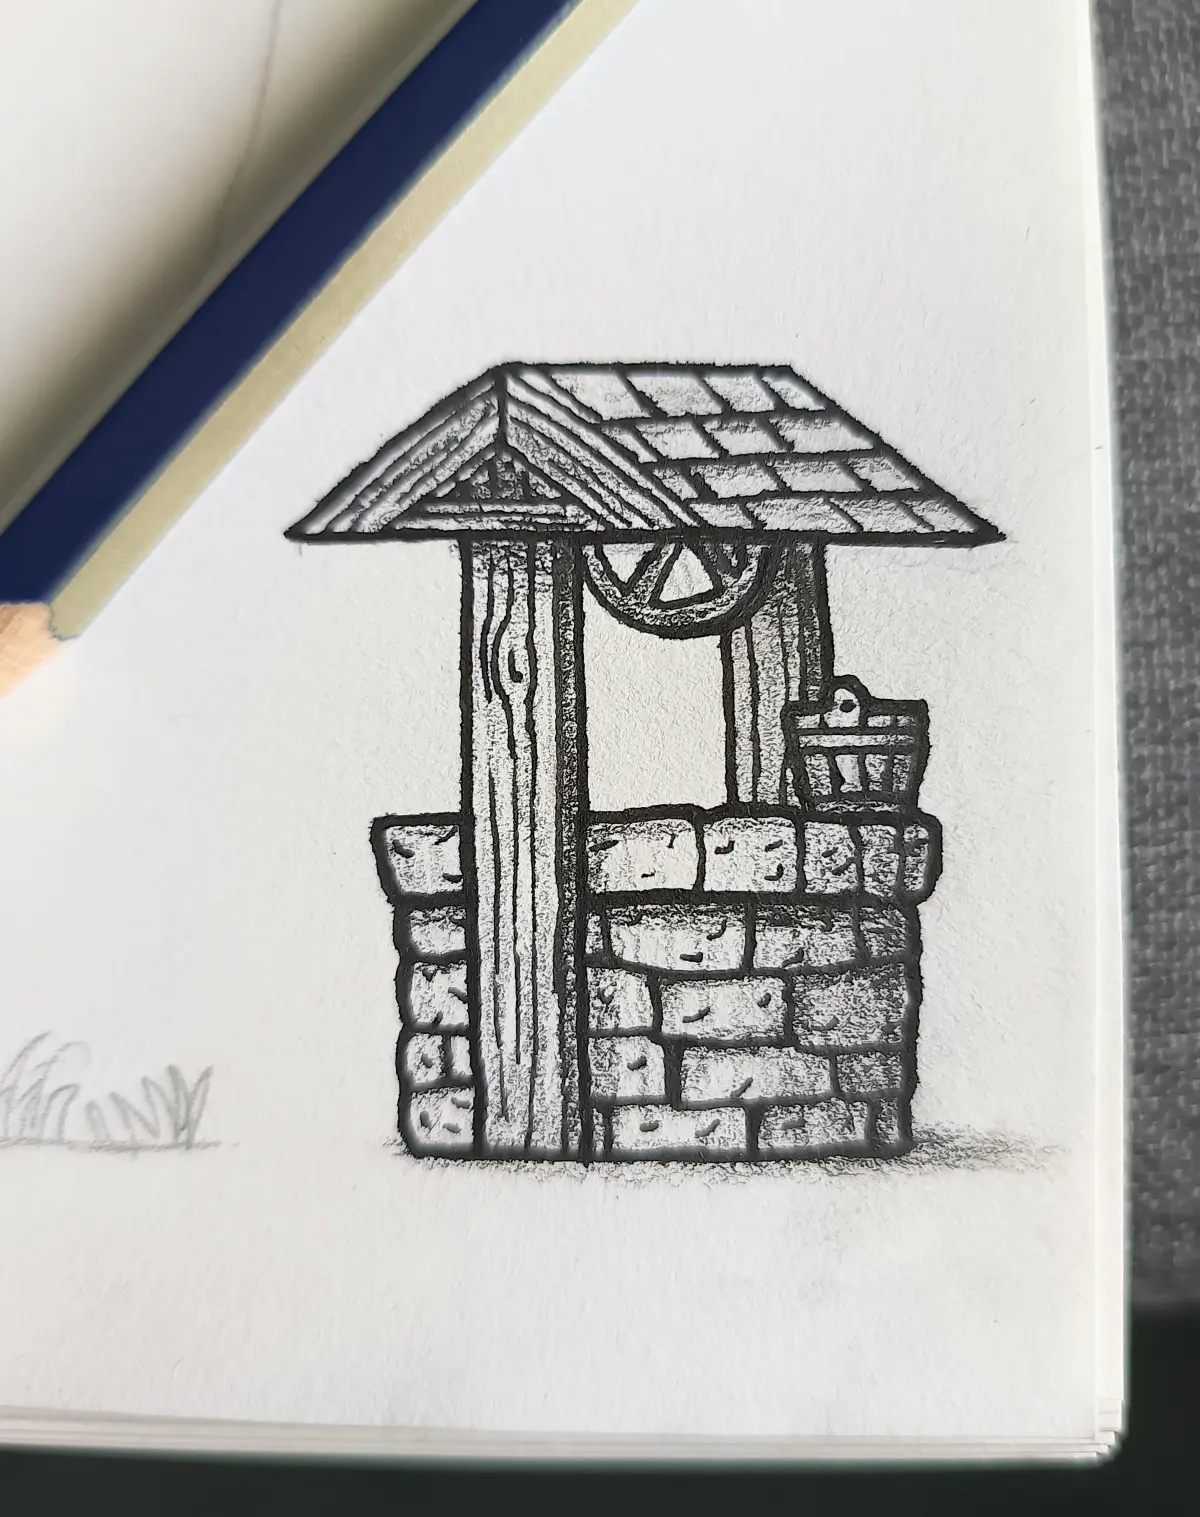
For those new to drawing, blending and smudging are often the most intuitive starting points. Blending involves softening the edges of graphite or charcoal marks to create smooth transitions between light and dark areas. While many beginners use their fingers to smudge, this often transfers natural skin oils onto the paper, which can ruin the texture and cause uneven patches. Instead, using a paper stump, also known as a tortillon, allows for more precise control and cleaner results.
When practicing blending, consider these tips to improve your work:
- Always work from the darkest areas toward the light to prevent over-darkening your highlights.
- Use a kneaded eraser to lift graphite and create soft, realistic highlights after blending.
- Keep your hand elevated above the paper with a scrap sheet to avoid smearing your work.
- Practice creating a value scale from pure white to solid black to understand the full range of your medium.
Why stippling creates unique textures
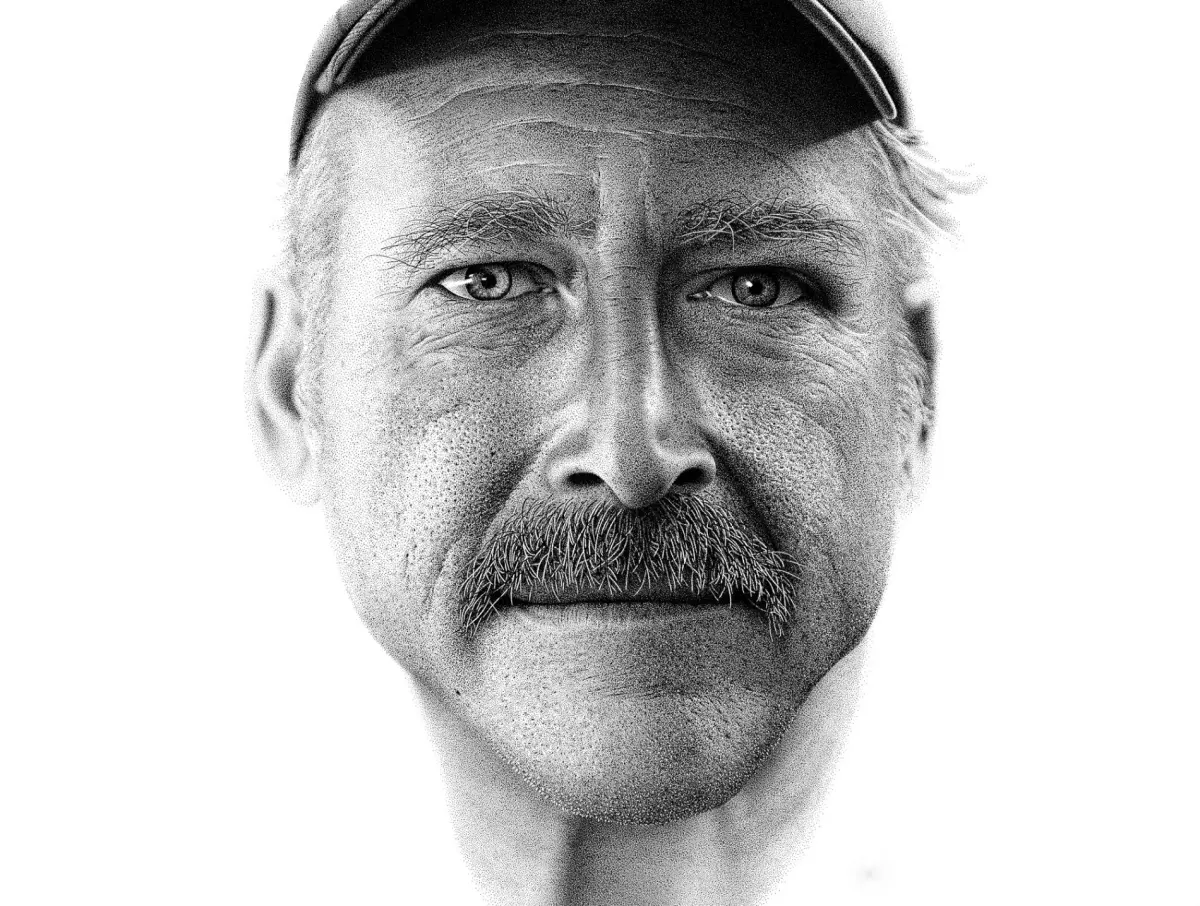
Stippling is a shading technique that relies entirely on thousands of tiny dots to create value. Unlike line-based methods, stippling avoids directional marks, making it ideal for rendering soft surfaces like skin, fruit, or clouds. The density of the dots determines the darkness; the closer the dots are clustered, the deeper the shadow. This technique requires significant patience, as it is a slow, methodical process that cannot be rushed.
Artists often prefer stippling for its high-contrast potential and its ability to create intricate, pointillist-style details. Because it relies on individual marks, it is impossible to "erase" a stippled area if you make a mistake, so careful planning is essential. Start by lightly mapping out your shadow shapes with a hard pencil before committing to the ink dots. Avoid the common mistake of making the dots too uniform in size, as varying the size of the dots can add much-needed visual interest and depth to the final composition.
Common mistakes when shading drawings
One of the most common mistakes is failing to define a clear light source, which leads to "flat" drawings that lack a sense of three-dimensional space. Without a consistent light direction, shadows appear random and confusing to the viewer. Another frequent issue is the "fear of the dark," where artists avoid using the full range of their pencil or charcoal, resulting in drawings that look washed out and timid. Bold, dark shadows are necessary to make the highlights pop and give the subject weight.
To avoid these pitfalls, keep the following in mind:
- Identify your light source before starting and mark it on your reference or paper.
- Do not be afraid to use your darkest grade of pencil, such as a 6B or 8B, in the deepest shadows.
- Ensure your shadows have "core shadows" and "reflected light" to make the object look realistic.
- Check your work by squinting at it; if the image looks blurry and lacks contrast, you need to deepen your shadows.
How to choose the right shading tools
The effectiveness of your shading depends heavily on the tools you select. Graphite pencils range from 9H (hard and light) to 9B (soft and dark), and having a variety of grades is crucial for achieving a full tonal range. For charcoal, you might prefer vine charcoal for light sketches and compressed charcoal for deep, velvety blacks. The texture of your paper also plays a role; a "toothier" or rougher paper will grab more graphite, making it easier to build up dark, textured shadows.
When selecting your materials, consider the desired outcome of your drawing. Smooth Bristol board is excellent for fine-line hatching and stippling, while textured drawing paper is better for blending and expressive charcoal work. Always test your tools on a scrap piece of paper before applying them to your final project. By understanding the relationship between your medium and the surface, you can select the perfect combination to enhance your shading and bring your artistic vision to life.
Key facts
- Hatching involves drawing a series of parallel lines close together to create areas of shadow.
- Cross-hatching adds a second layer of lines at an angle to the first, significantly darkening the tone.
- Stippling uses tiny dots to build up value, where denser clusters of dots create deeper shadows.
- Scumbling utilizes small, scribbled circular marks to create texture and gradual transitions in tone.
- Blending, or smudging, uses a tool like a tortillon to soften harsh lines into smooth gradients.
- Contour shading follows the physical curves of an object to emphasize its three-dimensional volume.
The bottom line
Mastering shading requires a combination of controlled pressure and the strategic selection of techniques to define form. By layering marks—whether through hatching, stippling, or scumbling—you can successfully translate three-dimensional objects onto a two-dimensional plane. Focus on building values gradually rather than rushing to dark tones, and always consider the direction of your light source to ensure your shadows remain consistent and believable throughout the drawing.
People also ask
What is the best pencil grade for shading?
Soft pencils, such as 2B, 4B, or 6B, are ideal for shading because they contain more graphite and create darker, smoother marks. Harder pencils, like 2H or 4H, produce lighter lines and are better suited for preliminary sketching or fine details.
How do I prevent smudging when shading with graphite?
Place a clean piece of scrap paper under your drawing hand to protect the surface from oils and graphite transfer. Additionally, work from the top left to the bottom right if you are right-handed to avoid dragging your hand over finished areas.
Why does my shading look flat or muddy?
Muddy shading often occurs from over-blending or applying too much pressure too early. Build your values gradually in layers, and avoid using your fingers to blend, as skin oils can permanently seal the paper's tooth and prevent further layering.
Can I use shading to show different textures?
Yes, specific techniques mimic different surfaces, such as using stippling for rough stone or scumbling for foliage and hair. By adjusting the direction and density of your marks, you can suggest whether an object is smooth, fuzzy, or metallic.
What is the "value scale" in drawing?
A value scale is a tool consisting of a series of boxes ranging from pure white to solid black. Practicing this scale helps artists learn how to control pressure to create a full range of tones between the lightest highlights and deepest shadows.
Should I shade with the tip or the side of the pencil?
Using the side of the pencil allows you to cover larger areas quickly and creates a softer, more uniform texture. The tip is reserved for fine details, sharp edges, and high-contrast areas where precision is required.
This answer was created with the help of AI research tools and reference sources. Spotted an error? Let us know — we correct mistakes quickly. See our editorial policy.