How do you make Nanaimo bars?
Short answer
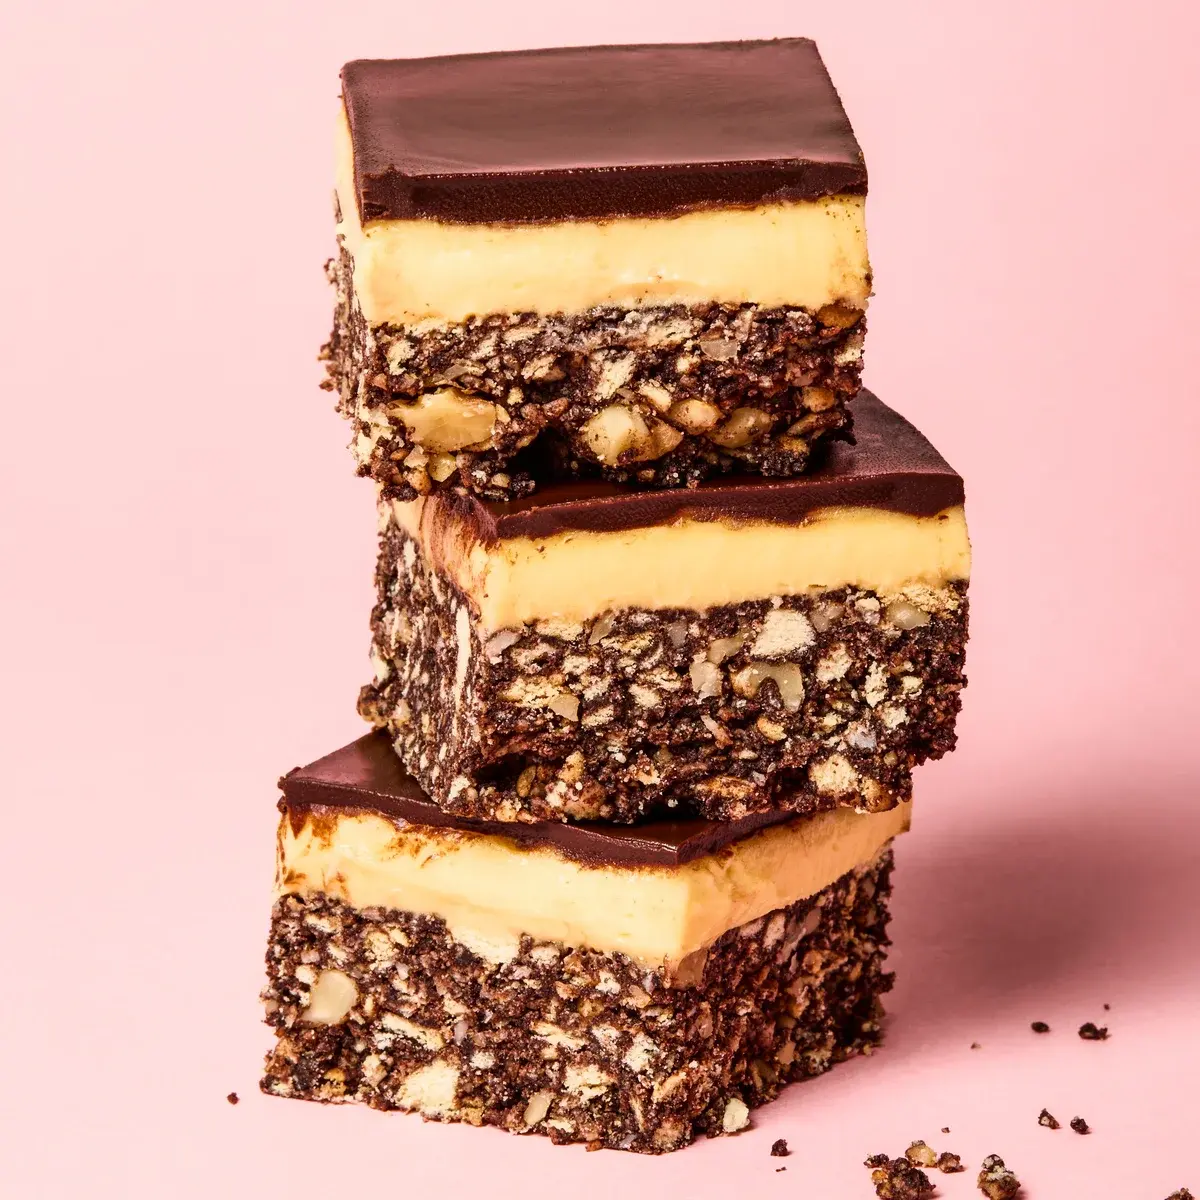
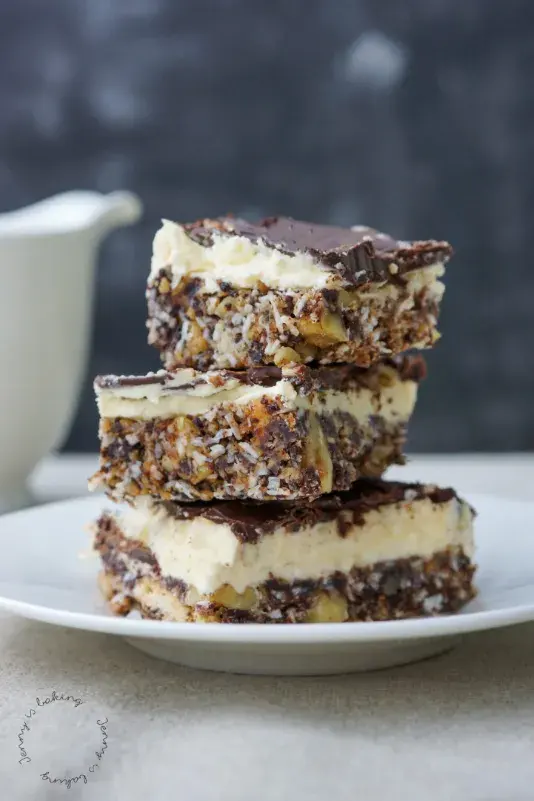
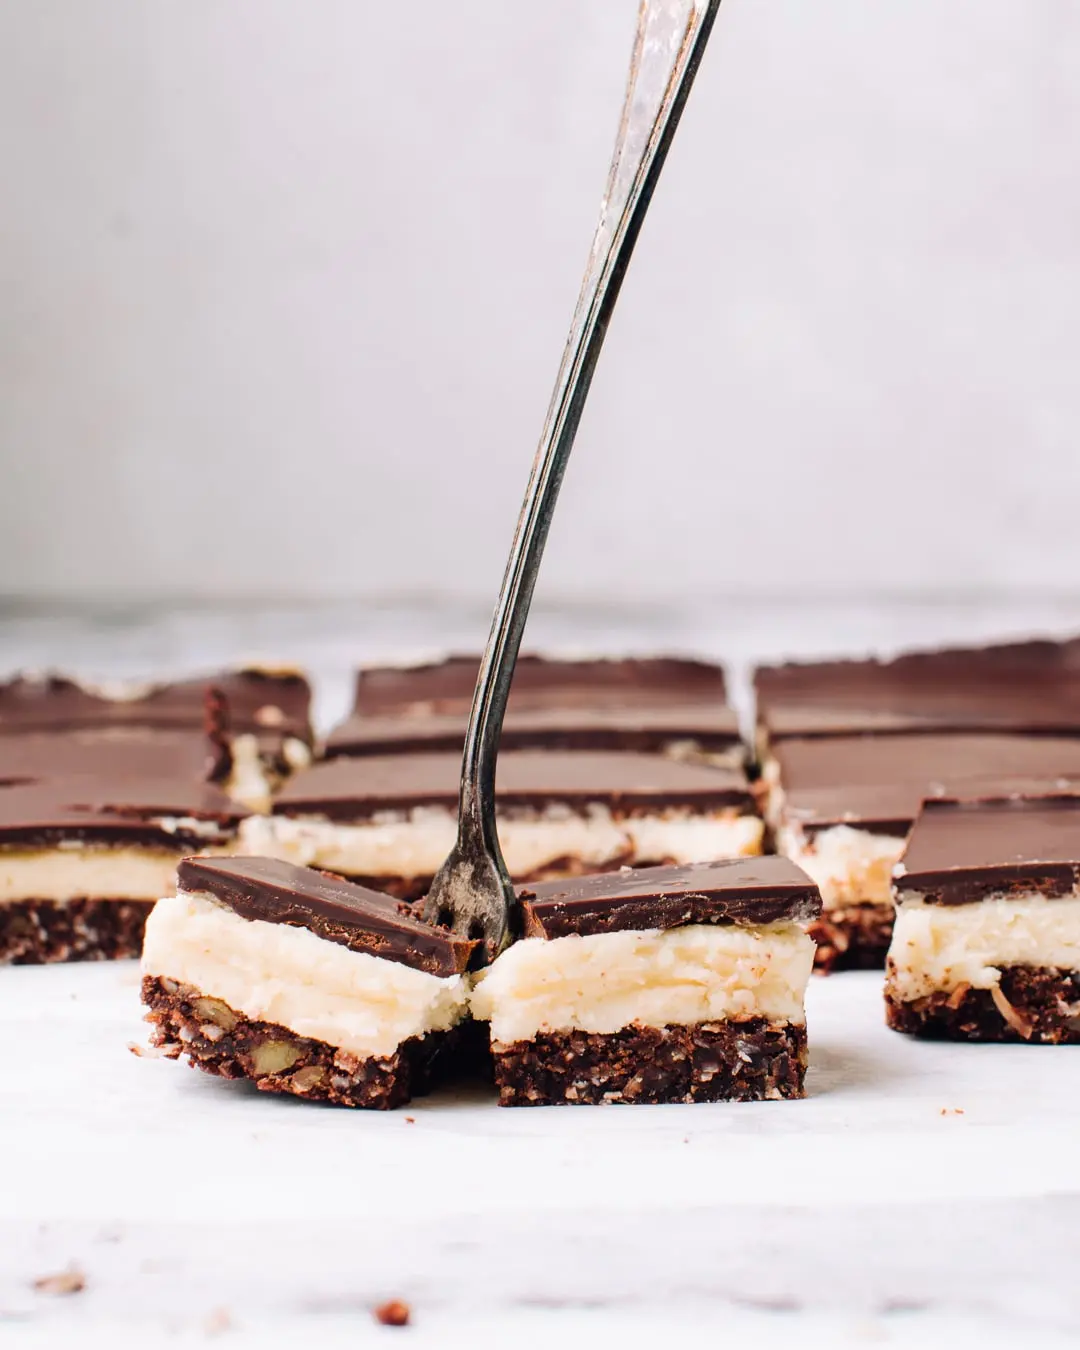
Nanaimo bars are a classic Canadian no-bake dessert consisting of three distinct layers: a crumbly chocolate-coconut-nut base, a creamy custard-flavored middle, and a smooth chocolate ganache topping. Named after the city of Nanaimo, British Columbia, these rich, decadent squares are prepared by layering, chilling, and cutting them into small, bite-sized pieces.
On this page
How to make the base layer
The foundation of a Nanaimo bar is a dense, chewy crust that provides a structural contrast to the soft fillings above. To begin, melt 1/2 cup of unsalted butter with 1/4 cup of sugar and 5 tablespoons of cocoa powder in a double boiler. Once smooth, whisk in one beaten egg, stirring constantly until the mixture thickens slightly. Remove from heat and fold in 1 3/4 cups of graham cracker crumbs, 1 cup of shredded coconut, and 1/2 cup of finely chopped walnuts or almonds.
Press this mixture firmly into the bottom of an ungreased 8x8-inch square pan. Using the back of a metal measuring cup or an offset spatula ensures the base is tightly packed and level, which prevents the bars from crumbling when sliced later. Chill the pan in the refrigerator for at least 20 minutes while you prepare the second layer. This cooling period is essential for setting the fats in the base, providing a stable platform for the custard filling.
What is the best custard filling recipe
The middle layer is the defining characteristic of the Nanaimo bar, traditionally flavored with custard powder. This specific ingredient, often sold under the brand Bird’s, provides the signature yellow hue and a distinct vanilla-floral flavor profile that cannot be perfectly replicated with cornstarch alone. If you cannot find custard powder, a combination of instant vanilla pudding mix or extra vanilla extract can serve as a substitute, though the texture will differ slightly.
To create the filling, follow these steps:
- Cream 1/2 cup of softened unsalted butter until light and fluffy.
- Gradually beat in 2 cups of powdered sugar, 2 tablespoons of custard powder, and 2 tablespoons of heavy cream.
- Whip the mixture on high speed for several minutes until it reaches a light, airy, and spreadable consistency.
- Spread this mixture evenly over the chilled base layer using a warm offset spatula to achieve a perfectly smooth surface.
Return the pan to the refrigerator for another 20 to 30 minutes to firm up the custard before adding the final topping.
How to make the chocolate ganache topping
The final layer is a thin, crisp chocolate ganache that provides a snap when bitten. For the best results, use a high-quality semi-sweet chocolate with a cocoa content of around 60 percent. Combine 4 ounces of chopped chocolate with 2 tablespoons of unsalted butter in a heatproof bowl. Melt the ingredients together using a microwave in 30-second intervals, or place the bowl over a pot of simmering water, ensuring no steam or water droplets enter the chocolate, as this can cause it to seize.
Once the mixture is glossy and smooth, pour it immediately over the chilled custard layer. Tilt the pan gently to ensure the chocolate coats the entire surface in a thin, uniform layer. Place the pan in the refrigerator for at least one hour to allow the chocolate to set completely. Avoid leaving the bars in the fridge for too long before slicing, as the chocolate layer may become too brittle and crack unevenly when you attempt to cut through it.
Common mistakes when making Nanaimo bars
A frequent error is failing to chop the nuts or coconut finely enough, which leads to a base that does not hold together properly. If the pieces are too large, the crust will crumble when you lift the bars from the pan. Additionally, many home bakers struggle with the custard layer by using too much liquid, resulting in a runny filling that leaks out the sides. Always measure your cream carefully; start with the minimum amount and add only enough to reach a spreadable consistency.
Another common pitfall is the slicing process. If you try to cut the bars straight from the refrigerator, the chocolate layer will likely shatter. To achieve clean, professional edges, follow these tips:
- Remove the bars from the refrigerator 10 to 15 minutes before serving to slightly soften the chocolate.
- Use a sharp, thin-bladed knife that has been dipped in hot water and wiped dry before each cut.
- Press straight down through the layers rather than sawing back and forth, which helps maintain the integrity of the distinct sections.
How long do Nanaimo bars last
Nanaimo bars are exceptionally shelf-stable due to their high sugar and fat content, making them an ideal candidate for advance preparation. When stored in an airtight container in the refrigerator, they will remain fresh and delicious for up to one week. If you need to keep them for a longer duration, they freeze remarkably well. Place the cut squares in a single layer on a baking sheet to freeze solid, then transfer them to a freezer-safe bag or container with parchment paper separating the layers.
When frozen, these bars can be kept for up to three months without a significant loss in flavor or texture. Simply remove the desired number of squares from the freezer and let them sit at room temperature for about 10 minutes before eating. This allows the custard to regain its creamy, melt-in-the-mouth quality while keeping the chocolate topping perfectly crisp. Because they are so rich, they are best served in small portions alongside a cup of strong coffee or tea to balance the sweetness.
Key facts
- The Nanaimo bar is a Canadian dessert consisting of three distinct layers: a coconut-graham cracker base, a custard-flavored butter icing, and a chocolate ganache topping.
- The treat originated in Nanaimo, British Columbia, and first appeared in print under its current name in a 1952 local hospital auxiliary cookbook.
- The base layer traditionally requires cocoa powder, shredded coconut, and crushed graham cracker crumbs, often bound with butter and an egg.
- The middle layer relies on custard powder, such as Bird’s brand, which provides the signature yellow color and distinct flavor profile.
- You must chill the bars between adding each layer to ensure they set properly and maintain distinct, clean lines when sliced.
- To achieve clean cuts, dip your knife in hot water and wipe it dry before slicing through the hardened chocolate top layer.
The bottom line
Creating the perfect Nanaimo bar requires patience and attention to the chilling process. By layering a rich coconut-graham base, a smooth custard filling, and a snappy chocolate ganache, you achieve the classic Canadian confection. Remember to use high-quality custard powder for authenticity and always warm your knife before slicing. When prepared correctly, these no-bake bars offer a professional-looking, decadent treat that is perfect for any occasion.
People also ask
Can I substitute the custard powder if I cannot find it?
You can replace custard powder with an equal amount of instant vanilla pudding mix or cornstarch mixed with a drop of yellow food coloring. While the flavor profile will shift slightly, these substitutes provide the necessary thickening and color for the middle layer.
Why does my chocolate topping crack when I try to cut it?
The chocolate layer often cracks because it is too brittle or the knife is too cold. Adding a small amount of butter or coconut oil to the chocolate before melting it creates a softer ganache that is easier to slice.
Do Nanaimo bars need to be refrigerated?
Yes, these bars are best stored in the refrigerator or freezer because the butter-based custard layer softens quickly at room temperature. Keeping them chilled preserves the structural integrity of the bars and prevents the layers from sliding.
Can I bake the base layer?
The base layer is typically prepared on the stovetop by melting butter, sugar, and cocoa before stirring in the dry ingredients. While some variations involve a quick bake to toast the coconut, the traditional method relies on the cooling process to firm the crust.
How long do these bars stay fresh?
Nanaimo bars will stay fresh in an airtight container in the refrigerator for up to one week. If you need to store them longer, they freeze exceptionally well for up to three months without losing their texture or flavor.
Are there gluten-free versions of this recipe?
You can easily make gluten-free Nanaimo bars by using gluten-free graham cracker crumbs or crushed gluten-free cookies for the base. Ensure that your custard powder and chocolate are also certified gluten-free to accommodate dietary restrictions.
This answer was created with the help of AI research tools and reference sources. Spotted an error? Let us know — we correct mistakes quickly. See our editorial policy.