How do you make a coil pot?
Short answer
Making a coil pot involves rolling clay into long, snake-like ropes and stacking them in circles to build walls. You must score and slip each layer to ensure they bond securely. Once the desired shape is achieved, smooth the surfaces to hide the coils and allow the piece to dry slowly.
On this page
How to prepare clay for coil pots
To begin your coil pot, you must first prepare your clay to ensure it is pliable and free of air bubbles. Start with a ball of clay about the size of a grapefruit. Knead the clay using a technique called wedging, which involves pressing it against a hard surface repeatedly. This process aligns the clay particles and removes trapped air that could cause the pot to explode in the kiln. If your clay feels too dry, mist it with a small amount of water, but be careful not to make it sticky or difficult to handle.
Once the clay is wedged, you need to create a flat base for your pot. Roll a small portion of the clay into a thick pancake using a rolling pin or by patting it down with your palms. Aim for a thickness of about one-quarter to one-half inch to provide a sturdy foundation. Use a needle tool or a knife to cut a perfect circle from this slab. This base will support the weight of the coils you are about to add, so ensure it is level and uniform.
How to roll and attach clay coils
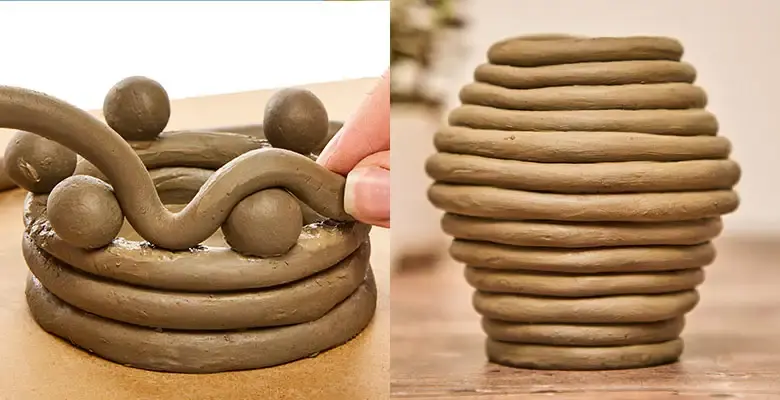
The core of the coil technique is creating consistent, uniform ropes of clay. Take a small amount of clay and roll it back and forth on a canvas-covered board or a smooth table. Start from the center and work your hands outward using gentle, even pressure to avoid flat spots. Aim for a diameter of about the width of your pinky finger. If the coil becomes too thin or breaks, simply ball it up and start again until you achieve a smooth, consistent length.
After rolling your coils, you must attach them to the base using the score-and-slip method. This is essential for structural integrity. Follow these steps to ensure a strong bond:
- Use a needle tool or a serrated rib to scratch deep cross-hatch marks into the top edge of the base.
- Apply a small amount of liquid clay, known as slip, to the scored area.
- Gently press the first coil onto the base, following the outer perimeter.
- Score and slip the top of the first coil before adding the next layer to build height.
How to shape a coil pot
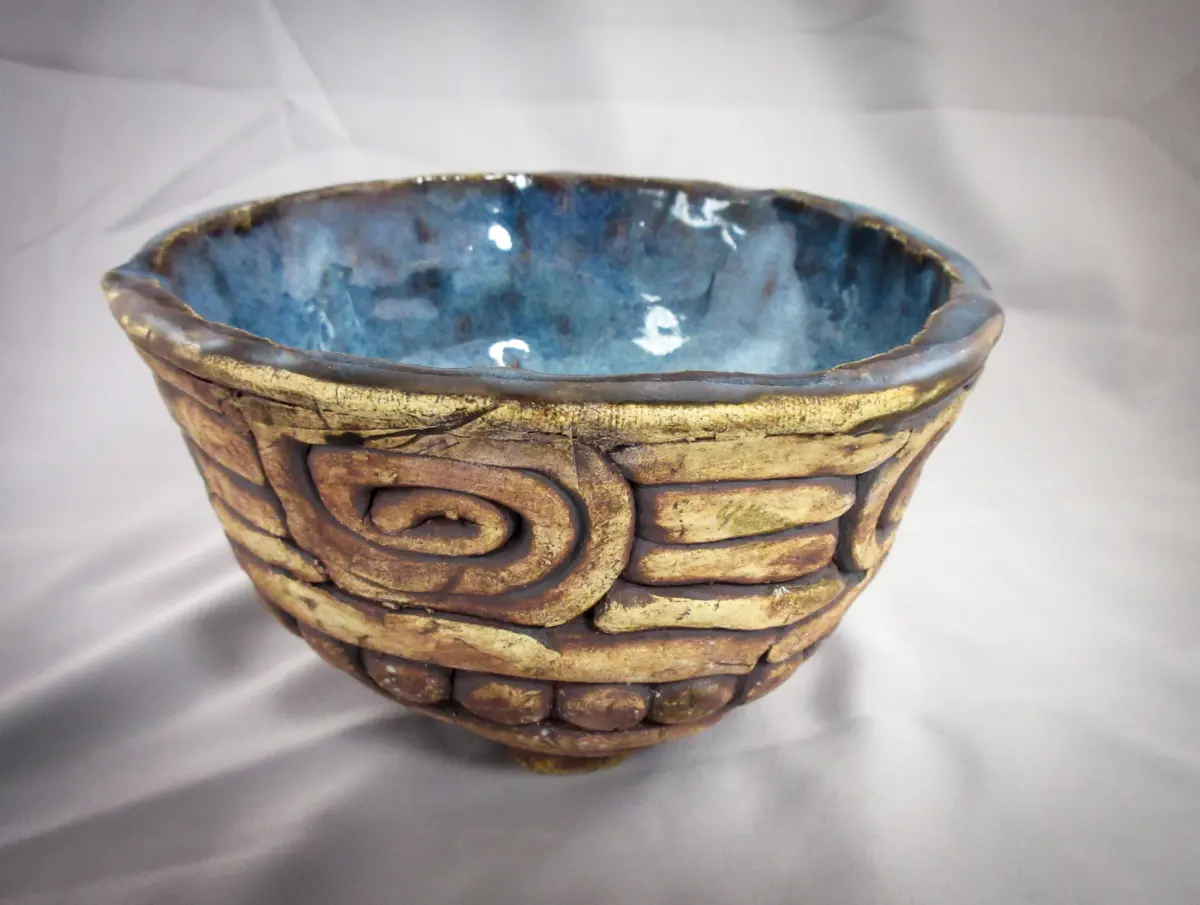
As you stack your coils, you can control the silhouette of your pot by adjusting the placement of each rope. If you want the pot to widen, place each new coil slightly toward the outer edge of the previous one. To create a neck or a narrowing effect, position each coil slightly toward the inside. This manual manipulation allows for a high degree of artistic freedom, enabling you to create bowls, vases, or tall cylinders. Use a wooden modeling tool to gently push the clay into the desired curve as you work.
Blending the coils is the final step in shaping the vessel. Use a metal or rubber rib to scrape the interior and exterior walls. This action fills the gaps between coils and creates a smooth, continuous surface. If you prefer a rustic look, you can leave the coils visible on the outside while smoothing only the inside for functionality. Always support the wall with one hand from the opposite side while smoothing to prevent the clay from deforming or collapsing under the pressure of your tools.
Common mistakes when making coil pots
One of the most frequent errors beginners make is failing to score and slip adequately between layers. If the surfaces are not roughened and moistened with slip, the coils will likely separate as the clay dries and shrinks. This creates cracks that are difficult to repair and often result in the pot falling apart during the firing process. Another common mistake is using coils that are too wet or too dry. If the clay is too soft, the weight of the upper coils will cause the bottom of the pot to sag and lose its intended shape.
Working too quickly is another pitfall. If you add too many coils in a single session, the bottom layers may not be strong enough to support the weight of the new additions. It is often better to build the pot in stages, allowing the bottom sections to firm up to a "leather-hard" state before adding more height. Additionally, neglecting to compress the clay thoroughly during the smoothing process can leave internal air pockets. These pockets are dangerous because they expand when heated in the kiln, which can cause the entire piece to shatter.
How to dry and finish your pot
Proper drying is the final, critical stage of the process. Never rush this step, as uneven drying leads to warping and cracking. Place your finished pot in a cool area away from direct sunlight or drafts. Cover it loosely with a plastic bag for the first 24 hours to allow the moisture to distribute evenly throughout the clay walls. After the first day, remove the plastic and let it dry slowly at room temperature for several days until it feels cool to the touch and has turned a lighter color.
Once the pot is completely bone-dry, it is ready for its first firing, known as the bisque fire. This process hardens the clay and prepares it to accept glazes. After the bisque fire, you can apply ceramic glazes to add color and a waterproof finish. After glazing, the pot undergoes a second, final firing in the kiln at a much higher temperature. This vitrifies the clay and melts the glaze into a glass-like coating, completing the transformation from raw earth into a durable, functional vessel that will last for years.
Key facts
- Coil pottery is one of the oldest ceramic techniques, dating back to the Jōmon period in Japan around 10,000 BCE.
- Use a consistent thickness for your coils, ideally about the width of your thumb, to ensure even drying and firing.
- Always score and slip the surfaces where coils join to create a strong, permanent bond between layers.
- Keep your clay moist by covering your work with plastic between sessions to prevent premature cracking.
- Smooth the interior and exterior walls with a wooden rib or your fingers to hide the coil seams.
- Avoid building too high in one session, as the weight of the wet clay can cause the base to collapse.
The bottom line
Coil building is a foundational ceramic technique that transforms simple ropes of clay into complex, sculptural vessels. By mastering the essential cycle of scoring, slipping, and smoothing, you can construct sturdy pots without the need for a wheel. Patience is your greatest tool; allow your clay to firm up between sessions to ensure structural integrity and professional results in your finished handmade ceramic pieces.
People also ask
Why is my coil pot cracking while it dries?
Cracking usually occurs because the clay dried too quickly or the coils were joined unevenly. To prevent this, cover your piece loosely with plastic to allow for a slow, uniform evaporation of moisture.
Do I need a pottery wheel to make a coil pot?
No, coil building is a hand-building technique that requires no specialized machinery. You only need a flat work surface, clay, a scoring tool, and a small amount of liquid clay known as slip.
How do I make the walls of my pot perfectly vertical?
Use a template cut from stiff paper or cardboard to hold against the side of the pot as you build. This acts as a guide, helping you maintain a consistent shape and angle as you stack your coils.
What is the purpose of scoring and slipping?
Scoring creates rough, cross-hatched marks on the clay surface, while slip acts as a glue. Combining these steps creates a mechanical and chemical bond that prevents the pot from falling apart during the drying process.
Can I use any type of clay for coil building?
Most ceramic clays work well, but stoneware or clay with some "grog"—fine particles of fired clay—is best for beginners. Grog provides structural support and helps reduce shrinkage, making it easier to build taller forms.
How long should I let the base harden before adding coils?
Let the base set until it reaches a "leather-hard" state, which feels firm but still cool to the touch. If the base is too soft, it will not be strong enough to support the weight of the subsequent coils.
This answer was created with the help of AI research tools and reference sources. Spotted an error? Let us know — we correct mistakes quickly. See our editorial policy.