How do you hand sew a seam?
Short answer
Hand sewing a seam involves pinning two fabric edges together and stitching along a straight line using a needle and thread. By securing the ends and maintaining consistent stitch length, you create a durable bond. This fundamental technique allows for precise garment construction, repairs, and customization without the need for a machine.
On this page
How to prepare fabric for hand sewing
Before beginning your seam, you must prepare the fabric to ensure the final result is straight and professional. Start by pressing your fabric with an iron to remove wrinkles, as creases can distort the seam line. Use tailor’s chalk or a fabric marking pen to draw a straight line where you intend to sew, typically 5/8 of an inch from the edge. This guide line prevents the seam from wandering as you work.
Next, align your fabric pieces with the "right sides" facing each other. The right side is the finished or patterned side of the fabric. Secure the edges together using sewing pins, placing them perpendicular to the seam line. This orientation allows you to remove the pins easily as you reach them with your needle. Proper alignment is the most critical step for achieving a seam that lies flat and looks clean.
What tools are needed for hand sewing
To sew a durable seam, you need a basic kit consisting of a needle, thread, and sharp scissors. Choose a needle size that corresponds to the weight of your fabric; for example, use a fine needle for silk and a sturdier, thicker needle for denim or canvas. High-quality polyester or cotton-wrapped polyester thread is ideal because it resists breaking during the tension of sewing.
- Sharp fabric shears for clean cuts.
- A pincushion to keep pins organized.
- A thimble to protect your finger when pushing the needle through thick layers.
- A seam ripper for correcting errors.
Having these tools ready prevents interruptions. A thimble is particularly helpful for beginners, as it provides the leverage needed to push the needle through multiple layers of fabric without causing discomfort or injury to your fingertip.
How to execute a running stitch or backstitch
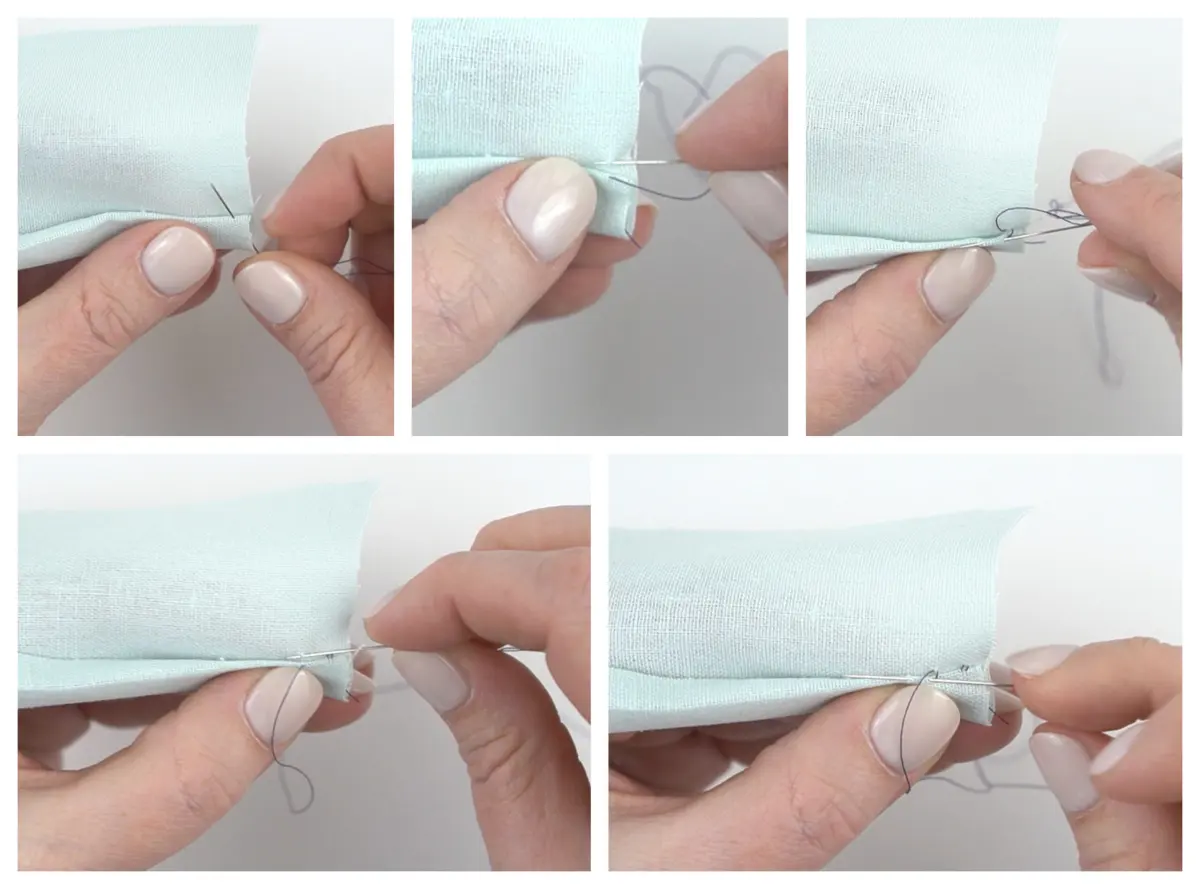
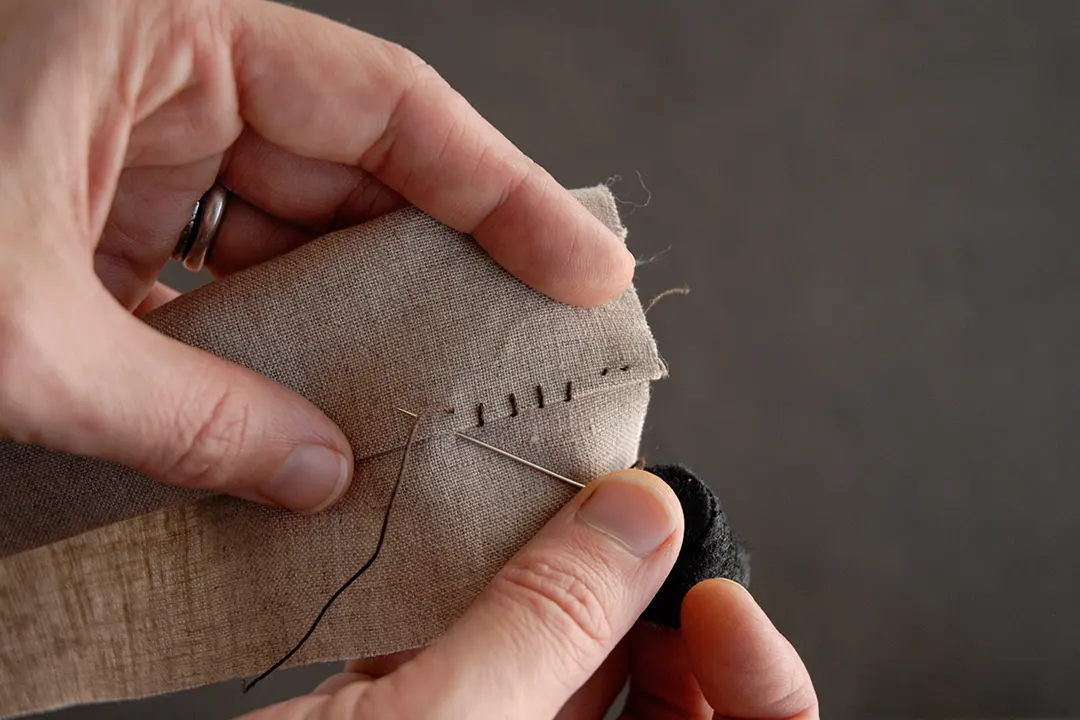
The backstitch is the gold standard for hand-sewn seams because it mimics the strength and security of a machine stitch. To perform a backstitch, bring your needle up through the fabric at your starting point. Move the needle a short distance forward, insert it into the fabric, and bring it back up a short distance behind where the thread emerged. Repeat this process, always inserting the needle at the end of the previous stitch.
- Knot the end of your thread securely before beginning.
- Push the needle through both layers of fabric from the back to the front.
- Insert the needle a small distance ahead, then bring it back up behind the previous stitch.
- Pull the thread taut but not so tight that it puckers the fabric.
- Continue this rhythm until you reach the end of the seam.
If you are sewing a temporary seam or a light-duty repair, a running stitch is faster. This involves weaving the needle in and out of the fabric at regular intervals. While faster, it is less secure than the backstitch and should be avoided for high-stress areas like armholes or pant crotches.
How long does it take to hand sew a seam
The time required to sew a seam by hand depends on the length of the fabric edges and the complexity of the stitch chosen. A simple, straight seam on a standard garment piece, such as a side seam, might take between 20 to 40 minutes for a beginner. Experienced sewers can often complete the same task in half that time due to improved muscle memory and consistent stitch rhythm.
Factors that influence speed include the thickness of the fabric and the length of your needle. Thicker fabrics require more force and time to pierce, while longer needles allow you to pick up more fabric in a single movement. Do not rush the process, as speed often leads to uneven stitch lengths or skipped sections. Consistent, measured progress ensures that your seam remains strong and aesthetically pleasing throughout the entire length of the project.
Common mistakes when hand sewing a seam
One of the most frequent errors is failing to knot the thread properly, which causes the seam to unravel immediately. Always tie a double knot at the end of your thread or take several small stitches in the same spot at the beginning and end of your seam to lock it in place. Another common mistake is using a thread length that is too long, which leads to frequent tangling and knotting as you pull it through the fabric.
- Using thread that does not match the fabric weight.
- Pulling the thread too tightly, resulting in puckered or distorted fabric.
- Sewing too far away from the intended seam line, which changes the fit of the garment.
- Forgetting to backstitch at the start and finish, leading to weak ends.
If you find your thread tangling, cut shorter lengths, ideally no longer than 18 to 24 inches. Additionally, always check your tension every few inches to ensure the fabric remains flat. By identifying these pitfalls early, you can maintain control over your project and produce professional results that withstand regular wear and washing.
Key facts
- A running stitch is the simplest method, created by passing the needle in and out of fabric at regular intervals.
- The backstitch is the strongest hand-sewing stitch, mimicking the look and durability of a machine-sewn seam.
- Always tie a secure knot at the end of your thread before starting to prevent the seam from pulling out.
- Use a thread length no longer than 18 to 24 inches to avoid tangles and knots while working.
- Matching the needle size to the fabric weight ensures the fabric is not damaged or puckered during sewing.
- Pressing your seam open with an iron after sewing creates a professional, flat finish that prevents bulk.
The bottom line
Hand sewing a seam is a fundamental skill that relies on patience and precision. By utilizing the backstitch for strength and keeping your thread length manageable, you can create durable, professional-looking garments. Always mark your seam allowance clearly and press your work as you go. With practice, these manual techniques provide excellent control, allowing you to mend clothing or construct projects with high-quality, long-lasting results.
People also ask
How do I keep my stitches straight?
Use a tailor's chalk or a fabric marking pen to draw a light line along your seam allowance before you begin. Following this guideline helps maintain consistent spacing and alignment as you sew.
What is a seam allowance?
The seam allowance is the distance between the fabric edge and the line of stitching. Standard clothing patterns typically use a 5/8-inch allowance, though you should verify this on your specific project.
Why does my thread keep knotting while I sew?
Thread often tangles because it is too long or because it is being pulled through the fabric at an awkward angle. Keep your thread short and occasionally let the needle dangle to untwist the fibers.
How do I finish the ends of a seam?
Secure your seam by sewing two or three tiny stitches in the exact same spot at the beginning and end. Alternatively, tie a sturdy surgeon’s knot and trim the excess thread close to the fabric.
Can I use any type of thread for hand sewing?
While you can use most threads, polyester-cotton blends are best for general sewing because they resist shrinking. Avoid using thick upholstery thread for delicate fabrics, as it can tear the material.
How do I fix a mistake in my stitching?
Use a seam ripper to gently cut the stitches without damaging the fabric fibers. Once the threads are removed, pull them away from the fabric and re-sew the section carefully.
This answer was created with the help of AI research tools and reference sources. Spotted an error? Let us know — we correct mistakes quickly. See our editorial policy.