How do you draw hands?
Short answer
Drawing hands requires breaking complex anatomy into simple geometric shapes like boxes and cylinders. By focusing on the palm’s square structure and the fingers’ varying lengths, artists can build a solid foundation. Consistent practice using your own hand as a reference is the most effective method for mastering this challenging subject.
On this page
How to simplify hand anatomy
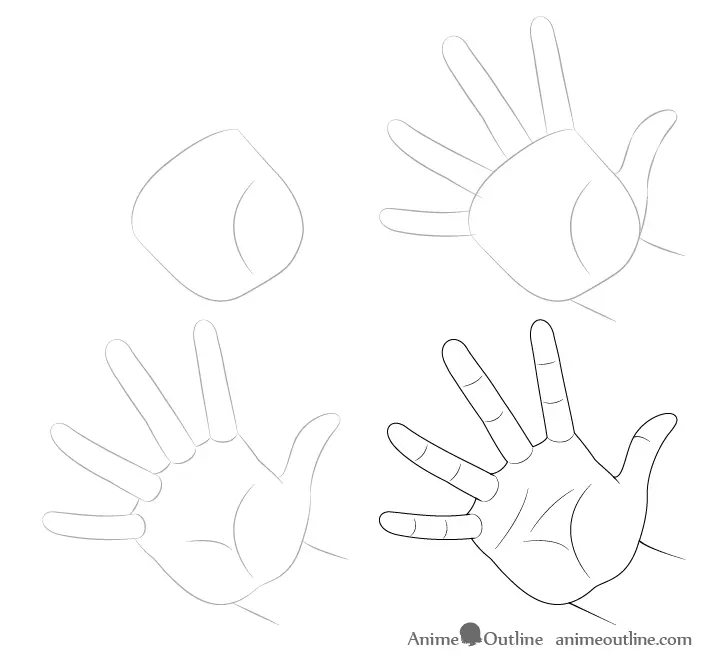
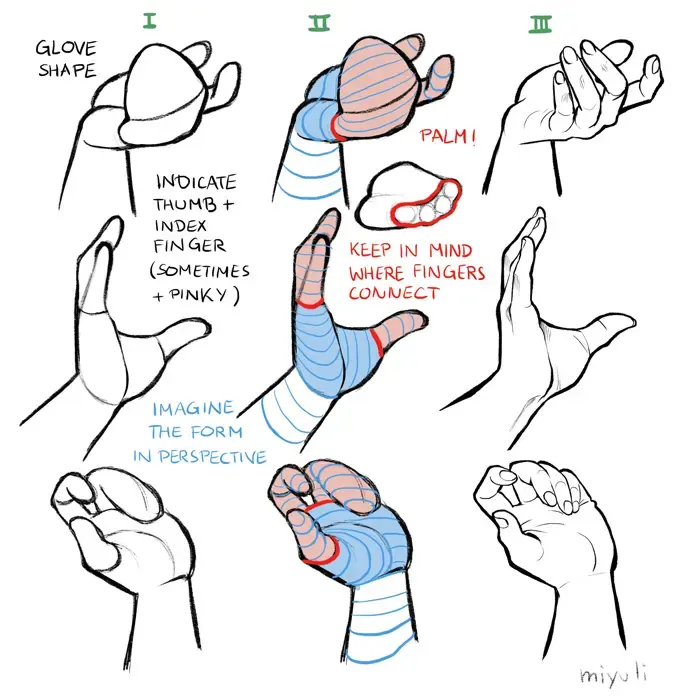
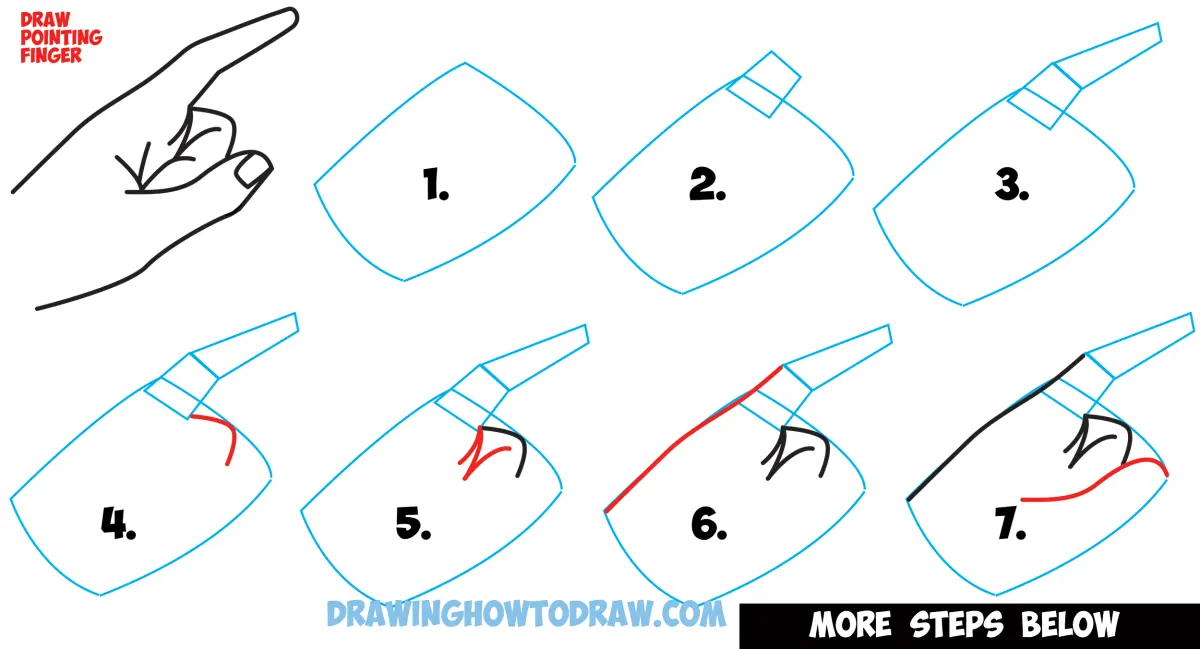
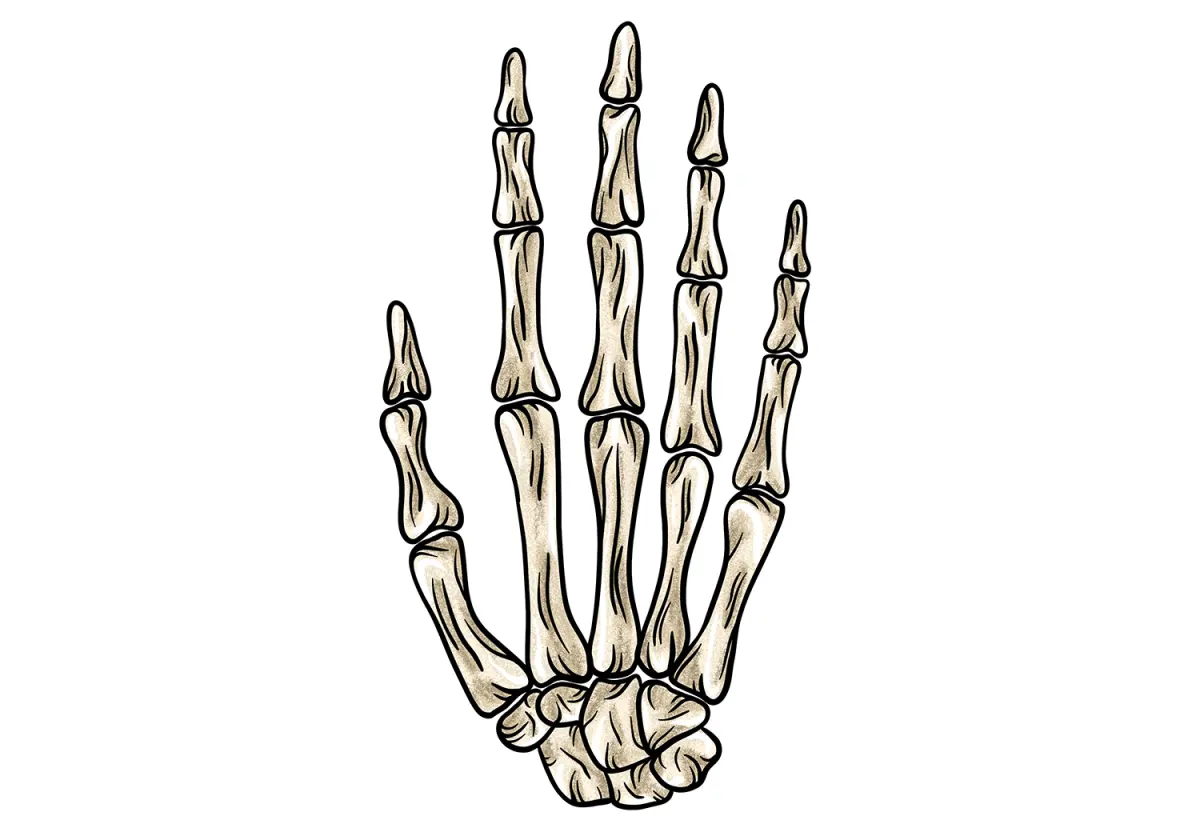
The human hand is a complex structure consisting of 27 bones, but artists simplify this by viewing the palm as a flat, slightly trapezoidal block. The wrist acts as a hinge, while the fingers are essentially cylinders of varying lengths. Before adding details like knuckles or fingernails, establish the gesture of the hand using these basic shapes. Think of the palm as a rigid box and the fingers as flexible extensions that pivot from the knuckles.
To begin, draw a square or a wedge for the palm. Attach the thumb at the base of the palm, noting that it rotates on a different plane than the four fingers. By reducing the hand to these primitive forms, you can establish the perspective and foreshortening before committing to complex anatomical details. This structural approach prevents the common error of making fingers appear disconnected or disjointed from the main mass of the hand.
How to measure finger proportions
Finger length is often misunderstood by beginners, who frequently draw them too short. A helpful rule of thumb is that the middle finger is generally equal to the length of the palm itself. The index and ring fingers are slightly shorter, while the pinky finger typically reaches the first joint of the ring finger. These proportions remain consistent across most adult hands, providing a reliable guide for your sketches.
- Measure the height of the palm from the wrist crease to the base of the middle finger.
- Use that same measurement to determine the length of the middle finger.
- Mark the secondary fingers based on their relationship to the middle finger’s joints.
- Ensure the thumb reaches roughly to the middle of the index finger’s first phalanx.
Following these ratios ensures that your drawings look natural and grounded in reality rather than stylized or distorted.
Best tools for practice
For those starting out, a standard graphite pencil (HB or 2B) and a sketchbook are sufficient. Using a softer lead allows for expressive lines, while a harder lead helps in mapping out structural shapes. Many artists also prefer charcoal for its ability to quickly block in shadows, which helps define the volume of the hand. Avoid using pens until you are confident in your structural foundation, as they do not allow for easy corrections.
- Graphite pencils (HB, 2B, 4B) for sketching and shading.
- A kneaded eraser to lift highlights and refine edges.
- A mirror to observe your own hand from various angles.
- A sketchbook with smooth paper to allow for clean, precise lines.
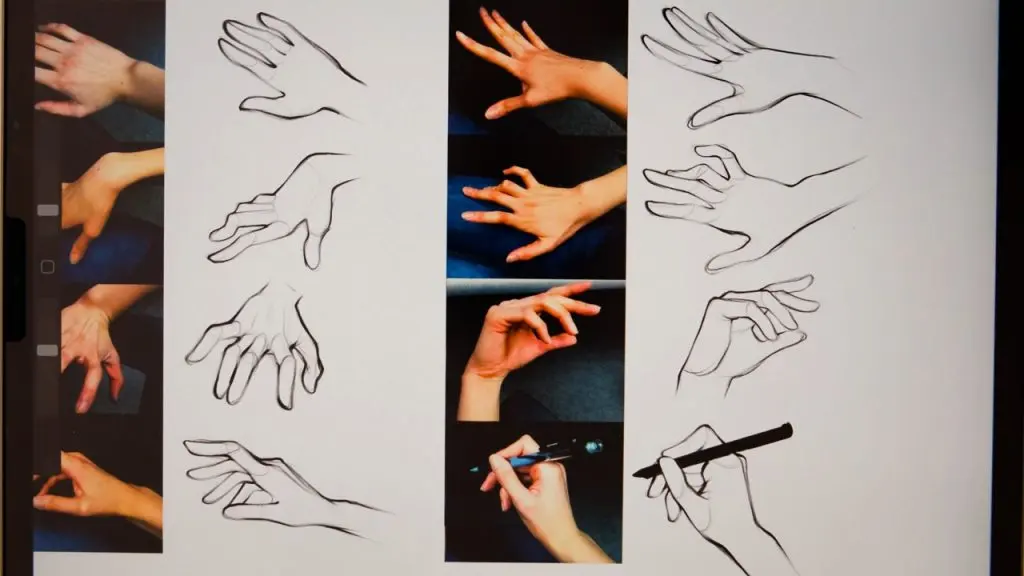
Using your own hand as a model is invaluable because it provides a live reference that you can manipulate into any position. Take photos of your hand in different poses to study how light hits the curved surfaces.
Why hands look distorted
Distortion often occurs when an artist focuses on individual details like fingernails or wrinkles before establishing the overall volume. This "symbol drawing" approach—where the brain draws what it thinks a hand looks like rather than what it sees—leads to flat, rubbery, or alien-looking appendages. Another common issue is failing to account for the thickness of the fingers, which should be treated as three-dimensional tubes rather than flat, two-dimensional lines.
When drawing a hand in motion, remember that the skin stretches and folds. The webbing between the fingers and the pads at the base of the thumb are crucial for creating a sense of weight. If a hand looks stiff, it is likely because the joints are not properly articulated. Focus on the "rhythm" of the hand, which is the continuous curve that flows from the wrist through the palm and into the longest finger.
Common mistakes when drawing hands
One of the most frequent errors is neglecting the perspective of the wrist. The wrist is not a straight pipe but a slightly curved joint that dictates the orientation of the entire hand. Beginners often draw the hand as a flat paddle, ignoring the fact that the palm has a distinct arch. This arch is what allows the hand to grip objects and gives it a dynamic, organic quality that flat drawings lack.
- Avoid drawing fingers as perfectly straight lines; add slight curves to show movement.
- Do not forget the thickness of the skin; fingers have depth and volume.
- Stop outlining every single knuckle, as this makes the hand look aged or overly skeletal.
- Ensure the thumb is placed correctly, as drawing it on the wrong side of the palm is a frequent oversight.
By consciously avoiding these pitfalls and focusing on the underlying structure, you will steadily improve your ability to render hands with accuracy and artistic confidence.
Key facts
- The human hand contains 27 individual bones, including 8 carpals in the wrist, 5 metacarpals in the palm, and 14 phalanges in the fingers.
- Divide the hand into two main shapes: a trapezoid for the palm and five cylinders or boxes for the fingers and thumb.
- The middle finger is the longest digit and serves as the primary anchor point for measuring the length of the other fingers.
- When the hand is relaxed, the fingers naturally curl inward in a gentle arc rather than remaining perfectly straight.
- The thumb is uniquely opposable and attaches lower on the side of the palm, rotating from a different axis than the fingers.
- Use the "box and cylinder" method to simplify complex joints into basic geometric forms before adding organic curves and skin folds.
The bottom line
Drawing hands is a challenge of simplifying complex anatomical structures into manageable geometric forms. By mastering the proportions of the palm and the unique movement of the thumb, you can construct convincing hands from any angle. Focus on volume and perspective rather than surface details. Consistent practice through observation will eventually allow you to capture the expressive, fluid nature of human hands with confidence and accuracy.
People also ask
Why do hands look unnatural when I draw them?
Hands often look stiff because artists draw them as flat shapes rather than three-dimensional volumes. Focus on the thickness of the fingers and the curve of the palm to create depth.
How do I get the proportions of the fingers correct?
A common rule is that the middle finger is roughly the same length as the palm itself. Use the palm's width as a unit of measurement to gauge the relative length of each digit.
Should I draw the fingernails first?
Never draw fingernails until the very end, as they are surface details that can distract from the underlying structure. Focus on the bone and muscle placement first to ensure the hand looks solid.
How do I make the hand look like it is gripping an object?
When drawing a grip, ensure the fingers wrap around the form of the object according to its perspective. The knuckles should align with the curvature of the object being held.
What is the most common mistake when drawing the thumb?
Beginners often attach the thumb too high on the palm or draw it as if it moves like a finger. Remember that the thumb moves from the base of the wrist and has a distinct, wide range of motion.
How can I practice drawing hands effectively?
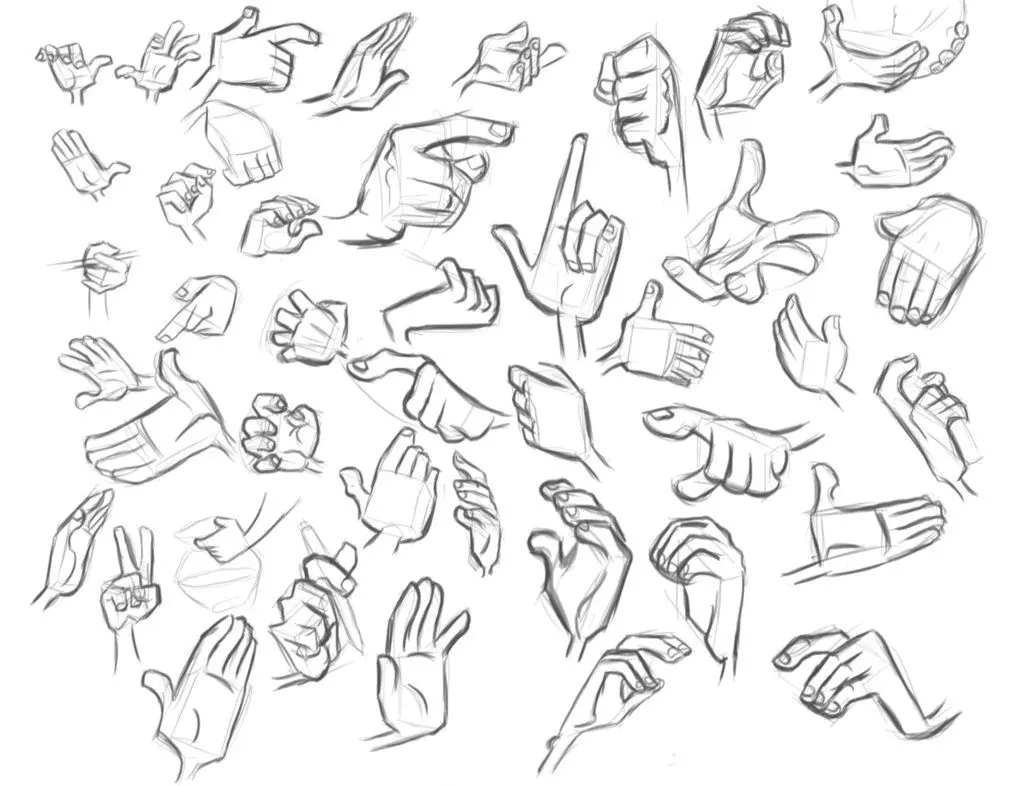
Sketch your own hand from various angles using a mirror or camera. Frequent observation of your own anatomy is the fastest way to understand how bones and tendons shift during movement.
This answer was created with the help of AI research tools and reference sources. Spotted an error? Let us know — we correct mistakes quickly. See our editorial policy.