How do you draw grapes?
Short answer
Drawing grapes involves creating a cluster of overlapping circles arranged in a triangular or bunch shape. Focus on varying the sizes of the spheres to mimic organic growth, applying consistent light sources for highlights, and using overlapping lines to establish depth. A successful drawing relies on layering shadows to create volume and texture.
On this page
How to draw grapes step by step
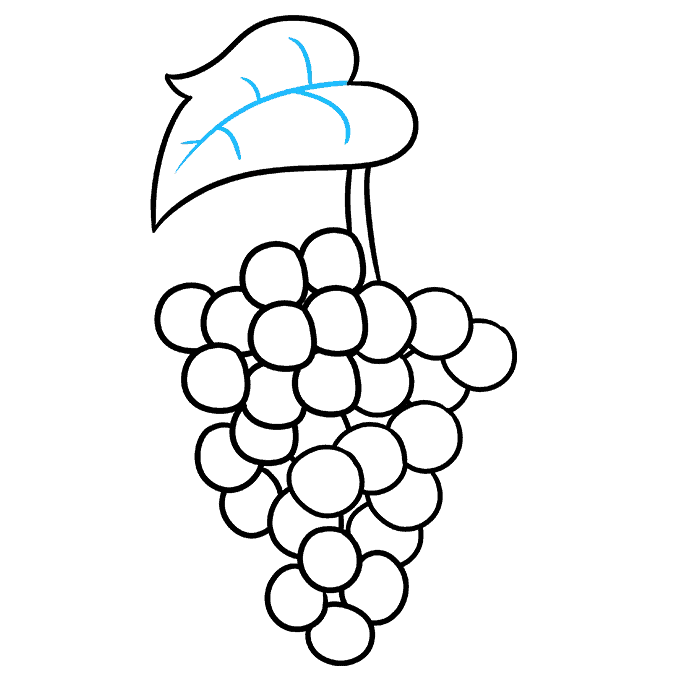
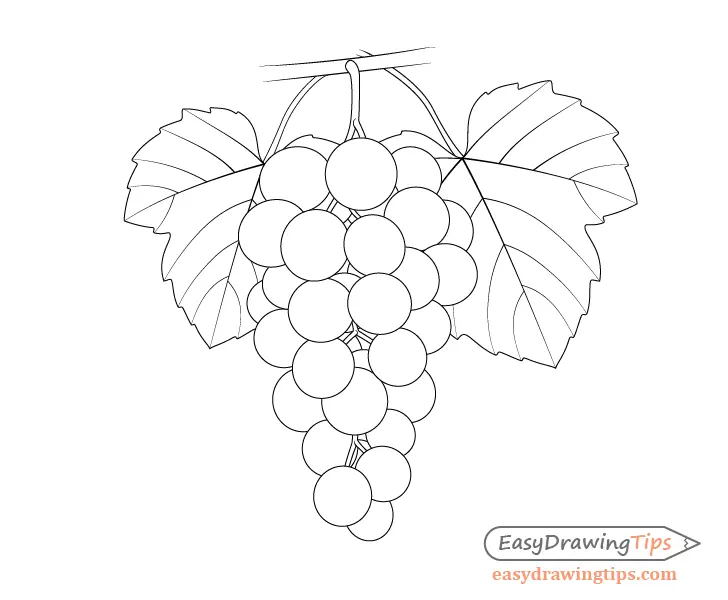
Drawing a realistic bunch of grapes requires a systematic approach to structure and form. Begin by sketching a light, inverted triangle or an oval shape to act as the boundary for your entire cluster. This guide helps you maintain the overall volume of the fruit without losing track of the composition.
- Draw a series of overlapping circles within your boundary, varying their sizes to mimic natural growth.
- Add a thick, curved stem at the top of the cluster, branching out into smaller tendrils that connect to individual grapes.
- Erase the overlapping lines inside the grapes that are in the foreground to make them appear solid.
- Define the shadows on the underside of each grape to create a three-dimensional effect.
- Add small, bright highlights on the top surfaces to indicate the waxy skin texture.
Focusing on these steps ensures that your drawing looks like a cohesive bunch rather than a collection of scattered shapes. By establishing the stem system early, you provide a logical anchor for the fruit to hang from naturally.
Best tools for drawing grapes
The choice of medium significantly impacts the final realism of your fruit study. Graphite pencils are ideal for beginners because they allow for precise control over shading and tonal gradients. Use a range of pencils, from 2H for initial light outlines to 4B or 6B for the deepest shadows in the crevices of the bunch.
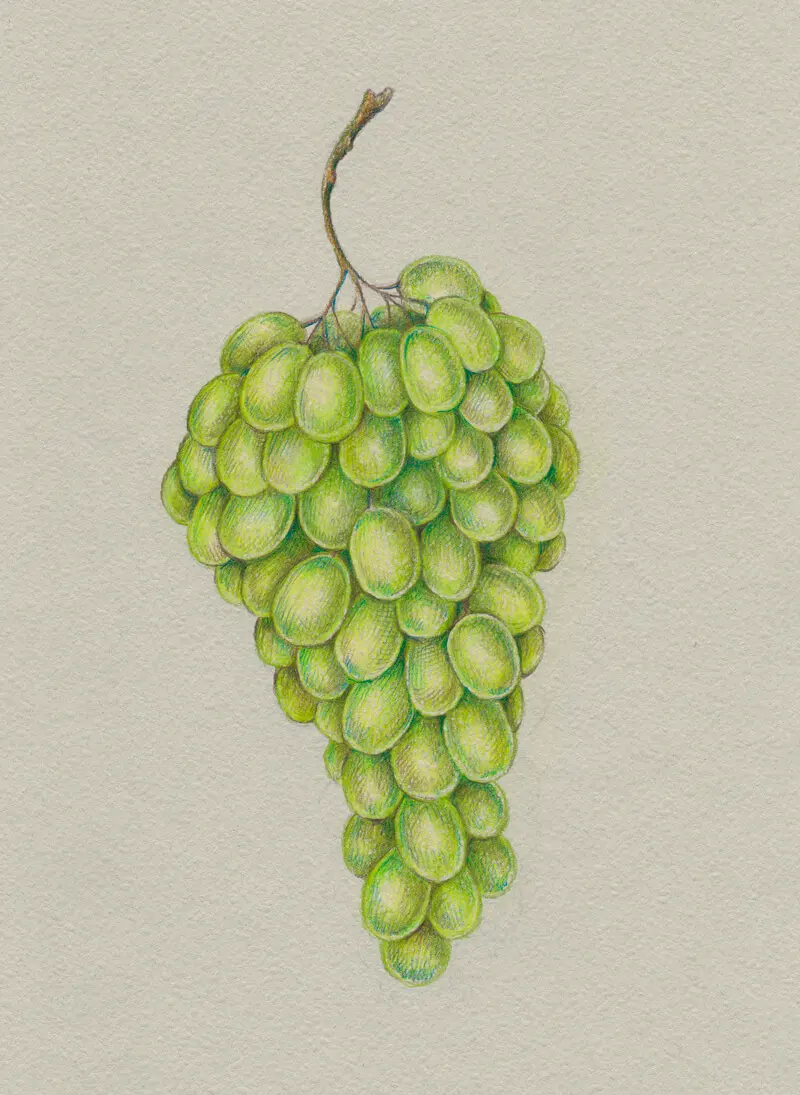
For those interested in color, colored pencils or watercolors offer excellent ways to capture the translucent quality of grapes. When using colored pencils, layer lighter shades of green or purple first, then build up darker tones to create depth. If you prefer watercolor, use a wet-on-wet technique to allow colors to bleed slightly, which mimics the soft, rounded skin of the fruit. Regardless of the medium, keep your tools sharp to ensure you can define the crisp edges of the highlights and the subtle curves of the grape surfaces.
Why grapes look three-dimensional
The illusion of depth in a drawing is achieved through the manipulation of light, shadow, and perspective. When light hits a spherical object like a grape, it creates a specific pattern: a highlight, a mid-tone, a core shadow, and a reflected light on the bottom edge. By consistently applying this pattern to every grape in your cluster, you create a sense of weight and volume that makes the fruit appear tangible.
Overlapping is the most important technique for creating spatial depth in a bunch. When one grape partially covers another, the viewer immediately perceives the one in front as closer to them. To enhance this, make the grapes in the foreground slightly larger and more detailed than those in the background. Using a darker value where grapes touch each other creates a "contact shadow," which anchors the fruit together and prevents the bunch from looking like a flat, floating mass.
Common mistakes when drawing grapes
A frequent error is drawing all the grapes as identical, perfect circles. In nature, grapes are slightly irregular, often flattened slightly where they press against their neighbors. Avoid making every grape the same size, as this creates a static, unnatural appearance. Varying the sizes and adding slight asymmetries will make your drawing look much more organic and realistic.
Another common mistake is neglecting the highlights or placing them inconsistently. If your light source is coming from the top right, every highlight on the grapes should be positioned on the top right side. Placing highlights randomly makes the grapes look like they are made of different materials or lit by multiple light sources. Additionally, beginners often forget to include the stem, which is essential for providing context. Without a stem, the grapes lack a connection point, making the entire cluster appear disconnected from its environment and structurally unsound.
How to add texture to grapes
Grapes often feature a natural, powdery coating known as "bloom," which gives them a matte appearance rather than a high-gloss shine. To replicate this, use a blending stump or a soft cloth to gently smudge your graphite or colored pencil work. This softens the transitions between the highlight and the shadow, creating a smoother, more realistic skin texture.
You can also enhance realism by adding subtle imperfections. Consider these techniques to elevate your final piece:
- Use a kneaded eraser to lift small, irregular spots of color to represent the natural waxy surface.
- Add tiny, thin lines or dots on the surface of the grapes to mimic small blemishes or skin variations.
- Vary the pressure of your pencil to create soft, feathered edges on the shadow side of the grapes.
- Leave small, uncolored gaps between grapes to suggest the space between them, which adds to the overall complexity of the cluster.
By paying attention to these fine details, you transform a simple drawing of circles into a convincing representation of fruit. Consistency in your shading and careful observation of how light interacts with the skin are the keys to mastering this subject.
Key facts
- Start by sketching a cluster shape, such as a triangle or an inverted pyramid, to define the overall volume.
- Draw individual grapes as overlapping circles or ovals, varying their sizes to create a natural, organic appearance.
- Use a single light source to determine where highlights should be placed on the top-right or top-left of each sphere.
- Apply shading on the side of each grape opposite the light source to give them a three-dimensional, rounded look.
- Leave a small, unshaded white gap on the top of each grape to represent the reflective "bloom" or waxy coating.
- Connect the cluster to a main stem using short, curved lines that tuck behind the topmost grapes.
The bottom line
Drawing grapes is best approached by focusing on the cluster's overall volume before detailing individual spheres. By varying the size of your circles and carefully placing highlights, you can transform a simple sketch into a realistic bunch of fruit. Remember to use consistent shading to define the depth of the cluster, ensuring that the grapes in the back remain less detailed than those in the front.
People also ask
How do you make grapes look shiny?
To create a shiny effect, leave a bright white highlight on the surface of each grape where the light hits directly. Keep the edges of this highlight soft rather than sharp to mimic the translucent skin of the fruit.
Should I draw every single grape in a cluster?
You do not need to draw every grape; focus on the ones in the foreground to establish the cluster's shape. Use loose, sketchy lines for the grapes in the back to suggest depth without overcomplicating the drawing.
What is the best pencil grade for shading grapes?
Use an HB pencil for the initial outline and a 4B or 6B pencil for the deep shadows. Softer leads allow you to build up the dark tones necessary to make the fruit look plump and heavy.
How do I draw the stem realistically?
Draw the stem with a slightly irregular, woody texture rather than a perfectly straight line. Add small knots or bumps where the stem branches out to connect to individual grapes.
What is a common mistake when drawing grapes?
A common error is drawing all the grapes the same size and in a perfectly symmetrical grid. Varying the size and overlapping the shapes makes the cluster look realistic and visually interesting.
How do I add color to a grape drawing?
Use layered colors, starting with a light base coat and adding darker tones toward the shadowed edges. Include hints of purple, blue, or green to reflect the natural variations found in real grape skins.
This answer was created with the help of AI research tools and reference sources. Spotted an error? Let us know — we correct mistakes quickly. See our editorial policy.