How do you draw an ambulance?
Short answer
Drawing an ambulance involves constructing a rectangular chassis, adding a raised roof compartment, and detailing emergency features. Start with a basic box shape, incorporate wheels, and add identifying elements like sirens, reflective decals, and the iconic medical cross. Focus on clean, geometric lines to capture the vehicle's functional and sturdy appearance.
On this page
How to draw the basic ambulance shape
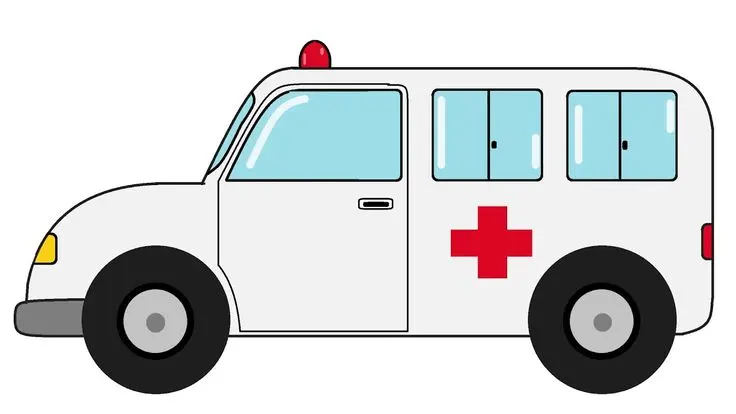
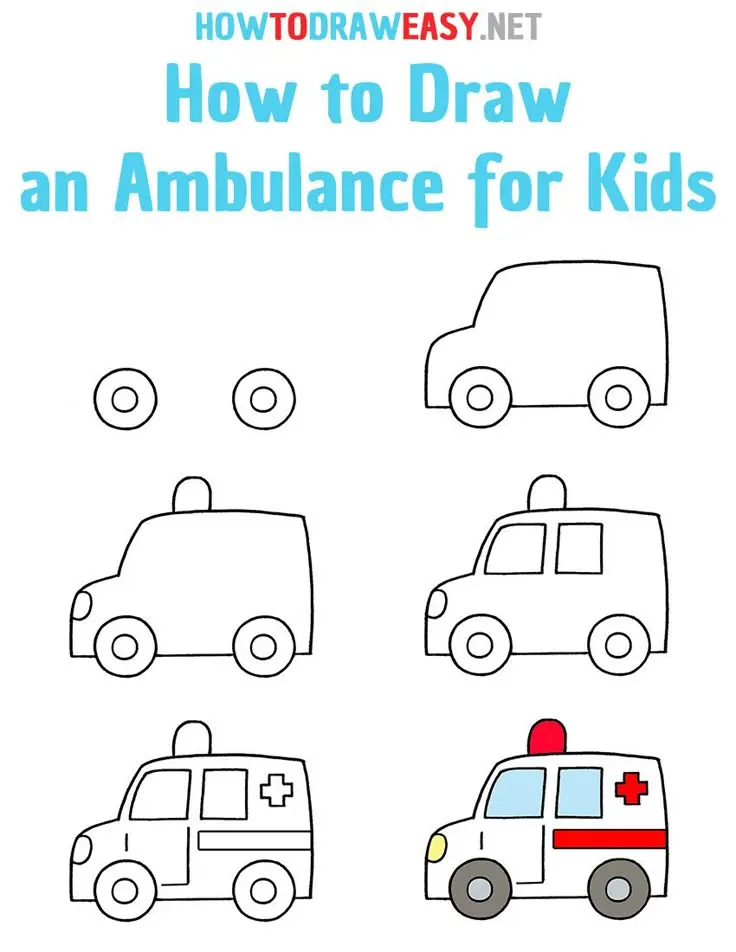
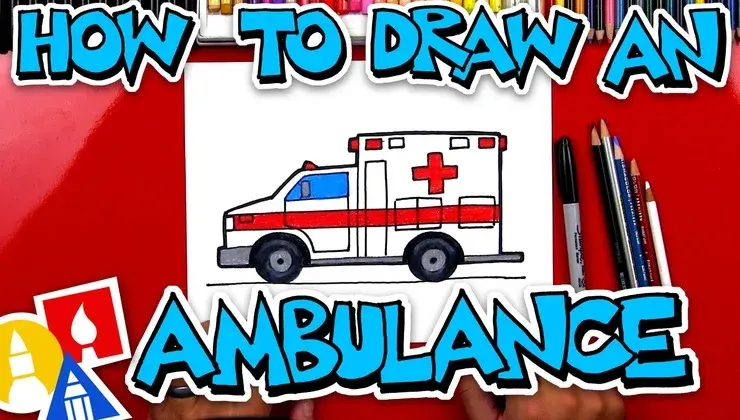
Start by sketching a long, horizontal rectangle to serve as the main body of the ambulance. Above the rear two-thirds of this rectangle, draw a smaller, slightly taller box to represent the patient compartment, which is typically higher than the driver's cab. Connect these shapes with smooth lines to create a unified silhouette. Ensure the front of the vehicle has a slight slope or a rounded hood to distinguish the engine area from the boxy rear section.
Once the primary structure is set, add two circles at the bottom for the wheels. Position them so they align with the front and back thirds of the vehicle body. Draw smaller circles inside these to represent the rims. Use a ruler or a straight edge to keep your lines crisp, as ambulances are defined by their utilitarian, boxy design. Avoid overly curved or organic shapes, as these will make the vehicle look more like a passenger car than a specialized medical transport.
Best tools for drawing vehicles
For beginners, a mechanical pencil with 0.5mm lead is ideal for creating precise, thin outlines that can be easily adjusted. Using a graphite pencil allows you to sketch light guidelines that you can erase once the final form is established. Pair your pencil with a high-quality vinyl eraser to clean up overlapping lines without damaging the paper surface. A dedicated drawing pad with a smooth finish helps maintain consistent line quality.
When moving to the final stage, consider using fine-liner pens to ink your work. These pens come in various tip sizes, allowing you to use thicker lines for the outer frame and thinner lines for internal details like windows and door panels. A set of alcohol-based markers or colored pencils is excellent for adding the signature white, red, or yellow emergency colors. Keep these tools organized to ensure your workflow remains efficient and your drawing stays clean throughout the process.
How to add realistic ambulance details
Adding specific features transforms a generic box into a recognizable ambulance. Focus on the following elements to increase accuracy:
- Windows: Draw rectangular windows on the side of the patient compartment and a standard windshield for the cab.
- Emergency Lights: Place a light bar on the roof of the cab and smaller strobe lights near the rear doors.
- Medical Symbol: Draw a six-pointed Star of Life on the side panel, which is the international symbol for emergency medical services.
- Reflective Decals: Add horizontal stripes running along the side of the body to mimic the high-visibility tape used on real vehicles.
Focus on the spacing of these elements to maintain proportion. The Star of Life should be centered on the side door, while the emergency lights should be positioned at the highest points of the vehicle to ensure they are visible from all angles.
Common mistakes when drawing ambulances
A frequent error is failing to maintain the correct perspective, which makes the vehicle appear flat or distorted. Ensure all horizontal lines converge toward a single vanishing point if you are drawing in perspective. Another common mistake is making the wheels too small or too large relative to the body. A standard ambulance has wheels that occupy roughly one-fourth of the total height of the vehicle. If the wheels look out of place, the entire drawing will lose its sense of scale and realism.
Additionally, many beginners forget to include the door handles, hinges, and side mirrors. These small mechanical details add a layer of authenticity that prevents the ambulance from looking like a cartoon toy. Be careful not to clutter the design with too many lines, as this can make the vehicle look messy. Stick to clean, functional lines that emphasize the ambulance's purpose as a rapid-response medical tool.
How to color and shade your drawing
Coloring is the final step that brings the ambulance to life. Most ambulances are painted white to reflect heat and provide a high-contrast background for emergency decals. Use light gray shading underneath the chassis and around the wheel wells to create a sense of depth and weight. This prevents the vehicle from appearing like it is floating on the paper. Use bright, saturated colors like emergency red or neon yellow for the decals and the light bar to make them pop against the white body.
When shading, consider the direction of your light source. If the light is coming from the top right, place your shadows on the bottom left of the vehicle body. Use a blending stump or a soft tissue to smooth out your pencil or marker strokes, creating a professional gradient. By carefully balancing the bright white surfaces with intentional shadows, you provide the drawing with a three-dimensional quality that accurately reflects the heavy, metallic nature of a real-world emergency vehicle.
Key facts
- Start by drawing a large rectangle for the main body of the vehicle, then add a smaller, slightly raised rectangle on top for the roof.
- Place two circles at the bottom of the main rectangle to represent the wheels, ensuring they are spaced evenly apart.
- Use a straight line to divide the side of the vehicle into sections for the driver’s door and the rear patient compartment.
- Draw a cross emblem on the side or rear door, as this is the universal symbol for emergency medical services.
- Add rectangular shapes for windows and a small square for the emergency light bar located on the roof.
- Use bold, contrasting colors like white for the body and red or blue for the markings to ensure high visibility.
The bottom line
Drawing an ambulance is a rewarding exercise in geometric construction. By starting with simple rectangles for the chassis and roof, you create a solid foundation for the vehicle. Adding essential features like the emergency cross, roof lights, and wheels brings the sketch to life. Focus on clean lines and high-contrast markings to capture the iconic, functional appearance that makes these emergency vehicles recognizable worldwide.
People also ask
Why do ambulances often have the word "AMBULANCE" written in reverse on the front?
This is known as mirror writing. It allows drivers looking into their rearview mirrors to read the word correctly and quickly identify the emergency vehicle behind them.
What are the most common colors for an ambulance?
While white is the most common base color for visibility, many modern ambulances use "star-of-life" decals and bright yellow or lime-green reflective tape. These high-contrast colors help the vehicle stand out in both daylight and low-light conditions.
How do I make the drawing look more realistic?
Focus on adding depth by drawing the wheel wells as small arches over the tires. Including small details like door handles, side mirrors, and the emergency light bar adds professional character to your sketch.
Should I draw the ambulance from the side or the front?
A side profile is the easiest way to show the length and the medical compartment of the vehicle. A front view is more challenging because it requires drawing the grille, headlights, and windshield at specific angles.
What is the standard shape of an ambulance?
Most ambulances are based on a "box" design mounted onto a truck chassis. This provides the necessary interior height for medical personnel to stand and treat patients while the vehicle is in motion.
Are there different types of ambulances to draw?
Yes, you can draw a Type I ambulance, which is a modular box on a truck chassis, or a Type II, which is a standard high-roof van. Each has a distinct silhouette that changes the proportions of your drawing.
This answer was created with the help of AI research tools and reference sources. Spotted an error? Let us know — we correct mistakes quickly. See our editorial policy.