How do you draw a ring step by step?
Short answer
Drawing a ring involves establishing two concentric ellipses to create a three-dimensional band. By adding shading to one side and a highlight to the other, you simulate the metallic luster of jewelry. Mastering the perspective of these circles is essential for creating a realistic representation of a circular object on paper.
On this page
How to draw a ring step by step
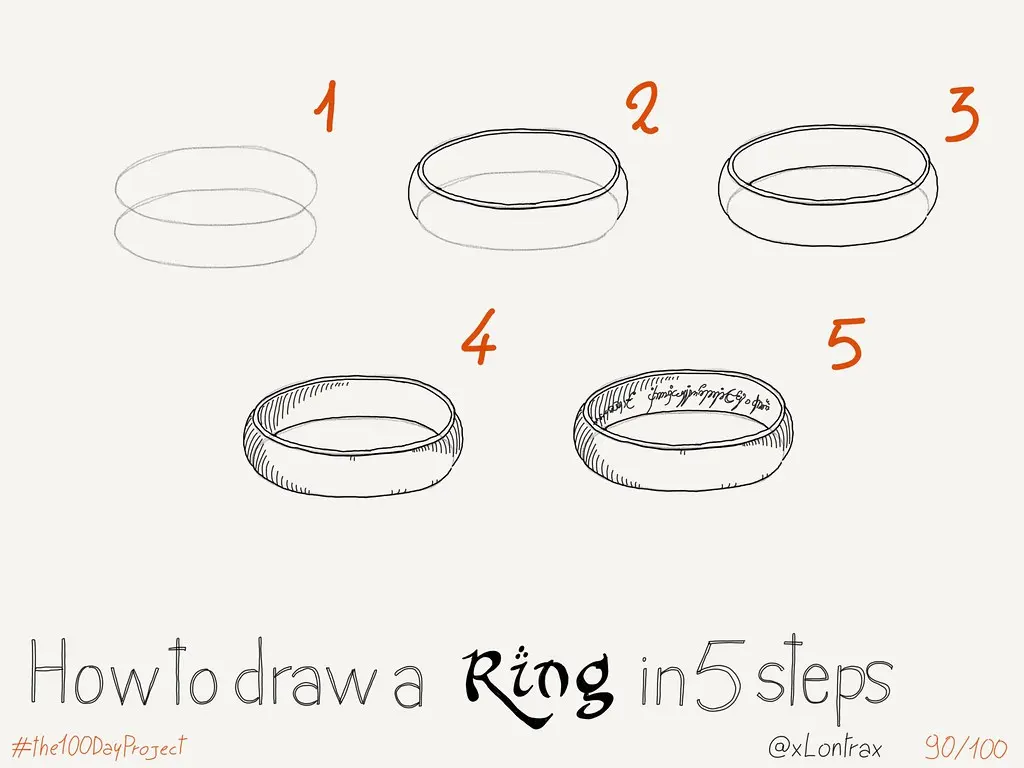
To begin your drawing, place a piece of paper on a flat surface and use a 2B pencil for light initial sketching. Start by drawing a horizontal oval, then draw a slightly smaller oval inside it to establish the thickness of the band. These two ellipses must share the same center point to ensure the ring looks symmetrical and balanced.
Once the basic structure is set, refine the curves so they appear smooth and fluid. If you want to add a gemstone, draw a small shape, such as a square or circle, at the top of the ring and connect it to the band with two small vertical lines. This foundational framework provides the necessary geometry to build a convincing three-dimensional object.
- Sketch a large, wide ellipse to serve as the outer edge.
- Draw a smaller, inner ellipse to define the thickness of the metal.
- Erase the overlapping guidelines in the center to leave a clear band.
- Add a small setting or stone at the top if desired.
Best tools for drawing jewelry
Using the right equipment significantly improves the quality of your drawing. A set of graphite pencils ranging from H (hard) to 6B (soft) allows you to create a wide spectrum of tones, which is vital for mimicking the reflective nature of gold, silver, or platinum. H pencils are excellent for light construction lines, while B pencils excel at creating deep, dark shadows.
Beyond pencils, a kneaded eraser is an indispensable tool for artists. Unlike standard rubber erasers, a kneaded eraser can be molded into precise shapes to lift small amounts of graphite, creating the sharp highlights necessary for a metallic shine. A blending stump or a piece of soft tissue is also useful for smoothing out transitions between light and shadow, giving the ring a polished, professional appearance.
- Use a 2H pencil for initial layout lines that are easy to erase.
- Use a 4B or 6B pencil for the darkest shadows to create contrast.
- Keep a sharpener nearby to maintain fine points for detailed work.
- Utilize a blending stump to soften gradients on the curved surface.
Why metallic shading is important
Shading is the most critical element when drawing a ring because it defines the material’s texture. Metal is highly reflective, meaning it captures light from the environment and creates sharp, high-contrast transitions. To achieve this, you must identify a consistent light source and ensure that your highlights and shadows remain logically placed throughout the entire piece.
When shading, avoid using a single flat tone. Instead, create a gradient that moves from a dark shadow on one side of the band to a bright, white highlight on the opposite side. This transition creates the illusion of a curved, reflective surface. If the shading is too uniform, the ring will appear dull and flat, losing the essential quality of precious metal that makes jewelry look realistic.
Common mistakes when drawing rings
One of the most frequent errors beginners make is failing to align the inner and outer ellipses properly. If the inner circle is shifted too far to one side, the ring will appear lopsided or broken rather than circular. Always check that the distance between the inner and outer lines is consistent, unless you are intentionally drawing a tapered band.
Another common mistake is neglecting the "cast shadow" that the ring creates on the surface beneath it. Without a shadow, the ring appears to float in space rather than resting on a table or finger. Adding a soft, elliptical shadow directly underneath the ring helps ground the object, providing a sense of weight and physical presence that makes the drawing feel complete.
- Misaligning the center points of the two ellipses.
- Making the band too thick, which makes the ring look heavy and cartoonish.
- Forgetting to leave a white space for the highlight, which removes the metallic shine.
- Using heavy outlines that make the object look like a flat sticker.
How to add texture and detail
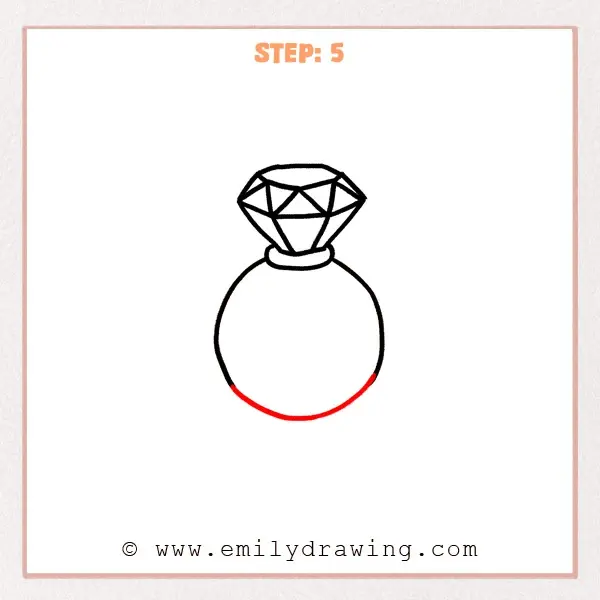
Once the basic shading is finished, you can enhance the drawing by adding details like engravings or stone settings. If you are drawing a diamond or other gemstone, use very sharp, geometric lines to represent the facets. These facets should have their own internal light and dark areas, which helps distinguish the stone from the metal band.
Finally, consider the background or the environment reflected in the metal. You can add subtle, wavy lines or distorted shapes within the shaded areas to suggest reflections of the surrounding room. These small, thoughtful details add a layer of complexity that elevates a simple sketch into a sophisticated piece of art. By carefully observing how light interacts with real jewelry, you can continue to refine your technique and achieve increasingly lifelike results in your future drawings.
Key facts
- Use an elliptical shape rather than a perfect circle to create the illusion of three-dimensional depth.
- Draw two parallel ellipses to represent the thickness of the metal band.
- Connect the outer edges of the ellipses with short, vertical lines to define the band's width.
- Add a smaller, centered ellipse on top of the band if you intend to include a gemstone setting.
- Use shading on the bottom inner curve and the top outer curve to suggest a metallic, reflective surface.
- Keep your initial construction lines light so they can be easily erased after the final outline is inked.
The bottom line
Drawing a realistic ring relies on mastering the ellipse, which provides the necessary perspective for a circular object viewed from an angle. By focusing on the thickness of the band and applying strategic shading, you can transform simple shapes into a convincing piece of jewelry. Practice consistent light sources to enhance the metallic luster, and always use light construction lines to maintain proportion before finalizing your details.
People also ask
How do you make a ring look like gold or silver?
Use high-contrast shading to mimic metallic reflections. Keep the highlights bright white and use dark, blended shadows to show the curvature of the band.
What is the best tool for drawing jewelry?
A mechanical pencil with 0.5mm lead is ideal for precise, thin construction lines. Use a kneaded eraser to lift graphite without damaging the paper texture.
How do I draw a diamond on a ring?
Draw a small triangle or kite shape on top of the band. Add internal lines radiating from the center to represent the facets of the stone.
Should I use a compass to draw the circles?
While a compass creates perfect circles, freehand sketching is often better for rings. Freehand lines allow for more natural, organic variations in the band’s thickness.
How do I show the ring is hollow inside?
Draw a small portion of the inner back curve visible through the front of the band. This creates a sense of transparency and depth.
Why does my ring drawing look flat?
A flat appearance usually results from a lack of shading or incorrect perspective. Ensure the ellipses are tilted slightly to show the top and bottom surfaces.
This answer was created with the help of AI research tools and reference sources. Spotted an error? Let us know — we correct mistakes quickly. See our editorial policy.