How do you draw a telescope?
Short answer
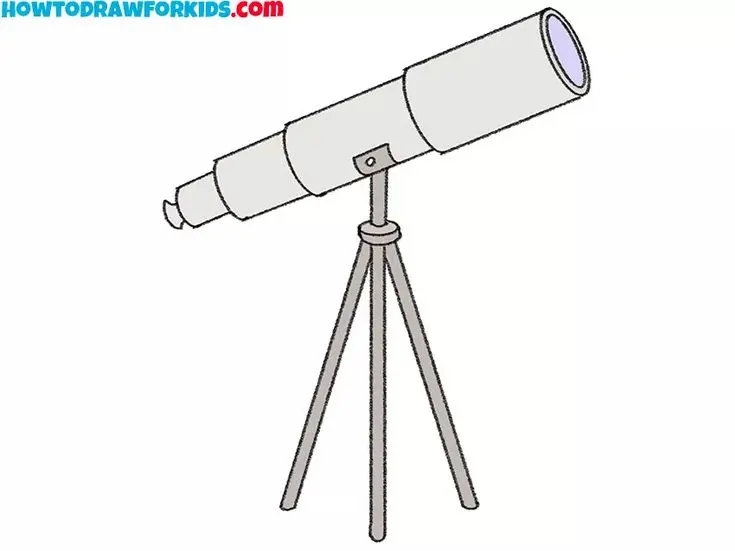
Drawing a telescope begins with sketching the main optical tube as a long, hollow cylinder. Add a smaller viewfinder scope on top and a sturdy tripod base underneath. Use geometric shapes like circles and rectangles to build the structure, then refine the details with shading to create depth and metallic texture.
On this page
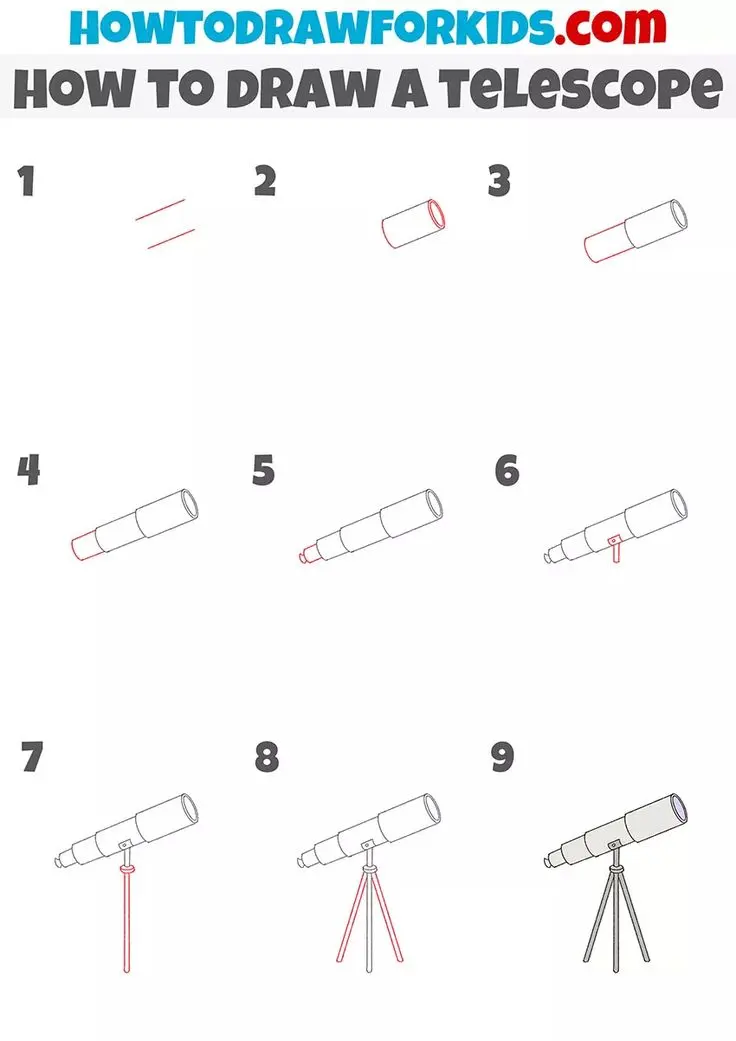
How to draw a telescope step by step
To begin your drawing, start with the primary tube, which is the heart of the telescope. Use a long, slightly tilted rectangle to represent the main body, ensuring the lines are straight to suggest a rigid, metallic construction. Add a smaller, thinner cylinder on top of the main tube to serve as the finderscope, which helps astronomers locate celestial objects. Once the basic silhouette is established, draw a series of smaller circles at the front opening to represent the lens housing and internal baffles.
- Sketch a long, horizontal rectangle for the main tube.
- Draw a smaller cylinder on top for the finderscope.
- Attach a Y-shaped or tripod structure to the bottom of the main tube.
- Add a square eyepiece at the rear end of the tube.
- Use an eraser to clean up overlapping lines and define the edges.
Focus on the connection points where the tube meets the mount. These joints are usually circular or boxy, providing the mechanical movement necessary for tracking stars. Keep your lines light initially so you can easily adjust the proportions before committing to darker, final outlines.
Best drawing techniques for beginners
When capturing the look of a telescope, focus on the cylindrical geometry. Beginners often struggle with perspective, so use vanishing points if you want the telescope to appear as if it is pointing toward the sky. To make the object look three-dimensional, apply shading along the bottom curve of the main tube. This technique, known as gradient shading, mimics the way light hits a curved metal surface, giving the drawing a realistic, polished appearance.
- Use a hard graphite pencil (2H) for initial light sketches.
- Switch to a softer pencil (4B or 6B) for deep shadows and metallic highlights.
- Use a blending stump or a piece of tissue to smooth out transitions between light and dark areas.
- Incorporate a white gel pen to add sharp reflections on the metal, which makes the surface look reflective.
Precision is key when drawing technical equipment. Use a ruler to ensure the main tube is perfectly straight, as a warped tube will immediately look incorrect to the viewer. Practice drawing cylinders at different angles to improve your spatial awareness before attempting a complex telescope assembly.
Why shading is important for telescopes
Telescopes are typically constructed from aluminum, steel, or carbon fiber, materials that reflect light in specific ways. Without proper shading, your drawing will appear flat and cartoonish. By identifying where the light source is coming from, you can create a consistent highlight along the top of the tube and a dark shadow along the bottom. This contrast is what defines the form and gives the instrument its characteristic weight and industrial feel.
Reflections on a telescope are rarely uniform. Because the tube is a curved surface, the light will create a thin, bright strip along the side, while the rest of the tube fades into a mid-tone gray. Study reference photos of professional-grade telescopes, such as the Schmidt-Cassegrain or Newtonian designs, to observe how light behaves on their specific coatings. Adding these subtle highlights transforms a simple drawing into a professional-looking technical illustration.
Common mistakes when drawing telescopes
A frequent error is neglecting the complexity of the tripod base. Many beginners draw the telescope tube perfectly but attach it to a flimsy, unrealistic stand. The mount must look capable of supporting the weight of the optics; therefore, ensure the tripod legs are thick and firmly planted on the ground. Another common mistake is failing to include the focuser, which is the small knobbed mechanism near the eyepiece. Without these essential details, the object loses its functional identity.
- Drawing the tripod legs at inconsistent angles, making the base look unstable.
- Forgetting to add the small knobs and adjustment screws that control the telescope's movement.
- Making the finderscope too large, which throws off the scale of the main optical tube.
- Using outlines that are too thick, which obscures the fine details of the lens and eyepiece.
Always check your proportions by comparing the length of the tube to the height of the tripod. If the tube is significantly longer than the tripod legs are tall, the telescope will appear top-heavy and physically impossible.
How to add realistic details to your drawing
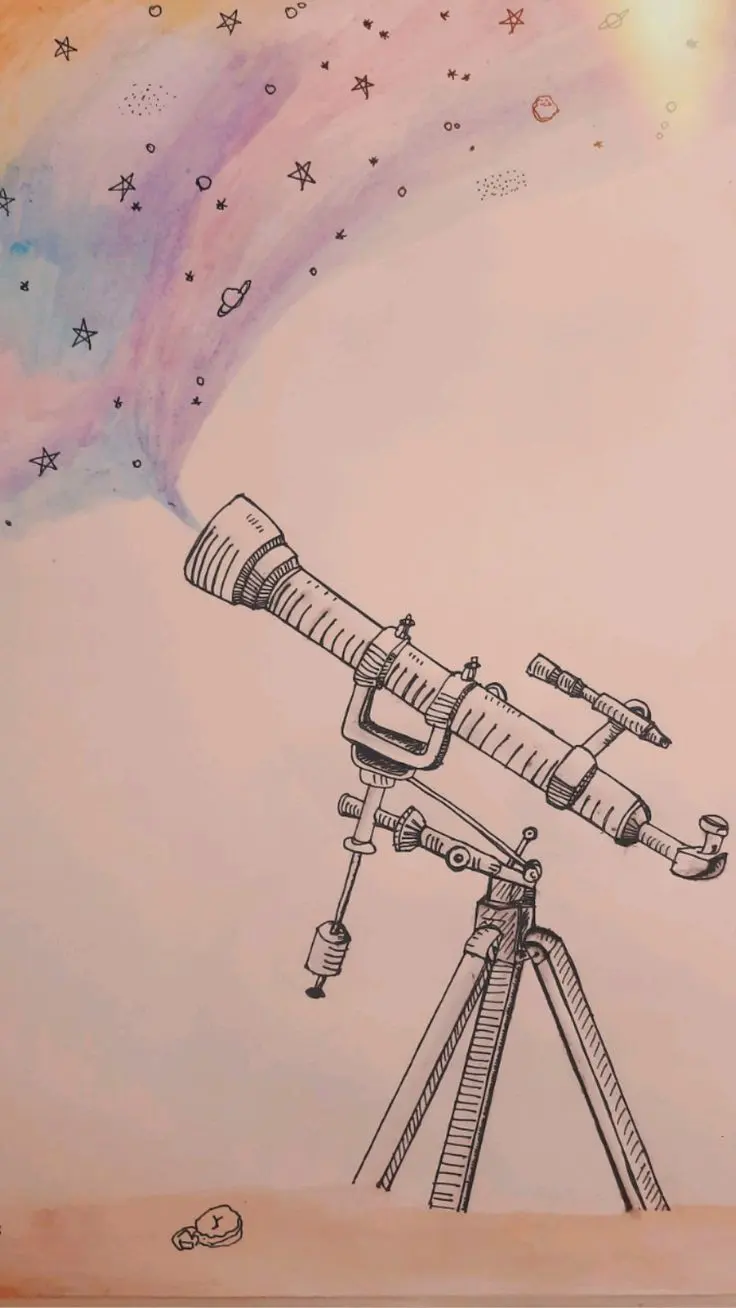
Once the structure is complete, focus on the mechanical components that define a telescope's purpose. Add fine, parallel lines near the eyepiece to represent the focus adjustment knobs. You can also sketch the interior of the tube as a dark, cavernous circle, which creates a sense of depth and mystery. Adding small bolts, screws, and labels on the side of the tube adds a layer of realism that suggests a high-quality scientific instrument rather than a simple toy.
Consider adding a background to ground your drawing. A simple circular aperture or a faint depiction of a starry night sky can provide context for the telescope's function. By focusing on these small, functional details, you demonstrate an understanding of how the machine works, which enhances the viewer's appreciation of the art. Remember to keep the focus on the telescope itself, using the background only to complement the primary subject matter rather than distracting from the intricate mechanical work you have completed.
Key facts
- A refracting telescope is best visualized as a long, thin cylinder with a smaller eyepiece tube attached at one end.
- Use a ruler to draw straight, parallel lines for the main body to ensure the structure looks stable and professional.
- Add a tripod base consisting of three slanted lines meeting at a central point to provide the necessary perspective of support.
- Include a small, perpendicular cylinder near the eyepiece to represent the finderscope, which helps users aim the device.
- Draw a slight flare at the front of the main tube to represent the objective lens housing, adding depth to your sketch.
- Use shading on one side of the tube to create a three-dimensional effect, suggesting a cylindrical form rather than a flat rectangle.
The bottom line
Drawing a telescope is an exercise in geometric precision, focusing on the relationship between the main optical tube and its supporting tripod. By prioritizing straight lines, accurate proportions, and small mechanical details like the finderscope and focus knobs, you can create a realistic representation. Remember that shading is essential to transform a flat, two-dimensional shape into a convincing, three-dimensional instrument ready for celestial exploration.
People also ask
What is the most important part of a telescope to draw first?
Start by drawing the main tube, known as the optical tube assembly, as it serves as the foundation for all other components. Getting the proportions of this primary cylinder right ensures the telescope looks balanced and functional.
Should I draw a refracting or reflecting telescope?
A refracting telescope is easier to draw because it is a simple, straight tube. Reflecting telescopes, like Newtonians, require drawing a wider, shorter tube with an eyepiece positioned on the side, which is more complex.
How do I make the tripod look realistic?
Draw the three legs extending outward from a central hub underneath the telescope body. Ensure the legs are slightly angled and touch the ground at different points to create a sense of stability.
What details should I add to make the telescope look authentic?
Add small knobs near the eyepiece for the focuser and a mounting bracket where the tube connects to the tripod. These minor mechanical details distinguish a scientific instrument from a simple pipe.
How can I show that the telescope is pointed at the sky?
Angle the main tube upward at a 45-degree inclination to suggest it is being used for observation. Adding a few faint stars or a crescent moon in the background further reinforces the context of the drawing.
Is it better to use a pencil or ink for this sketch?
Use a pencil first to establish your lines and perspective, as this allows you to correct the length and width of the tube. Once you are satisfied with the shape, use ink to define the edges and add shading for contrast.
This answer was created with the help of AI research tools and reference sources. Spotted an error? Let us know — we correct mistakes quickly. See our editorial policy.