How do you draw a key for beginners?
Short answer
Drawing a key involves breaking down the object into basic geometric shapes: a circle for the bow, a rectangle for the shank, and irregular polygons for the bit. By sketching these primary forms lightly and refining the edges with darker lines, you can create a realistic, functional-looking key in just a few minutes.
On this page
How to draw a key step by step
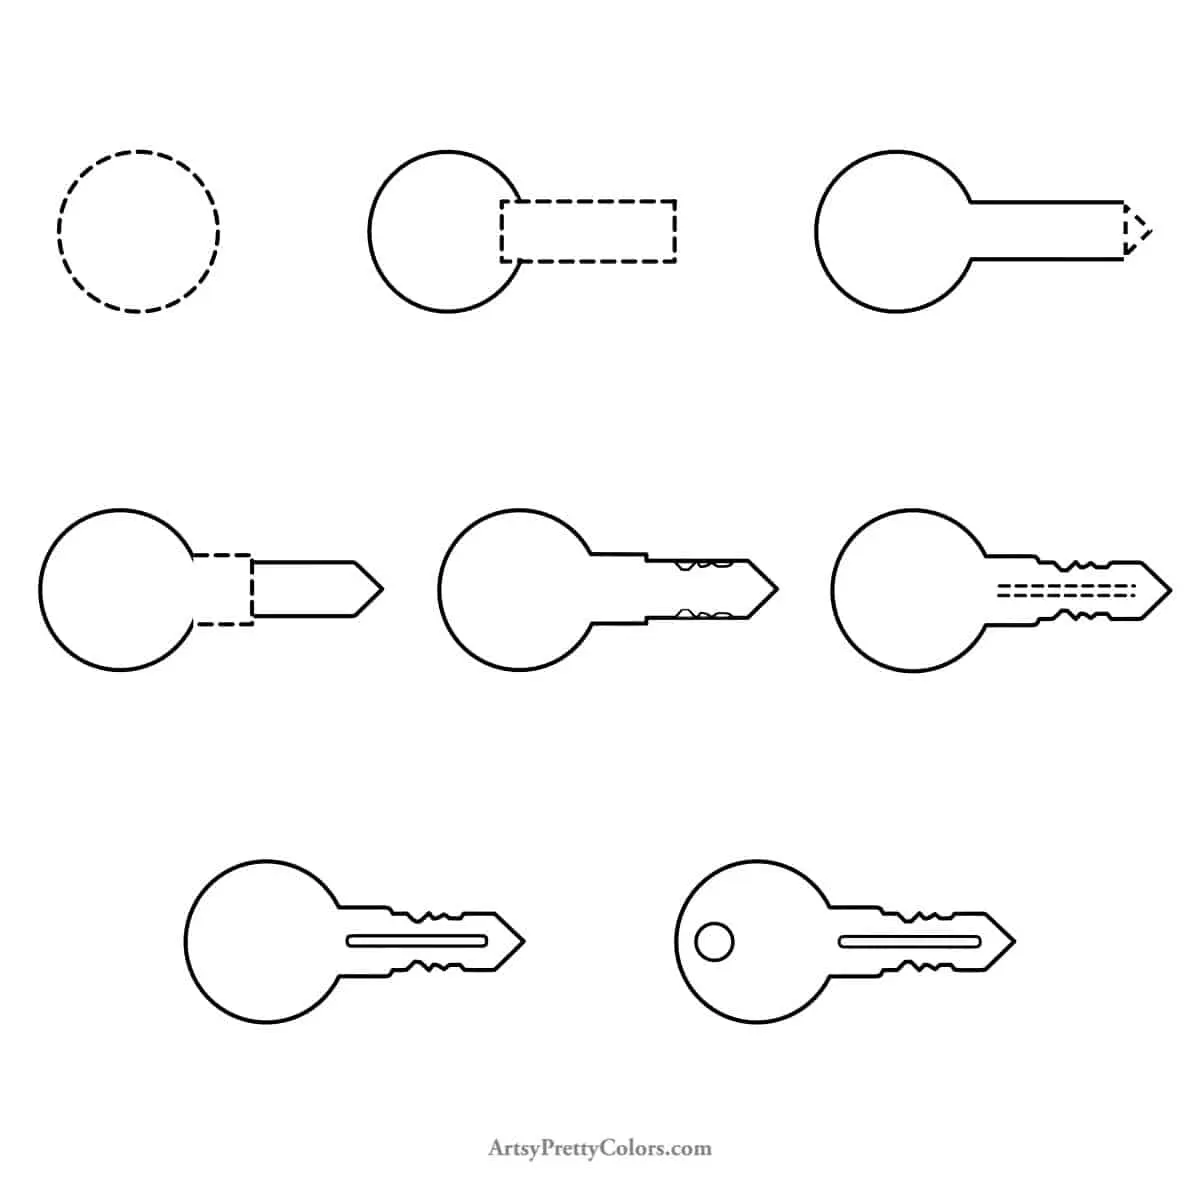
To begin your drawing, focus on the structural anatomy of a standard cylinder key. Start by drawing a large circle at the top to serve as the bow, which is the handle you hold. Directly beneath this, draw a long, narrow rectangle extending downward to represent the shank, or the body of the key. Ensure these two shapes are perfectly centered to maintain symmetry.
Once the basic frame is established, add the bit at the bottom of the shank. This is the part that interacts with the lock mechanism. You can draw this as a small, jagged rectangle or a series of varying teeth shapes. Use these steps to construct your initial guide:
- Sketch a light circle for the handle.
- Draw a vertical line through the center of the circle to align the shank.
- Add a rectangular shank attached to the bottom of the circle.
- Draw small, irregular rectangular notches on the side of the shank to create the bit.
- Add a small hole inside the bow for the keychain.
Best drawing tools for beginners
For those just starting, a simple graphite pencil is the most effective tool. A standard HB pencil provides a perfect balance between hardness and softness, allowing you to create light guidelines that are easy to erase later. If you want to add more depth, consider using a 2B pencil for darker, bolder final lines.
Paper choice also matters significantly for beginners. Standard printer paper is acceptable for practice, but a smooth-surfaced sketchpad will allow your pencil to glide more easily. Avoid using charcoal or heavy ink pens until you have mastered the basic proportions, as these mediums are less forgiving of mistakes. Keep a soft white eraser handy to clean up your construction lines once the final shape is defined. Having a dedicated sharpener ensures your lines remain crisp, which is essential for the precise geometric nature of a key.
Why key proportions matter
The visual appeal of a key drawing relies heavily on the ratio between the bow and the shank. If the handle is too small, the key looks fragile; if the shank is too wide, it appears cartoonish. Aim for the shank to be approximately twice the length of the diameter of the bow. This creates a balanced aesthetic that mimics real-world locksmithing standards.
Perspective also plays a vital role in how the key is perceived by the viewer. If you want the key to look like it is lying flat on a table, draw the bow as a slightly flattened oval rather than a perfect circle. This subtle change in geometry provides a sense of depth and realism. When you align the teeth of the bit, ensure they are parallel to the shank to maintain structural integrity. Observing real keys or photographs will help you understand these subtle shifts in proportion and angle.
Common mistakes when drawing keys
One of the most frequent errors beginners make is drawing the shank off-center from the bow. This misalignment makes the key look broken or poorly manufactured. Always use a faint center line as a reference point before you begin drawing the solid outlines. Another common mistake is making the bit teeth uniform in size and shape. Real keys have unique, irregular patterns that allow them to operate specific locks; uniformity makes the drawing look artificial.
- Forgetting to add the hole in the bow, which makes the key look like a solid pendant.
- Using heavy, dark lines for the initial sketch, which makes the drawing look muddy.
- Drawing the shank too short, which ruins the classic elongated silhouette of a key.
- Neglecting to erase the internal construction lines, which clutters the final image.
- Failing to vary line weight, which makes the object look flat and two-dimensional.
How to add detail and shading
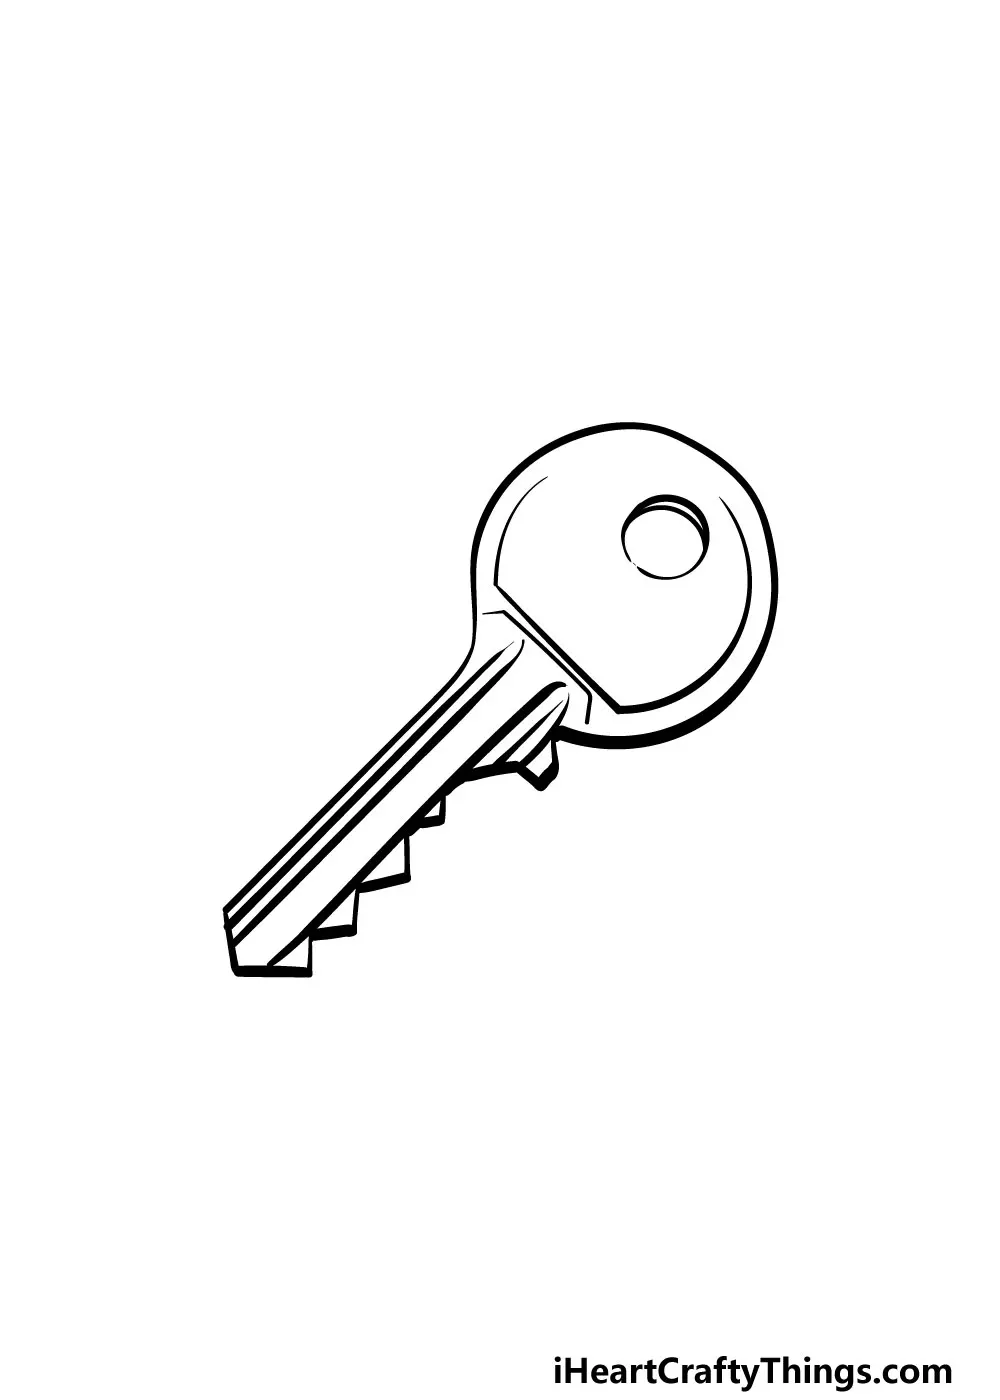
Once the basic outline is complete, you can bring your drawing to life through shading. Keys are typically made of brass or steel, both of which are reflective materials. To simulate this, identify a single light source and keep one side of the shank and bow lighter than the other. Use cross-hatching or smooth blending to create a gradient from light to dark across the surface of the metal.
Adding highlights is just as important as adding shadows. Leave a thin, white strip along the top edge of the shank to represent the reflection of light hitting the metal. You can also add a slight shadow beneath the key to ground it on the page, creating the illusion that it is resting on a surface. By focusing on these small details, you transform a simple line drawing into a sophisticated, professional-looking illustration that captures the metallic texture and weight of an actual key.
Key facts
- A standard house key consists of three main parts: the head (bow), the blade, and the tip.
- Start by drawing a simple rectangle for the blade and a circle or oval for the head.
- Use a ruler to ensure the blade edges are perfectly parallel to maintain structural realism.
- The "bitting" refers to the unique pattern of teeth cut into the blade that match a lock.
- Draw the teeth as a series of varying V-shapes or squares along the top edge of the blade.
- Add a small circle inside the head of the key to represent the hole for a keychain.
The bottom line
Drawing a key is an excellent exercise in geometric precision and shading. By breaking the object down into a simple circle and rectangle, you create a solid foundation for adding complex details like bitting and metallic highlights. Focus on maintaining straight lines for the blade and consistent spacing for the teeth. With practice, you will master the ability to translate simple mechanical shapes into realistic illustrations.
People also ask
What is the most common mistake when drawing a key?
Beginners often forget to align the teeth with the blade's edge, making the key look disconnected. Ensure the bitting pattern is carved directly into the top profile of the blade.
Should I use a pencil or a pen for the initial sketch?
Use a light graphite pencil to outline the basic shapes first. This allows you to erase and adjust the proportions before finalizing the details with a darker pen.
How do I make the key look metallic?
Apply shading by leaving thin white strips on the edges to represent highlights. Use cross-hatching or blending to create a gradient from light to dark across the blade.
Are all keys shaped the same way?
No, keys vary significantly based on the lock mechanism. While house keys are flat, antique skeleton keys have a cylindrical shaft and a complex, ornate head.
How do I draw the grooves on the side of the key?
Draw thin, long lines running parallel to the length of the blade. These lines simulate the milling grooves found on most modern keys, adding depth and texture.
Can I draw a key from memory?
It is difficult to capture the specific tooth pattern of a real key from memory. It is better to place a physical key on your desk and observe its unique cuts while you draw.
This answer was created with the help of AI research tools and reference sources. Spotted an error? Let us know — we correct mistakes quickly. See our editorial policy.