How do you take photos of pets?
Short answer
Capturing great photos of pets requires patience, proper lighting, and meeting the animal at their eye level. Use fast shutter speeds to freeze motion, engage the pet with toys or treats to secure their focus, and prioritize natural light. By keeping sessions short and rewarding, you ensure both comfort and quality results.
On this page
How to get a pet to look at the camera
Getting a pet to focus on a lens is often the most challenging part of photography. Animals are easily distracted by movement, sounds, or scents in their environment. To capture a direct gaze, hold a favorite squeaky toy or a high-value treat just above the camera lens. This creates a natural focal point that draws the animal's eyes toward the glass. If the pet is highly food-motivated, you may need an assistant to hold the treat while you operate the camera from a slightly different angle.
Consistency and timing are essential when trying to capture attention. Avoid shouting or making erratic movements, as this can cause the pet to become anxious or overly excited. Instead, use a soft, consistent noise to pique their curiosity. Once you have their attention, fire off a burst of shots quickly. You should aim to capture the moment immediately after they make eye contact, as their interest will likely wane within seconds.
Best camera settings for pet photography
To photograph active pets, you must prioritize a fast shutter speed to prevent motion blur. Set your camera to Shutter Priority mode (often marked as 'S' or 'Tv') and aim for a minimum speed of 1/500th of a second. If the pet is running or jumping, increase this to 1/1000th of a second or faster. A wider aperture, such as f/2.8 or f/4, helps blur the background, which makes the subject stand out more effectively.
Focusing accurately is equally important for sharp images. Most modern cameras feature continuous autofocus, which tracks a moving subject as it changes position. When shooting, follow these technical steps to ensure clarity:
- Enable continuous autofocus (AF-C or Servo) to track movement.
- Select a single focus point to target the pet's eyes specifically.
- Use burst mode to take multiple photos in rapid succession.
- Check your ISO settings to ensure the image remains bright without too much grain.
Why natural light is better for pets
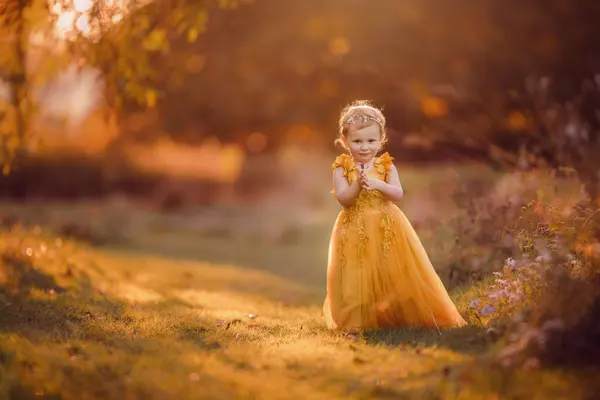
Natural light is the superior choice for pet photography because it avoids the harsh, startling effects of a camera flash. Flashes can frighten animals, causing them to bolt or display a "red-eye" effect that is difficult to edit out. Instead, position your pet near a large window or take them outdoors during the "golden hour," which occurs shortly after sunrise or just before sunset. This light is soft and flattering, highlighting the texture of fur and the depth of their eyes.
When shooting indoors, avoid overhead lights, which often create unflattering shadows under the eyes and nose. If you are outside, look for open shade, such as the area under a tree or a porch roof. This provides even, diffused light that prevents the pet from squinting. By working with the sun rather than against it, you create a professional, soft look that emphasizes the animal's natural features without causing unnecessary stress or discomfort.
Common mistakes when photographing pets
Many photographers make the mistake of standing over their pets, which results in distorted, top-down angles that make the animal look small or unnatural. To achieve a professional look, you must get down to the pet's eye level. This requires kneeling, sitting, or even lying flat on the ground. By aligning the camera lens with the animal's eyes, you create an intimate connection that makes the viewer feel as though they are interacting directly with the subject.
Another frequent error is conducting sessions that last too long. Pets have limited attention spans and can become bored or frustrated if forced to pose for extended periods. Keep sessions brief, ideally under 15 minutes, and always end on a positive note with a reward. Avoid these common pitfalls:
- Using a flash that startles the animal.
- Forcing the pet into a specific pose they dislike.
- Ignoring the background, which can lead to cluttered or distracting images.
- Forgetting to reward the pet for their cooperation during the process.
How to photograph pets in motion
Capturing a pet in motion requires anticipation and a high-speed approach to your equipment. Rather than trying to follow the pet's path with your camera, pre-focus on a specific spot where you expect the pet to run through. This technique, known as "trap focus," allows you to wait for the animal to enter your frame. As they hit the pre-determined mark, trigger your shutter burst to capture the action in sharp detail.
Patience is the final component of successful action photography. You may need to repeat the process several times to get the perfect frame of a dog catching a ball or a cat mid-leap. If the pet seems tired or uninterested, stop immediately and try again on another day. By keeping the experience fun and treating it like a game, you ensure the animal remains engaged. Always review your images to see which shutter speeds worked best for the specific speed of your pet's movement.
Key facts
- Set your camera to a high shutter speed, at least 1/500th of a second, to freeze motion and prevent blur.
- Position yourself at the pet’s eye level rather than shooting from above to create a more intimate and engaging perspective.
- Use natural, soft light from a window or an overcast sky to avoid harsh shadows and red-eye effects.
- Focus strictly on the animal's eyes, as they are the most expressive part of the portrait and define the image's sharpness.
- Keep a squeaky toy or a favorite treat near the camera lens to capture the pet's attention and direct their gaze.
- Turn off your camera's flash, as the sudden burst of light can startle animals and cause them to look away.
The bottom line
Capturing great pet photos relies on patience, proper lighting, and understanding your animal’s temperament. By dropping to their eye level and utilizing fast shutter speeds, you can freeze fleeting expressions and create professional-looking portraits. Focus on the eyes, minimize distractions, and keep sessions short to ensure your pet remains happy. With these technical adjustments and a few treats, you will consistently produce high-quality, memorable images of your companion.
People also ask
How do I get my pet to sit still for a photo?
Tire them out with a vigorous play session before the photo shoot so they are naturally calmer. Alternatively, use high-value treats to reward them for staying in a specific spot while you adjust your settings.
What is the best time of day to photograph pets outdoors?
The golden hour, which occurs shortly after sunrise or before sunset, provides the most flattering, warm, and diffused light. Avoid shooting at midday when the sun is directly overhead, as it creates unflattering shadows under the eyes and nose.
Should I use a portrait lens for pet photography?
A lens with a focal length between 50mm and 85mm is ideal because it provides a flattering compression of features. These lenses also allow for a wide aperture, which creates a soft, blurred background that makes the pet stand out.
How can I avoid blurry photos of active pets?
Ensure you are in a bright environment to allow for a faster shutter speed. If your pet is moving quickly, use your camera's continuous autofocus mode to track their movement as they run or jump.
Is it better to use a phone or a professional camera?
Both can produce excellent results, but professional cameras offer better control over depth of field and shutter speed. If using a phone, use the "Portrait" mode to simulate a professional look and ensure you have plenty of light.
How do I handle pets that are afraid of the camera?
Spend time letting the animal sniff and investigate the camera while it is turned off. Reward them with treats whenever they are near the equipment to build a positive association before you start taking pictures.
This answer was created with the help of AI research tools and reference sources. Spotted an error? Let us know — we correct mistakes quickly. See our editorial policy.