What is overexposure?
Short answer
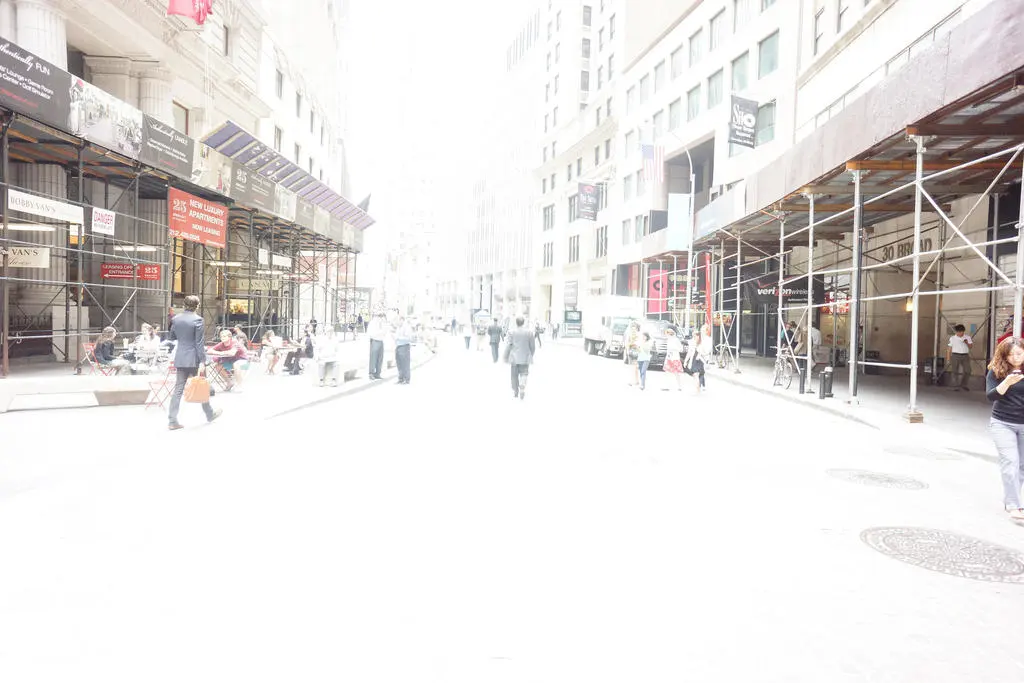
Overexposure occurs when a photographic sensor or film receives too much light, resulting in an image that is excessively bright or "blown out." In this state, highlights lose detail, appearing as pure white patches where textures should be visible. It is a common technical error caused by improper camera settings or lighting.
On this page
Why overexposure happens
Overexposure is primarily a result of an imbalance between the three pillars of photography: aperture, shutter speed, and ISO. When the camera’s sensor is exposed to light for too long, or the aperture is open too wide, the sensor becomes "saturated." Once the sensor reaches its maximum capacity to record light, it can no longer distinguish between different shades of brightness, causing all highlights to collapse into a uniform, featureless white.
This phenomenon is particularly common in high-contrast scenes, such as a subject standing in deep shade against a bright, sunlit background. The camera’s light meter often struggles to balance these extremes, leading it to prioritize the darker areas and inadvertently flooding the lighter areas with too much data. Understanding your camera’s histogram—a graph showing the distribution of tones—is the most effective way to identify if your image is clipped on the right side, indicating overexposure.
How to fix overexposure in camera
Preventing overexposure requires manual intervention to ensure the camera’s exposure settings align with the available light. If you notice your images are consistently too bright, you should adjust your settings before taking the shot. By reducing the amount of light hitting the sensor, you preserve the subtle details in the highlights, such as clouds in the sky or the texture of white fabric.
Follow these steps to adjust your exposure manually:
- Decrease your ISO to the lowest native setting, typically 100, to reduce sensor sensitivity.
- Increase your shutter speed to limit the duration the sensor is exposed to light.
- Narrow your aperture by choosing a higher f-stop number, such as f/8 or f/11, to restrict the light entering the lens.
- Utilize exposure compensation by dialing in a negative value, such as -0.7 or -1.0, to tell the camera to intentionally underexpose the scene.
Common mistakes when shooting
Many photographers inadvertently cause overexposure by relying too heavily on automatic modes. In "Auto" or "Program" mode, the camera makes assumptions based on the entire frame, which often fails when the scene has significant bright spots. Another frequent error is ignoring the "blinkies," a feature on most digital cameras that causes the overexposed areas of an image to flash black and white on the display during playback.
Avoid these common pitfalls to improve your image quality:
- Relying on the LCD screen brightness, which can be misleading depending on your environment.
- Shooting in JPEG format, which discards image data and makes it nearly impossible to recover highlight detail later.
- Failing to use a lens hood, which can prevent stray light from hitting the lens and causing unwanted flare that mimics overexposure.
- Neglecting to check the histogram, the only objective way to see if your exposure is truly balanced.
Best tools for managing light
Managing light effectively often requires physical accessories that physically block or diffuse incoming rays. A neutral density (ND) filter is an essential tool for photographers working in bright conditions, such as at the beach or in snow. These filters act like sunglasses for your lens, reducing the intensity of light across the entire spectrum without altering the colors, allowing you to use wider apertures or slower shutter speeds without blowing out the highlights.
Reflectors and diffusers are also vital, especially for portrait photography. By using a diffuser, you soften harsh, direct sunlight, spreading the light more evenly across the subject and reducing the extreme contrast that leads to overexposure. If you are shooting in a studio, adjusting the intensity of your flash or strobe lights is a more precise way to control exposure than relying solely on camera settings. Always prioritize lighting control at the source rather than attempting to fix it later.
Can you fix overexposure in editing
While modern photo editing software is powerful, it has physical limits regarding how much data it can recover. If an area of an image is completely "clipped"—meaning the pixels have recorded pure white—there is no color or texture data to retrieve. You can often pull back some detail from highlights that are only slightly overexposed, but once the data is gone, the white patch will remain white regardless of how much you lower the exposure slider.
To maximize your chances of recovery, always shoot in RAW format. RAW files contain significantly more data than JPEGs, allowing you to manipulate highlights and shadows with much greater flexibility. When editing, focus on the "Highlights" and "Whites" sliders rather than the overall exposure slider, as this allows you to target the overexposed areas specifically without darkening the rest of the image. However, remember that careful shooting techniques will always yield better results than attempting to salvage a poorly exposed file in post-production.
Key facts
- Overexposure occurs when too much light reaches the camera sensor or film, resulting in a washed-out, bright image.
- In photography, the "exposure triangle"—aperture, shutter speed, and ISO—controls the amount of light entering the lens.
- A histogram that shows a large spike on the far right side indicates that your highlights are likely "blown out" and lack detail.
- To fix overexposure in-camera, decrease the aperture size, increase the shutter speed, or lower the ISO sensitivity.
- Use the "exposure compensation" dial on your camera to quickly darken or brighten an image without changing manual settings.
- Avoid shooting in direct, harsh midday sunlight, as the high contrast often makes it impossible to expose for both shadows and highlights.
The bottom line
Overexposure is a common technical error where excessive light compromises image quality, leading to a loss of detail in the brightest parts of a photograph. By mastering the exposure triangle and utilizing tools like histograms and highlight alerts, you can maintain control over your lighting. While minor overexposure can sometimes be corrected in post-production, learning to balance your settings in the field remains the best practice.
People also ask
How can I tell if my photo is overexposed while shooting?
Most digital cameras feature a "blinkies" or highlight alert setting that causes overexposed areas to flash black and white on your screen. Checking your histogram is also a reliable way to see if your data is pushed too far to the right.
Can I fix an overexposed photo during editing?
You can recover some detail in slightly overexposed RAW files by lowering the exposure and highlights in editing software. However, if the pixels are pure white, the data is permanently lost and cannot be recovered.
Does overexposure happen only with digital cameras?
No, film photography is also susceptible to overexposure, though film is generally more forgiving than digital sensors. Negative film often retains detail in highlights even when overexposed, while digital sensors clip highlights much more abruptly.
What is the difference between overexposure and high-key photography?
High-key photography is a deliberate artistic style that uses bright lighting to minimize shadows and create a clean, airy look. Overexposure is typically an accidental technical error that results in a loss of image quality and detail.
Why does my phone camera often produce overexposed photos?
Phone cameras use automatic metering that tries to balance the entire scene, which can lead to overexposure when a subject is in shadow against a bright background. You can usually fix this by tapping your subject on the screen to set the exposure manually.
Is there ever a reason to intentionally overexpose a shot?
Yes, photographers sometimes intentionally overexpose by one-third or two-thirds of a stop to ensure that shadow details are captured clearly. This technique is often used in portraiture to create a softer, more flattering skin tone.
This answer was created with the help of AI research tools and reference sources. Spotted an error? Let us know — we correct mistakes quickly. See our editorial policy.