How do you remove a background in Photoshop?
Short answer
Removing a background in Photoshop is best achieved using the Remove Background tool found in the Properties panel or the Select Subject feature. By isolating the primary subject from its environment, you can create a transparent layer, allowing you to place the object onto a new background or export it as a clean PNG.

On this page
How to remove a background in Photoshop quickly
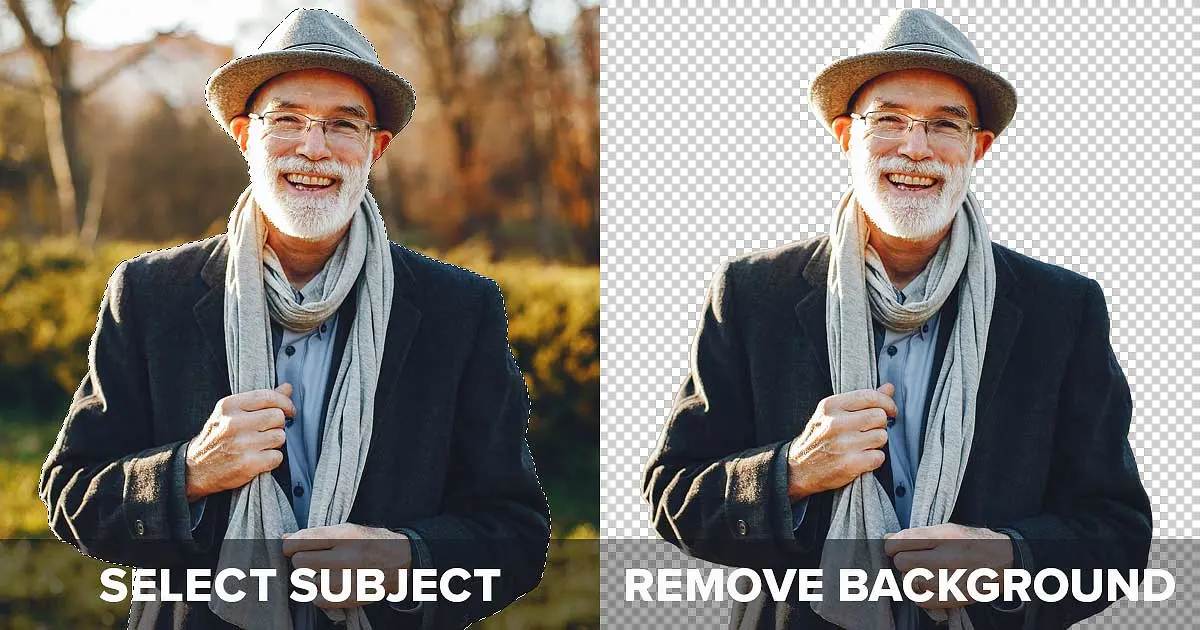
The most efficient method for modern users involves the Remove Background quick action. This feature utilizes automated object detection to identify the main subject and mask out the surrounding pixels in a single click. To begin, open your image in Photoshop and ensure the layer is unlocked by clicking the small padlock icon in the Layers panel. Once unlocked, navigate to the Properties panel, which is typically located on the right side of the workspace. Under the Quick Actions section, you will see the "Remove Background" button. Clicking this button automatically generates a layer mask that hides the background while preserving your original image data. This non-destructive approach allows you to refine the edges later if the software misses small details like hair or fine textures.
- Open your image file in Adobe Photoshop.
- Ensure the layer is unlocked in the Layers panel.
- Open the Properties panel.
- Select "Remove Background" under the Quick Actions menu.
- Adjust the resulting layer mask with a brush if necessary.
How to use the Select Subject tool for precision
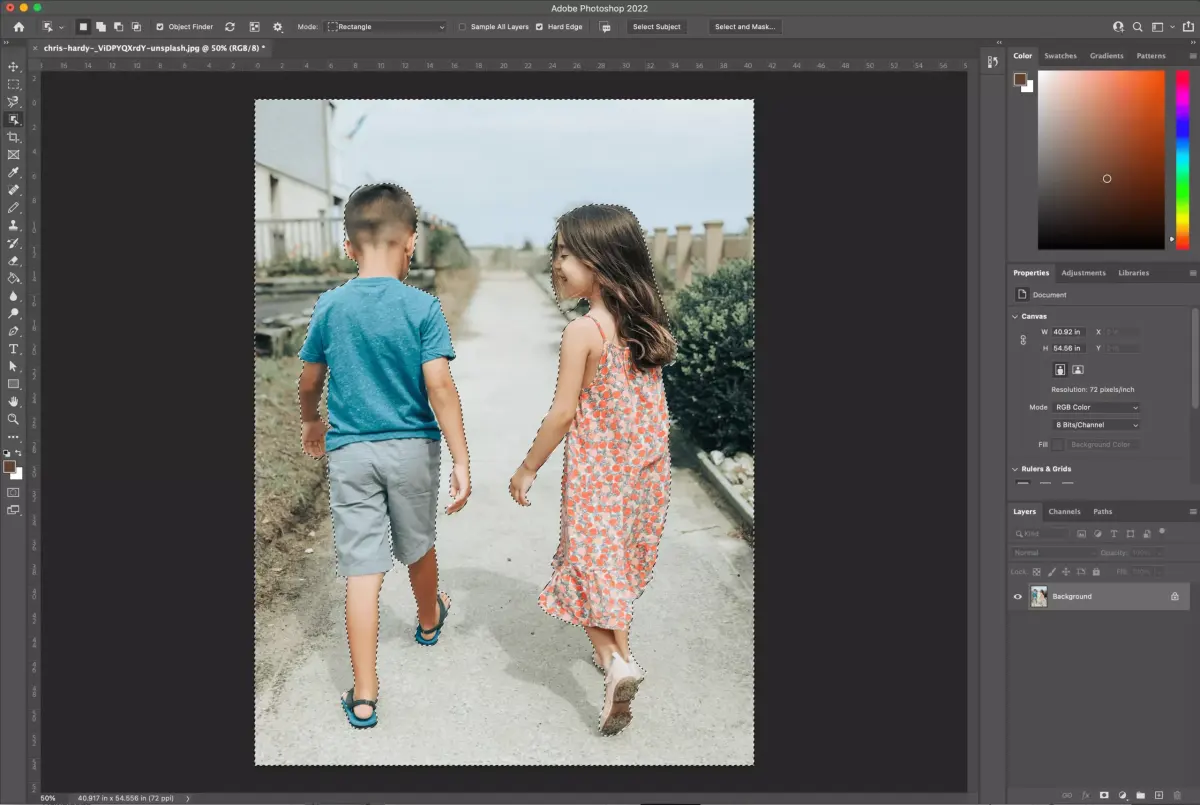
If you require more control than the automated quick action provides, the Select Subject tool is the industry standard for precision. This tool analyzes the image to create a high-quality selection around the most prominent person or object. To use it, select any selection tool, such as the Quick Selection or Lasso tool, from the toolbar. You will see a "Select Subject" button appear in the options bar at the top of the screen. Clicking this creates a "marching ants" selection border around your subject. Once the selection is active, you can click the "Add Layer Mask" icon at the bottom of the Layers panel. This instantly removes the background while keeping the subject intact and editable, which is ideal for complex compositions requiring manual adjustments.
- Use the "Select and Mask" workspace to refine difficult edges like fur or foliage.
- Toggle the "View Mode" to "On Layers" to see how your subject looks against a transparent background.
- Use the Refine Edge Brush tool to paint over areas where the selection is too soft or imprecise.
Why background removal looks unrealistic
A common issue when removing backgrounds is the presence of "halos" or color fringing around the subject. This happens when pixels from the original background remain visible along the edge of the cutout, often because the selection was slightly too large or too small. To fix this, you can use the "Defringe" command found under the Layer menu, specifically under the Matting submenu. Another reason for an unrealistic look is the lack of a natural shadow. When you place a subject on a new background, the original lighting may not match the new environment. To combat this, create a new layer beneath your subject and use a soft, low-opacity black brush to paint a subtle shadow where the subject touches the ground. This simple technique grounds the object and makes the composite appear much more professional.
Common mistakes when removing backgrounds
One frequent error is failing to work on a duplicate layer, which makes it impossible to recover pixels if you make a mistake. Always press Command+J (Mac) or Ctrl+J (Windows) to create a copy of your background layer before starting. Another mistake is ignoring the importance of edge quality. Sharp, jagged edges often indicate that the selection was made with a hard-edged tool without any feathering. Applying a slight feather of 0.5 to 1 pixel can help blend the subject into a new background more naturally. Furthermore, beginners often forget to check the edges of the image after removal, leaving behind small artifacts or stray pixels. Always zoom in to 200% or 300% to inspect the perimeter of your subject for any missed background elements that need to be cleaned up with a soft eraser.
Best tools for removing backgrounds manually
While automated tools are powerful, sometimes manual intervention is necessary for high-end retouching. The Pen tool remains the gold standard for creating clean, vector-based paths around subjects with hard edges, such as products or architecture. By clicking to create anchor points, you can trace the subject with absolute accuracy, resulting in a perfectly smooth edge that automated tools cannot always replicate. For subjects with soft edges, such as hair, the Background Eraser tool or the Refine Edge brush are superior choices. These tools allow you to sample colors and selectively remove background pixels while protecting the foreground subject. Mastering a combination of the Pen tool for hard edges and the Refine Edge brush for soft details will ensure you can handle any image removal task with professional results regardless of the subject's complexity or lighting conditions.
Key facts
- The "Remove Background" button is located in the Properties panel when a layer is selected.
- The Quick Selection tool creates a selection by clicking and dragging over the subject you wish to keep.
- Use the Select Subject command in the Select menu for a rapid, automated initial selection of the main object.
- Layer masks are non-destructive, meaning they hide pixels rather than deleting them, allowing for future adjustments.
- The Refine Edge brush is essential for capturing fine details like hair or fur around the subject's perimeter.
- Saving your file as a PSD or TIFF preserves the transparency of your background layer for future editing.
The bottom line
Removing a background in Photoshop is a fundamental skill that balances speed with precision. While automated features provide a quick starting point, mastering layer masks and the Refine Edge tool is essential for professional results. By choosing the right technique for your specific subject, you can achieve clean, seamless cutouts that integrate perfectly into new compositions while maintaining the flexibility to edit your work later.
People also ask
Can I remove a background without losing the original image?
Yes, by using a layer mask instead of the eraser tool, you keep the original pixel data intact. This allows you to paint back parts of the image if you make a mistake during the selection process.
Why do my edges look jagged after removing the background?
Jagged edges often occur when the selection is too tight or lacks feathering. You can smooth these transitions by adjusting the Feather or Smooth sliders within the Select and Mask workspace.
How do I handle transparent objects like glass?
Transparent objects require manual selection using the Pen tool or careful color range adjustments. Automated tools often struggle with transparency, so manual paths provide the highest level of precision for glass.
What is the purpose of the Select and Mask workspace?
This dedicated workspace provides specialized tools for refining selections, specifically around complex edges. It allows you to view your cutout against different backgrounds to ensure the transition looks natural.
Is it better to use the Pen tool or selection tools?
The Pen tool offers the most professional and precise results for hard-edged objects. While selection tools are faster, the Pen tool provides complete control over every anchor point for clean, sharp edges.
How do I save an image with a transparent background?
You must save or export your file in a format that supports transparency, such as PNG or TIFF. JPEG files do not support transparency and will automatically fill empty areas with a solid color.
This answer was created with the help of AI research tools and reference sources. Spotted an error? Let us know — we correct mistakes quickly. See our editorial policy.