How do you photograph waterfalls?
Short answer
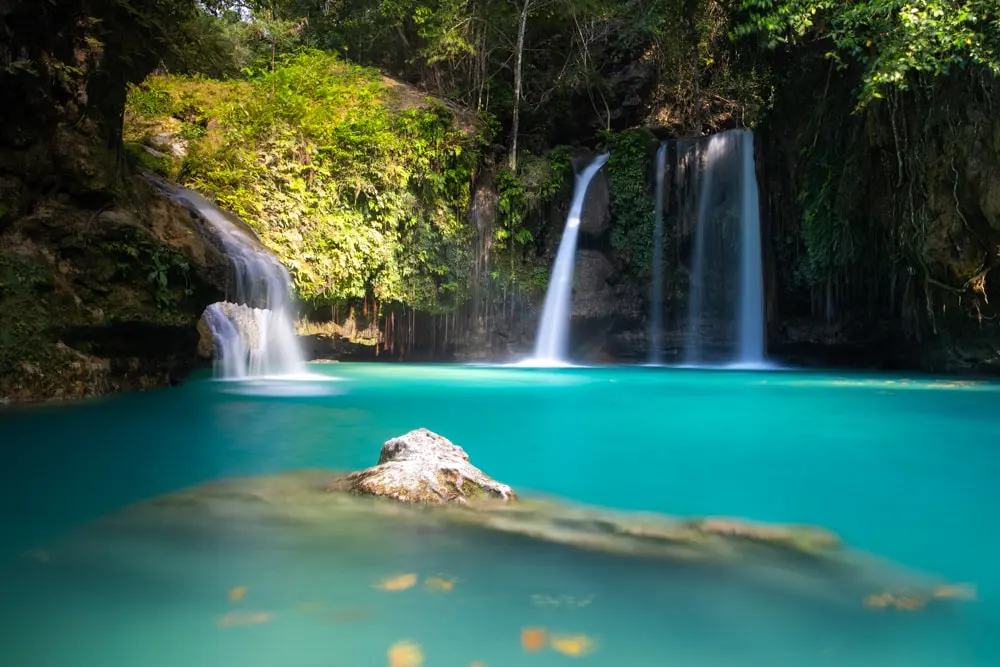
Photographing waterfalls requires a tripod, a neutral density filter, and a slow shutter speed to capture the characteristic silky motion of water. By balancing ambient light with long exposures, you can transform chaotic splashes into smooth, ethereal streams. Success depends on stable equipment, precise focus, and shooting during soft, diffused lighting conditions.
On this page
What equipment is needed for waterfall photography?
To capture professional-grade images of waterfalls, you must prioritize stability and light control. A sturdy tripod is the most essential piece of gear because long exposure times make handheld shooting impossible; even the slightest movement will result in blurry, unusable images. If you are hiking to remote locations, consider a carbon-fiber tripod to reduce weight without sacrificing rigidity.
Beyond support, managing light is critical for achieving the "silky" water effect. A circular polarizer is indispensable for cutting glare off wet rocks and foliage, which saturates colors and adds depth. Furthermore, a neutral density (ND) filter acts like sunglasses for your camera, allowing you to keep the shutter open for several seconds even in bright daylight. Without these tools, you will struggle to achieve the desired motion blur without overexposing your highlights.
- Sturdy tripod with a reliable ball head.
- Circular polarizing filter to remove reflections.
- Neutral density filter (6-stop or 10-stop) for long exposures.
- Remote shutter release or the camera’s built-in self-timer.
- Microfiber cloths to keep the lens dry from spray.
How to set camera settings for waterfalls?
Achieving the perfect waterfall shot involves balancing your aperture, shutter speed, and ISO. Start by setting your camera to Manual (M) or Shutter Priority (Tv/S) mode. To maximize depth of field and keep the entire scene sharp, use a narrow aperture between f/8 and f/11. Avoid using apertures smaller than f/16, as this can introduce lens diffraction, which softens the overall image quality.
The shutter speed is the primary variable that dictates the look of the water. For a textured, energetic look, try a shutter speed between 1/15 and 1/2 second. If you prefer the classic, smooth, ethereal look, extend your shutter speed to 2 seconds or longer. Always keep your ISO at its lowest native setting—typically ISO 100—to ensure the highest possible dynamic range and minimal digital noise in the shadows.
- Use a low ISO (100) to maintain image clarity.
- Set aperture to f/8–f/11 for optimal sharpness.
- Adjust shutter speed based on the desired water texture.
- Use the camera’s histogram to ensure highlights are not blown out.
Best time of day to photograph waterfalls?
The quality of light is arguably more important than the waterfall itself. Direct, harsh sunlight creates high-contrast scenes with bright, white highlights and deep, impenetrable shadows, which are difficult for camera sensors to process. The best time to photograph waterfalls is during overcast, cloudy days, as the clouds act as a massive natural diffuser, providing soft, even light across the entire scene.
If you must shoot on a sunny day, aim for the "golden hours" shortly after sunrise or just before sunset. Alternatively, look for waterfalls located in deep, shaded canyons where the sun never hits directly. If you find yourself shooting in bright light, use your body or a friend’s jacket to cast a shadow over the immediate foreground or the waterfall itself to balance the exposure. Consistent, flat lighting is the secret to capturing the vibrant greens of moss and the subtle details in the cascading water.
Common mistakes when photographing waterfalls?
One of the most frequent errors is failing to account for the surrounding environment. Many photographers focus exclusively on the water, ignoring the composition of the rocks, trees, and foreground elements that provide scale and context. Always look for a leading line, such as a fallen log or a jagged rock formation, to guide the viewer’s eye toward the waterfall.
Another common mistake is neglecting lens maintenance. Waterfalls generate significant mist and spray, which will inevitably land on your front element. This creates soft, blurry spots that ruin the clarity of your image. Check your lens constantly, and keep a dry microfiber cloth in an accessible pocket. Finally, avoid over-processing the water in post-production. If you push the "clarity" or "texture" sliders too far, the water will look artificial and harsh rather than smooth and natural.
How to compose a waterfall shot?
Composition is the art of organizing the chaos of a natural scene into a coherent image. Start by finding a vantage point that includes a clear foreground, middle ground, and background. A wide-angle lens is often the best choice for capturing the scale of a large waterfall within its forest setting. If the waterfall is smaller or more intimate, a standard focal length or short telephoto lens can help isolate specific cascades or interesting patterns in the flow.
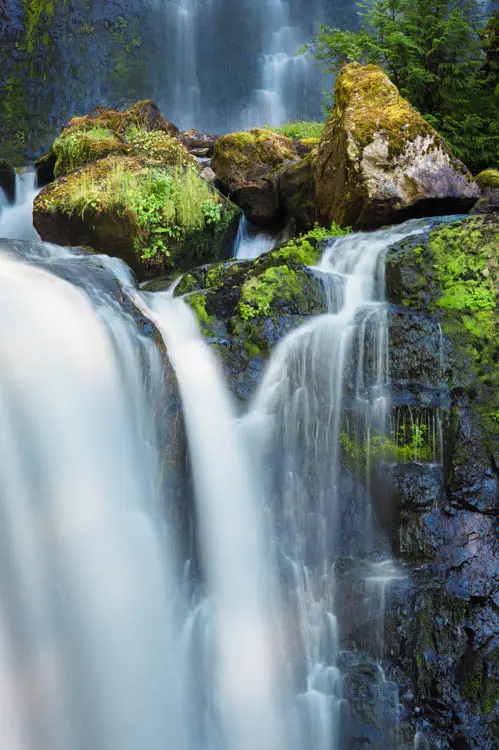
Consider the orientation of your frame carefully. Vertical compositions often work best for tall, narrow waterfalls, as they emphasize the height and downward motion of the water. Horizontal frames are generally better for wider cascades or when you want to include more of the surrounding landscape. Always experiment with different heights; getting low to the ground can make small rocks or flowers in the foreground appear larger and more impactful, adding a sense of three-dimensional depth to your final photograph.
Key facts
- Use a tripod to keep the camera perfectly steady during the long exposures required for silky water.
- Set your camera to Shutter Priority mode or Manual, choosing a shutter speed between 0.5 and 2 seconds.
- Use a Neutral Density (ND) filter to block excess light, allowing for longer exposures during bright daylight.
- Set your ISO to the lowest possible native setting, typically 100, to minimize digital noise in the image.
- Choose a small aperture, such as f/11 or f/16, to maintain a deep depth of field and keep the entire scene sharp.
- Photograph waterfalls on overcast days or during the "blue hour" to avoid harsh, uneven highlights and deep shadows.
The bottom line
Capturing professional-quality waterfall images requires balancing light and motion through precise camera settings. By utilizing a sturdy tripod, a low ISO, and an ND filter, you can achieve that signature silky water effect. Always prioritize shooting in diffused, overcast lighting to maintain detail in shadows and highlights. With careful attention to lens cleanliness and steady exposure control, you can transform simple cascades into stunning landscape art.
People also ask
Why does my waterfall photo look blurry instead of silky?
This usually happens because your shutter speed is too slow or the camera moved during the exposure. Ensure your tripod is on stable ground and use a remote shutter release or the camera’s self-timer to prevent vibrations.
Do I need a special lens for waterfall photography?
A wide-angle lens is generally best for capturing the scale of the waterfall and its surrounding environment. However, a telephoto lens can be used to isolate specific sections of the cascade or interesting rock formations.
What is the best time of day to shoot waterfalls?
Overcast weather is ideal because clouds act as a natural diffuser, creating soft, even lighting. If you must shoot in bright sun, aim for early morning or late afternoon to avoid high-contrast glare.
How do I keep water droplets off my lens?
Waterfalls create significant mist that can quickly ruin a shot. Keep a microfiber cloth handy and wipe the front element of your lens frequently between exposures.
Should I use a polarizing filter?
Yes, a circular polarizer is highly recommended as it cuts glare on wet rocks and foliage. It also helps saturate colors and adds contrast, making the water stand out against the background.
How can I make the water look frozen in time?
To capture individual droplets and sharp texture, use a fast shutter speed of 1/500th of a second or higher. This technique is effective for massive, powerful waterfalls where you want to convey raw energy.
This answer was created with the help of AI research tools and reference sources. Spotted an error? Let us know — we correct mistakes quickly. See our editorial policy.