How do you make a felt ornament?
Short answer
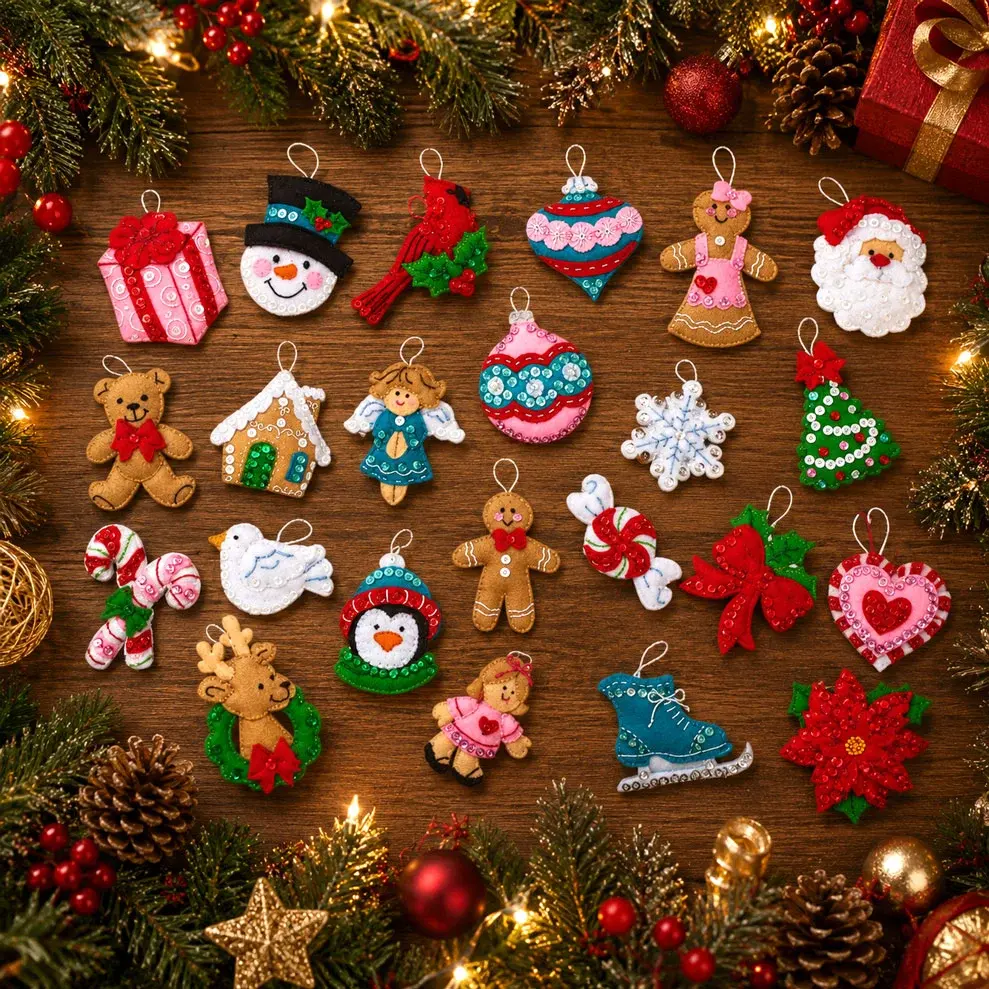
Making a felt ornament involves cutting shapes from wool or synthetic felt, stitching the edges with embroidery floss, and adding stuffing for dimension. You can personalize these decorations using appliqué, beads, or sequins. This accessible craft requires minimal tools, making it an ideal project for beginners to create durable, handmade holiday keepsakes.
On this page
What materials are needed for felt ornaments?
To create a high-quality felt ornament, you must select the right base material. Wool-blend felt is the gold standard because it is thick, durable, and does not pill or fray when cut. Synthetic craft felt is a cheaper alternative, but it is often thin and can look flimsy. You will also need sharp embroidery scissors, as dull blades will cause the fabric to bunch and create jagged edges.
Beyond the fabric, gather a few essential sewing supplies to ensure your project holds together. Use embroidery floss in colors that either match or contrast with your felt. A standard size 5 or 7 embroidery needle works best for most felt thicknesses. Finally, keep a small bag of polyester fiberfill on hand to give your ornament a soft, three-dimensional shape. Avoid overstuffing, as this can pull the seams apart and distort the final design.
How to cut and assemble felt shapes
Precision during the cutting phase determines the professional appearance of your ornament. Use a template printed on cardstock to trace your shapes onto the felt with a disappearing ink fabric marker or a tailor's chalk. If you are making a complex design, cut out the individual pieces of the pattern first, then pin them to the felt before cutting. This prevents the fabric from shifting while you work.
Once your pieces are cut, follow these steps to assemble the ornament:
- Arrange any decorative appliqué or sequins on the front piece and stitch them down before joining the front and back.
- Place the front and back pieces together, ensuring the edges are perfectly aligned.
- Use a whip stitch or blanket stitch to sew around the perimeter, leaving a small one-inch gap.
- Insert small pinches of fiberfill through the gap until the ornament reaches your desired firmness.
- Stitch the remaining gap closed and secure your thread with a double knot.
Best stitches for felt ornaments
The blanket stitch is the most popular choice for felt projects because it provides a decorative, secure edge that prevents the fabric from separating. To execute this stitch, bring your needle up through both layers of felt from the back. Loop the thread under the needle point before pulling it tight. This creates a neat "L" shape along the seam that reinforces the structure while adding a classic, handmade aesthetic to the piece.
If you prefer a simpler look, the whip stitch is a faster alternative. This involves wrapping the thread over the edge of the two felt pieces repeatedly. While the whip stitch is less decorative than the blanket stitch, it is highly effective for smaller, intricate ornaments where space is limited. Regardless of the stitch chosen, maintain consistent spacing between your needle entries to ensure the edges look uniform and professional. A ruler can help you mark even intervals if you struggle with consistency.
Common mistakes when making felt ornaments
One of the most frequent errors beginners make is using too much stuffing. While it is tempting to make the ornament look plump, excessive fiberfill puts unnecessary tension on your stitches. This often leads to visible gaps between the layers of felt where the stuffing begins to poke through. Aim for a gentle, rounded shape rather than a tight, overstuffed appearance to keep the seams clean and intact.
Another common pitfall is using low-quality thread or needles that are too thick. Standard sewing thread is often too thin to show up against the texture of felt, whereas heavy-duty upholstery thread can be difficult to manage. Always use embroidery floss, which consists of six individual strands. You can separate these strands to use two or three at a time, allowing you to adjust the thickness of your stitches to match the scale of your ornament. Always test your thread thickness on a scrap piece of felt before starting the final project.
How to add finishing touches and hangers
The final step in the process is attaching a hanger and adding embellishments that give the ornament character. For a classic look, use a thin satin ribbon or metallic cord. Loop the ribbon and stitch it securely into the top seam of the ornament between the front and back layers. If you prefer a more rustic aesthetic, a piece of jute twine or baker’s twine works exceptionally well. Ensure the hanger is anchored deep within the seam to prevent it from pulling out over time.
For added flair, consider these decorative additions:
- Seed beads or small glass pearls for a festive, shimmering effect.
- Fabric glue to attach felt holly leaves or miniature bows.
- Metallic thread for outlining specific features like eyes or patterns.
- Iron-on patches for a modern, graphic design style.
When using glue, apply it sparingly to avoid staining the felt. Allow all adhesives to dry completely for at least 24 hours before hanging the ornament on a tree. This ensures the bond is strong and the materials do not shift while the glue is still tacky. By following these steps, you will produce a beautiful, long-lasting ornament that can be enjoyed for many holiday seasons to come.
Key facts
- Wool-blend felt is preferred over craft felt because it is more durable and less prone to pilling.
- Use a sharp embroidery needle and polyester or cotton embroidery floss to ensure your stitches remain secure.
- A disappearing ink fabric marker is the most accurate tool for tracing templates onto dark-colored felt.
- Blanket stitches are the gold standard for felt ornaments because they prevent the edges from fraying over time.
- Use small amounts of polyester fiberfill to stuff ornaments, as overstuffing causes seams to pucker and gap.
- Sharp, fine-tipped scissors are essential for cutting intricate felt shapes without creating jagged or uneven edges.
The bottom line
Creating felt ornaments is an accessible craft that rewards patience and attention to detail. By selecting high-quality wool-blend felt and utilizing the blanket stitch, you can produce professional-looking decorations that last for years. Focus on precise cutting and careful stuffing to ensure your ornaments maintain their shape. With these fundamental techniques, you can easily customize patterns to create unique, handmade gifts for any holiday or occasion.
People also ask
How do I prevent my felt from shifting while I cut it?
Pin your paper template to the felt using sewing pins or use a temporary fabric adhesive spray. You can also trace the pattern onto freezer paper, iron it onto the felt, and cut through both layers.
What is the best way to attach hanging loops to felt ornaments?
Fold a piece of ribbon or twine into a loop and tuck the raw ends between the two felt layers at the top. Secure the loop by stitching through all layers while closing the final seam.
Can I use a sewing machine to make felt ornaments?
Yes, a machine can speed up the process, though hand-stitching is traditional for a rustic look. Use a slightly longer stitch length to prevent the needle from perforating the felt too frequently.
How do I hide the knots in my embroidery thread?
Start your thread by pushing the needle through only the back layer of felt so the knot remains hidden inside the ornament. When finishing, take a tiny stitch, loop the thread, and pull it tight before burying the tail inside the stuffing.
Why do my felt edges look uneven after cutting?
This usually happens when using dull scissors or trying to cut too much material at once. Always use sharp shears and move the fabric into the blades rather than trying to maneuver the scissors around the felt.
How do I add details like eyes or buttons to the ornament?
Attach small decorative elements before sewing the front and back pieces of the ornament together. This allows you to secure the threads on the back side of the front panel, keeping the finished piece clean.
This answer was created with the help of AI research tools and reference sources. Spotted an error? Let us know — we correct mistakes quickly. See our editorial policy.