How do you improve line quality?
Short answer
Improving line quality requires mastering physical control, pressure sensitivity, and intentional mark-making. By engaging your shoulder rather than your wrist, you gain fluid motion and consistent weight. Practicing deliberate speed, varying your pressure, and maintaining a relaxed grip will transform shaky, hesitant marks into confident, expressive, and professional-grade lines.
On this page
How to improve line quality through physical technique
The most significant factor in line quality is the muscle group used to generate the stroke. Beginners often rely on the wrist, which creates short, cramped, and shaky lines because the range of motion is naturally restricted. By shifting the movement to the shoulder and elbow, you utilize larger muscle groups that allow for sweeping, fluid, and consistent arcs. This transition is essential for achieving long, graceful strokes that maintain a uniform pressure across the entire surface of the paper.
To practice this, tape a large sheet of paper to a wall or an upright easel. Standing while drawing forces you to engage your core and shoulder, preventing the tendency to hunch over and lock your wrist. Focus on "ghosting" your lines first, which involves moving your hand in the air above the paper to rehearse the motion before the pen touches the surface. This mental and physical preparation ensures that the final mark is intentional and executed with the necessary momentum.
How to vary line weight for depth and dimension
Line weight refers to the thickness and darkness of a mark, which is the primary tool for defining form and space. A static, uniform line often looks flat and lifeless, whereas a line that thickens and thins adds a sense of volume and weight. To achieve this, you must adjust the pressure applied to your tool or change the angle at which the nib or pencil tip meets the paper. Thicker lines typically represent shadows or objects closer to the viewer, while thinner lines suggest light, distance, or refined edges.
You can systematically practice line weight variation using these steps:
- Start a line with very light pressure, barely touching the paper.
- Gradually increase downward pressure as you move the stroke to create a taper.
- Release the pressure smoothly at the end of the stroke to create a clean, sharp point.
- Repeat this process while changing the speed of your hand to see how friction affects the texture of the mark.
Why shaky lines happen and how to fix them
Shaky or "hairy" lines are usually the result of hesitation and slow drawing speeds. When you move the drawing tool too slowly, your hand has more time to react to minor muscle tremors, resulting in a jagged, uneven appearance. Increasing your speed creates a more confident mark because the hand moves faster than the tremors can manifest. While it may feel counterintuitive to move quickly when you want accuracy, speed is actually the most effective way to produce a crisp, clean edge.
Common mistakes that contribute to poor line quality include:
- Gripping the pencil or pen too tightly, which restricts blood flow and causes muscle fatigue.
- Focusing exclusively on the tip of the tool rather than the intended destination of the line.
- Using paper with too much texture, which causes the tip to skip or vibrate during the stroke.
- Failing to warm up the hand with simple circles and figure-eights before starting a detailed piece.
Best tools for improving line quality
The choice of equipment significantly influences the character of your lines, especially for beginners. Graphite pencils offer a wide range of values based on lead hardness; for instance, an HB pencil provides a neutral middle ground, while a 4B pencil is softer and allows for much bolder, darker marks with minimal pressure. If you prefer ink, technical pens like the Sakura Pigma Micron provide a consistent, non-varying line that is excellent for learning precision. Conversely, brush pens allow for extreme variation in line width depending on the angle and pressure applied.
When selecting tools, consider the surface texture of your paper. Smooth, hot-pressed paper allows for fluid, fast movements without resistance, making it ideal for ink work. Rougher, cold-pressed paper provides "tooth," which grabs the graphite and allows for more nuanced shading but makes clean, continuous lines more difficult to achieve. Experimenting with different combinations of tools and surfaces will help you identify which setup best supports your personal drawing style and desired aesthetic outcomes.
Common mistakes when practicing line control
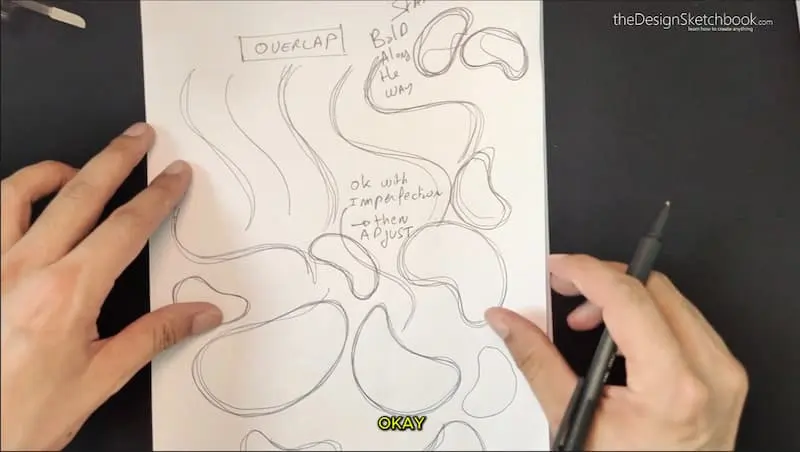
One of the most frequent errors is the tendency to "connect the dots" with short, choppy strokes. This approach creates a broken, messy appearance that lacks the energy of a singular, decisive mark. Even if a line is slightly inaccurate, it is often better to leave it as a single stroke rather than layering multiple small marks to correct it. Embracing the "mistake" and moving forward is a critical part of developing the muscle memory required for professional-level line quality.
Another mistake is neglecting the importance of posture and environment. Drawing while slumped over a desk compresses the chest and restricts the natural range of motion in the arm. Ensure your workspace is well-lit and that your paper is positioned at an angle that allows your arm to move freely. By maintaining a relaxed posture and keeping your hand loose, you allow your natural rhythm to guide the pen. Consistent practice of these fundamental habits will eventually make high-quality, confident lines a natural part of your artistic process.
Key facts
- Use your entire arm, including the shoulder and elbow, rather than just your wrist to create fluid, consistent strokes.
- Apply consistent pressure throughout the entire length of a line to avoid uneven thickness or "blobbing."
- Practice "ghosting" by moving your hand in the air above the paper to rehearse the motion before making contact.
- Hold your drawing tool at different distances from the tip to vary the weight and sensitivity of your lines.
- Rotate your paper to ensure your hand is always moving in the most comfortable and natural arc for your wrist.
- Use high-quality, smooth-surfaced paper to reduce friction and prevent the drawing tip from catching or skipping.
The bottom line
Improving line quality is a matter of physical coordination and intentional practice. By shifting from small wrist movements to larger, shoulder-driven motions, you gain the stability needed for clean, fluid strokes. Consistent pressure and the use of proper materials further enhance your control. Treat every mark as a deliberate action, focusing on the rhythm and confidence of your hand to achieve professional, expressive results.
People also ask
Does the type of pen or pencil affect line quality?
Yes, the medium directly influences the line's texture and weight. Graphite pencils allow for variable pressure, while technical pens provide a uniform, precise line that does not change regardless of force.
How can I stop my lines from looking shaky?
Shaky lines often result from drawing too slowly or using only the small muscles in your fingers. Speeding up your stroke and engaging your shoulder muscles creates a more confident, steady trajectory.
What is the benefit of cross-hatching?
Cross-hatching improves the perceived quality of a drawing by creating depth and shading through overlapping lines. It allows an artist to build value and form without relying on smudging or blending.
Should I lift my pen between strokes?
Lifting your pen is necessary for complex forms, but frequent stopping can break the visual flow. Try to connect lines at natural corners or intersections to maintain a cohesive look.
Why do my lines look blurry or messy?
This usually happens when your hand drags across wet ink or soft graphite. Place a scrap piece of paper under your palm to protect the drawing surface while you work.
How often should I practice line exercises?
Daily practice of simple shapes, such as circles and parallel lines, builds muscle memory. Even ten minutes of focused drills will significantly improve your control and consistency over time.
This answer was created with the help of AI research tools and reference sources. Spotted an error? Let us know — we correct mistakes quickly. See our editorial policy.