What are the basic drawing skills?
Short answer
Basic drawing skills involve mastering line quality, understanding light and shadow, and accurately perceiving proportions. These fundamental techniques allow artists to translate three-dimensional objects onto a two-dimensional surface. By developing hand-eye coordination and spatial awareness, beginners can effectively communicate form, depth, and texture, forming the essential foundation for all visual art.
On this page
How to improve hand-eye coordination
Drawing is primarily a cognitive process that requires training the eyes to see accurately before the hand moves. Beginners often struggle because they draw what they think an object looks like rather than what is actually in front of them. To overcome this, focus on observing the negative space—the empty areas around and between the subject—which helps define the silhouette more precisely.
Consistent practice is the only way to build muscle memory and fluid line control. Engage in "blind contour drawing," where you trace the edges of an object with your eyes while your hand follows the movement on paper without looking down. This exercise forces your brain to synchronize visual input with physical output. Follow these steps to refine your coordination:
- Select a simple object like a cup or a piece of fruit.
- Place your pencil on the paper and focus your eyes on the object's edge.
- Move your eyes slowly along the contour while your hand mirrors the path.
- Keep the pen moving continuously without lifting it from the page.
Why perspective and proportion matter
Perspective creates the illusion of depth, transforming a flat sheet of paper into a believable three-dimensional space. The most common method is linear perspective, popularized during the Italian Renaissance by figures like Filippo Brunelleschi. By establishing a horizon line and vanishing points, you can accurately render how objects shrink as they recede into the distance.
Proportion ensures that the relationships between different parts of an object remain consistent. If an artist draws a head too large for a body, the entire composition feels unbalanced. Use your pencil as a measuring tool by holding it at arm's length to compare the height and width of various elements. This technique, known as sighting, helps maintain internal consistency throughout your drawing. When you ignore these mathematical principles, the drawing will appear distorted or "flat," regardless of how much detail you add to the surface textures.
Best shading techniques for beginners
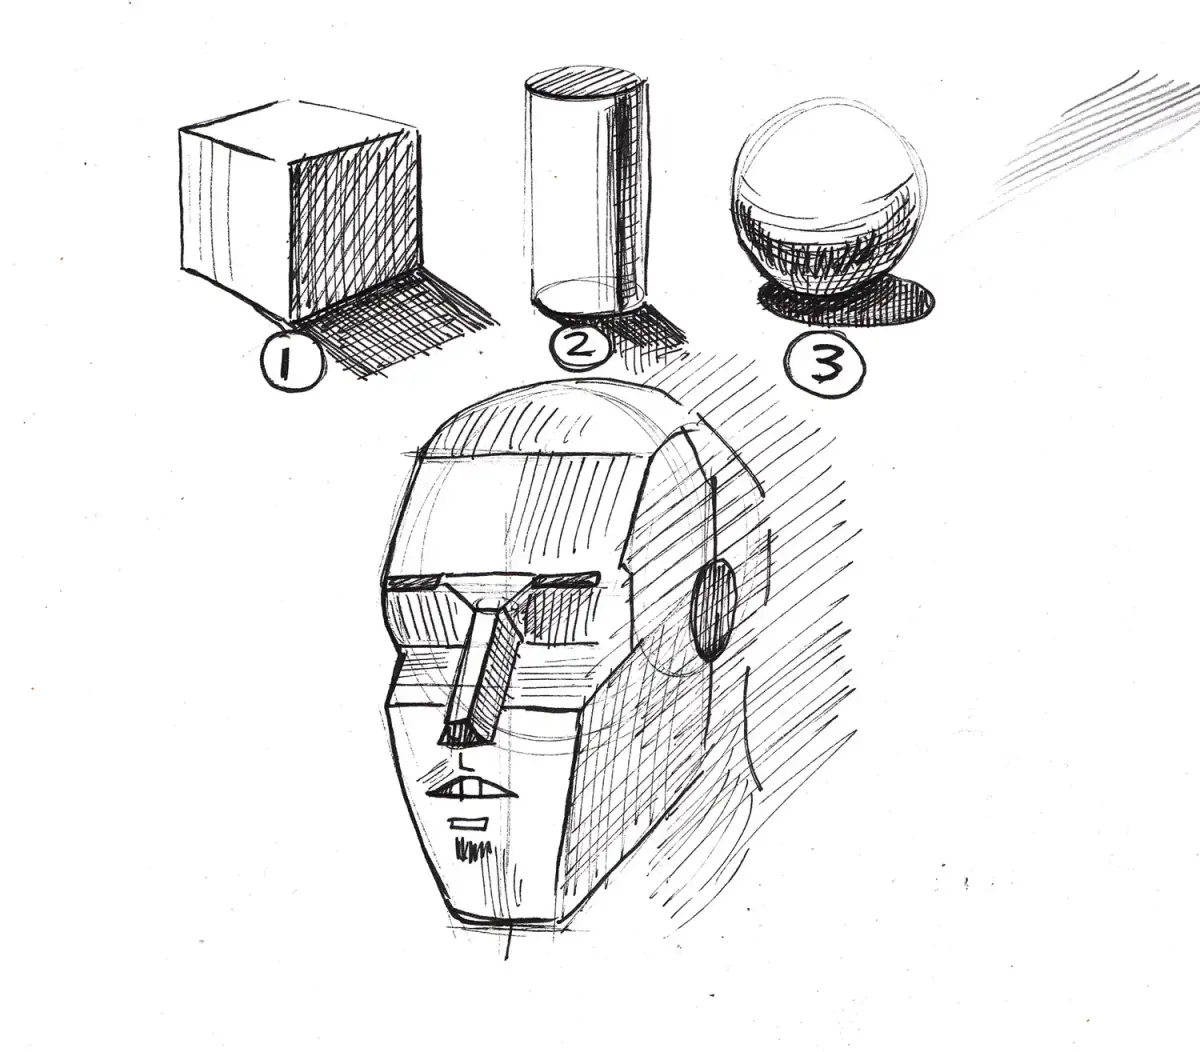
Shading gives an object volume, weight, and a sense of being illuminated by a specific light source. To begin, identify the "highlight," the "mid-tone," and the "core shadow" on your subject. The core shadow is the darkest part of the object, while the cast shadow provides the necessary anchor to the ground.
Mastering value—the range of lightness and darkness—requires patience and control over your medium. Avoid the common mistake of using only a single pencil grade; instead, use a range from 2H (hard, light) to 6B (soft, dark) to achieve a full spectrum of tones. Use these techniques to build depth:
- Hatching: Drawing parallel lines close together to create darker areas.
- Cross-hatching: Layering perpendicular lines to deepen shadows and create texture.
- Blending: Using a stump or soft cloth to smooth out transitions between light and dark.
- Stippling: Applying small dots to build value through density rather than lines.
Common mistakes when starting to draw
One of the most frequent errors for beginners is "petting the line," which involves using short, scratchy, and hesitant strokes. This creates a fuzzy, uncertain appearance that lacks confidence. Instead, aim for long, deliberate, and fluid strokes. If you make a mistake, do not immediately reach for an eraser; treat the error as a guide for correcting your next line.
Another major mistake is neglecting the background or the environment surrounding the object. Beginners often draw an object floating in a void, which makes the composition feel isolated and incomplete. Always consider the ground plane and how the light interacts with the entire scene, not just the primary subject. Finally, avoid rushing the initial layout phase. Spending extra time on the "under-drawing" or the basic geometric structure prevents significant proportion errors that become nearly impossible to fix once you have started adding detailed shading or color.
How long does it take to learn
Learning to draw is a lifelong pursuit, but significant progress can be observed within a few months of dedicated practice. Most experts suggest that consistent, shorter sessions are more effective than sporadic, long ones. Aim for at least 20 to 30 minutes of focused practice daily to see noticeable improvements in your line quality and observational skills within ninety days.
Progress is not linear, and every artist experiences plateaus where they feel their skills have stagnated. This is a normal part of the learning process. To keep moving forward, vary your subjects and mediums to keep your brain engaged. Keep a sketchbook to document your progress, as looking back at work from six months prior is the best way to recognize how far you have come. By focusing on the fundamentals—line, shape, form, value, and perspective—you will build a robust technical repertoire that allows you to express your creative vision with increasing clarity and confidence over time.
Key facts
- Use a light touch with your pencil to allow for easy erasing and adjustments during the initial sketching phase.
- Practice "contour drawing" by tracing the edges of objects with your eyes while your hand follows the shape on paper.
- Understand value by creating a scale of five to seven shades ranging from pure white to the darkest black.
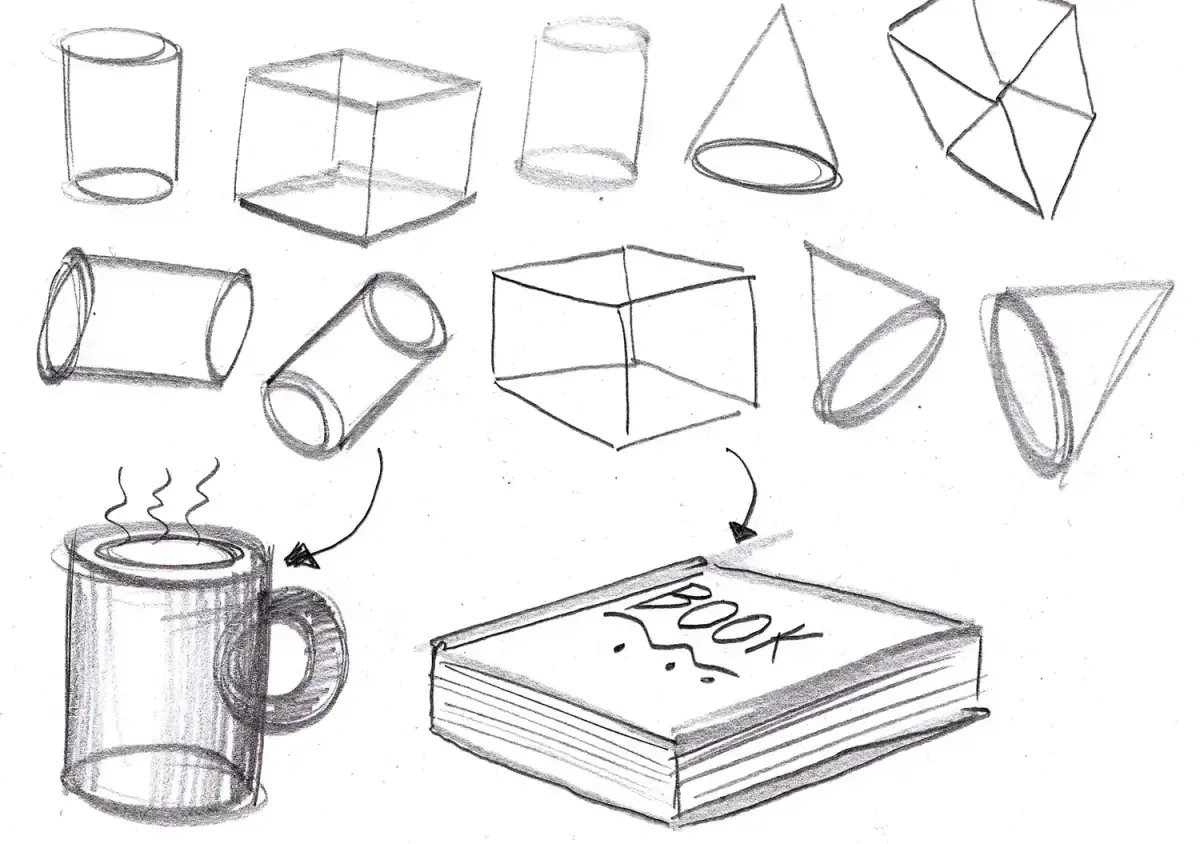
- Use basic geometric shapes like spheres, cubes, and cylinders to break down complex subjects before adding details.
- Always check your proportions by comparing the height and width of your subject using your pencil as a measuring tool.
- Hold your pencil further back from the tip to encourage looser, more fluid lines rather than stiff, cramped strokes.
The bottom line
Mastering drawing is a journey of learning to see the world as a collection of shapes, values, and proportions rather than finished objects. By practicing fundamental techniques like shading, perspective, and contouring, you develop the necessary hand-eye coordination to translate your vision onto paper. Consistent daily practice remains the most reliable path to technical proficiency, allowing your artistic voice to emerge through disciplined, deliberate observation.
People also ask
How often should I practice drawing to see improvement?
Aim for at least 15 to 30 minutes of focused practice daily. Consistent, short sessions are significantly more effective for building muscle memory than long, infrequent marathon drawing sessions.
What is the best type of pencil for beginners?
Start with an HB pencil, which offers a balanced hardness suitable for both light sketching and darker shading. As you progress, you can add a 2B for softer, darker lines and a 2H for lighter, precise work.
Should I use an eraser while drawing?
Use an eraser sparingly during the early stages to avoid damaging the paper surface. Think of your initial lines as a map; it is often better to draw over them lightly than to constantly erase.
How do I draw things in perspective?
Perspective relies on finding a horizon line and placing vanishing points where parallel lines appear to converge. Practice drawing simple boxes at different angles to understand how lines recede into the distance.
Is it better to draw from life or from photographs?
Drawing from life is superior for understanding depth, light, and spatial relationships. Photographs are useful for complex subjects, but they flatten the image and can lead to inaccurate perspective.
Why do my drawings look flat?
Drawings often look flat because they lack a full range of values or proper shading. Focus on identifying the light source and adding shadows to create the illusion of three-dimensional volume.
This answer was created with the help of AI research tools and reference sources. Spotted an error? Let us know — we correct mistakes quickly. See our editorial policy.