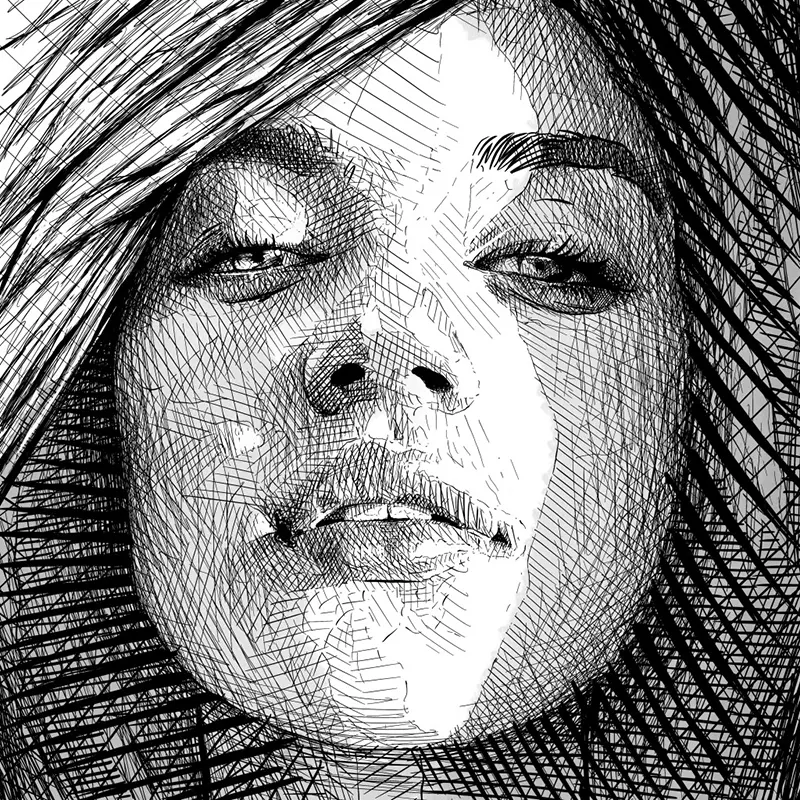
How do you draw with ink?
Short answer
Drawing with ink involves using fluid pigments applied to a surface via tools like dip pens, technical pens, or brushes. You must master pressure control, ink flow, and drying times to create varying line weights and textures. Because ink is permanent, success relies on careful planning, layering techniques, and patience.
On this page
What tools do you need to start drawing with ink?
To begin, you need a basic set of supplies that balance control and versatility. The most essential tools are archival-quality pens, which are resistant to fading and water. Technical pens, such as those made by Sakura or Staedtler, provide consistent line widths, while dip pens with interchangeable nibs allow for expressive, variable strokes. Choose a smooth, heavyweight paper—ideally 100lb or higher—to prevent the ink from bleeding or feathering across the surface.
Beyond the pens, consider acquiring a few essential accessories to refine your workflow. A small bottle of waterproof India ink is the industry standard for dip pens due to its deep opacity. You should also keep a set of brushes for filling in large dark areas, as using a pen for solid blocks of ink is inefficient and can damage the nib.
- Technical pens (0.1mm to 0.8mm for detail and outline)
- Dip pen holder and assorted nibs (G-nibs are best for beginners)
- Waterproof India ink or bottled drawing ink
- Smooth Bristol board or high-quality multimedia paper
- A soft graphite pencil for light preliminary sketches
How to use ink techniques for shading and depth
Since ink does not blend like charcoal or graphite, you must use specific mark-making techniques to create the illusion of volume and shadow. Cross-hatching is the most common method, involving overlapping sets of parallel lines to build darker tones. Stippling, which uses thousands of tiny dots, offers a more subtle transition between light and shadow but requires significantly more time to execute.
Contour hatching is another vital technique where lines follow the physical curvature of the subject. By spacing these lines closer together in recessed areas and further apart in highlighted zones, you can define the three-dimensional form of an object. Always work from light to dark, as you cannot erase ink once it has been applied to the page.
- Practice parallel lines of equal length to build muscle memory.
- Create gradients by varying the distance between your lines.
- Use cross-hatching at 45-degree angles to darken specific shadow areas.
- Experiment with stippling to soften edges where a hard line feels too aggressive.
Best ink drawing tips for beginners
The most critical habit for a beginner is learning to control the pressure of your hand. With a dip pen, pressing too hard will cause the tines of the nib to spread, resulting in an unintended "blob" of ink or a thick, messy line. Start by holding the pen at a 45-degree angle to the paper, letting the weight of the tool do the work rather than forcing the ink out.
Patience is equally important when managing drying times. Even if an area looks dry, ink can remain wet in the fibers of the paper, leading to accidental smudging when your hand passes over it. Use a clean piece of scrap paper to rest your hand on while you work, effectively creating a bridge that protects your progress from oils and moisture.
- Always test your ink flow on a scrap piece of paper before touching the final drawing.
- Keep a damp cloth nearby to wipe your nibs frequently, as dried ink can clog the flow.
- Use a light touch; you can always add more ink, but you cannot remove it.
- Work from the top left to the bottom right if you are right-handed to avoid smearing.
Why ink drawings smear and how to prevent it
Smearing is the most common frustration for artists working with ink. It typically happens because the ink has not fully cured or because the artist’s hand has introduced skin oils to the paper surface. High-quality, non-porous papers are less prone to smearing, but they also take longer to dry. Always allow each layer to set for several minutes before moving your hand across the area.
Another cause of smearing is the use of non-waterproof inks. If you plan to add watercolor or markers over your ink lines, ensure your ink is labeled "waterproof" or "permanent." If you use a water-soluble ink, any moisture introduced later—even from a humid room or a damp brush—will cause the lines to bleed. Using a fixative spray once the drawing is complete can provide a final layer of protection against environmental moisture.
Common mistakes when drawing with ink
One frequent error is overworking a drawing by adding too much detail in the early stages. Ink is a medium of clarity and contrast; adding excessive lines can turn a drawing into a muddy, grey mess. Focus on defining the primary shapes and the darkest shadows first, then add fine details only where they are necessary to define texture or focal points.
Another mistake is neglecting to clean your tools properly. Dried ink is notoriously difficult to remove from metal nibs and can permanently ruin a technical pen’s internal mechanism. Always rinse your nibs in warm water immediately after a session and store them dry. By maintaining your equipment and practicing disciplined mark-making, you will find that ink becomes a powerful and rewarding medium for your artistic expression.
Key facts
- India ink is the standard for drawing because it is waterproof, lightfast, and contains carbon black pigment.
- Use a dip pen with interchangeable nibs to achieve varying line weights based on the pressure applied.
- Technical pens, such as the Rotring or Staedtler brands, provide consistent, uniform lines for precise drafting.
- Hot-press watercolor paper is ideal because its smooth surface prevents fibers from snagging the pen tip.
- Always clean nibs immediately after use with warm water to prevent dried ink from clogging the delicate channels.
- Use a kneaded eraser to lift graphite guidelines gently without damaging the paper surface or smearing the ink.
The bottom line
Drawing with ink requires patience and a steady hand, as the medium is unforgiving of errors. By selecting the right tools—specifically archival India ink and smooth, heavy-weight paper—you can master the balance of line weight and shadow. Practice consistent maintenance of your pens and brushes to ensure longevity. With regular experimentation in hatching and wash techniques, you will develop a distinct and professional artistic style.
People also ask
Can I use fountain pen ink for artistic drawing?
Fountain pen ink is generally dye-based and not archival, meaning it will fade over time when exposed to light. It is also typically thinner than India ink, which can cause it to bleed or feather on lower-quality paper.
How do I create shading with ink?
Shading is achieved through techniques like cross-hatching, stippling, or contour lines. By varying the density and spacing of these marks, you can create the illusion of depth and tonal value.
What is the purpose of a wash in ink drawing?
An ink wash involves diluting ink with water to create transparent gray tones. This technique is used to add volume and atmosphere to a drawing, similar to using watercolor paints.
Why does my ink skip or fail to flow?
Skipping often occurs due to oils from your skin on the paper, which repel the ink. Always place a scrap piece of paper under your hand while drawing to keep the surface clean.
How can I fix a mistake in an ink drawing?
Ink is permanent, so mistakes are difficult to erase. Artists often use a sharp razor blade to carefully scrape dried ink off the paper or apply a small amount of opaque white gouache to cover errors.
Do I need special brushes for ink work?
Sable or high-quality synthetic round brushes are best for ink washes. They hold a sharp point and maintain their shape, allowing for both fine detailing and broad, fluid strokes.
This answer was created with the help of AI research tools and reference sources. Spotted an error? Let us know — we correct mistakes quickly. See our editorial policy.