How do you draw a violin?
Short answer
Drawing a violin requires establishing a symmetrical hourglass-shaped body, followed by adding the neck, fingerboard, and bridge. By mapping out the central axis, you ensure balance before detailing the f-holes, pegs, and strings. Focus on the graceful curves of the bouts and the precise placement of the bridge to achieve realism.
On this page
How to sketch the basic violin shape
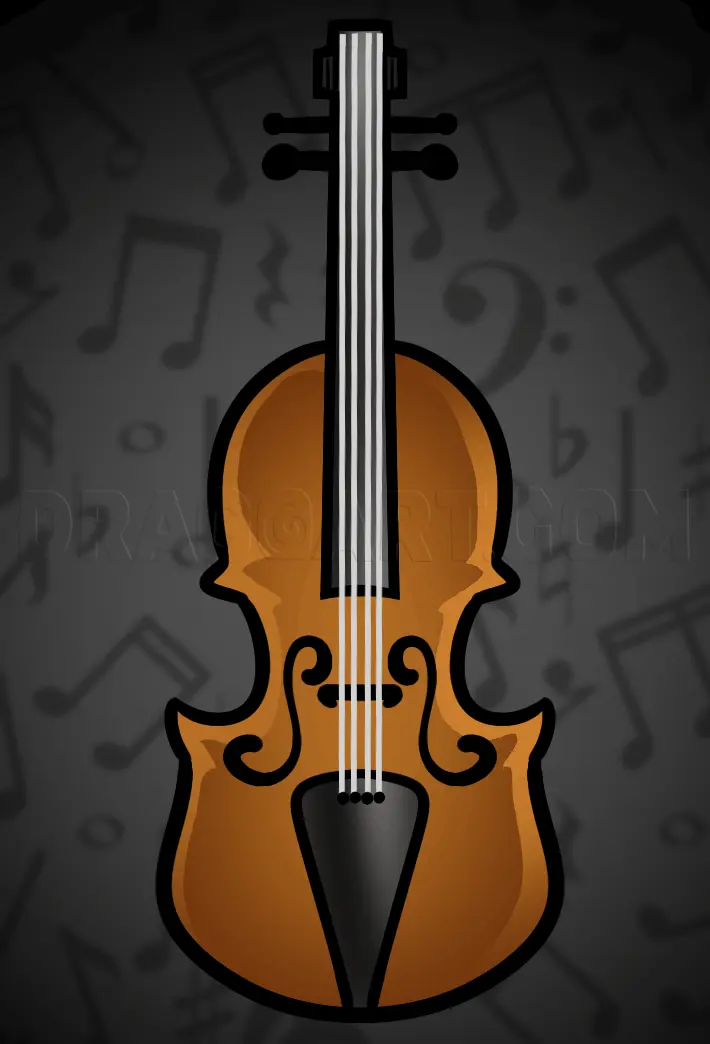
The foundation of a realistic violin drawing lies in its unique silhouette, often described as an hourglass or "figure-eight" shape. Begin by drawing a light vertical center line to serve as an axis, ensuring both sides remain symmetrical. Sketch two large, rounded shapes for the upper and lower bouts, connected by a narrower middle section known as the C-bouts. These middle curves must arch inward toward the center line, creating the space necessary for the bow to travel across the strings.
Once the primary body is outlined, add the neck and scroll at the top. The neck should be roughly one-third the length of the body, extending into a pegbox that terminates in a carved scroll. Keep your initial lines faint, as you will need to refine these edges later to give the instrument its characteristic elegance. Proper proportion is essential here; if the body is too wide or the neck too short, the drawing will lack the refined aesthetic of a classical string instrument.
How to add realistic details to the body
After establishing the outline, focus on the internal features that define a violin’s anatomy. The most prominent elements are the two f-shaped sound holes located on either side of the center line. These should be positioned symmetrically within the lower half of the body, mirroring each other perfectly. Between these holes, draw a small, slightly curved rectangle to represent the bridge, which sits atop the belly of the instrument.
- Draw the f-holes starting near the middle of the C-bouts, curving outward and then inward.
- Place the bridge exactly halfway between the top and bottom of the f-holes to maintain structural accuracy.
- Add the tailpiece at the bottom of the body, anchoring it to the endpin.
- Sketch the fingerboard as a long, thin trapezoid extending from the neck over the upper bout.
Adding these components provides the necessary depth and technical credibility to your drawing. Ensure the bridge is centered, as this is the focal point for the strings.
How to draw the strings and pegs
The strings are the final structural element that connects the scroll to the tailpiece. Draw four thin, parallel lines running from the tailpiece, over the bridge, and up the fingerboard to the pegbox. These lines should be perfectly straight and spaced evenly to mimic the tension of real steel or synthetic strings. At the pegbox, draw four small circles or T-shapes to represent the tuning pegs, which are inserted into the sides of the box.
- Use a sharp pencil to keep the string lines thin and consistent.
- Ensure the strings converge slightly as they approach the nut at the top of the fingerboard.
- Shade the area underneath the strings on the fingerboard to create a sense of elevation and depth.
- Draw the pegs at slightly different angles to suggest they have been adjusted for tuning.
By carefully placing these details, you create the illusion that the instrument is ready to be played. The tension in the lines is crucial for conveying the instrument’s functional nature.
Common mistakes when drawing a violin
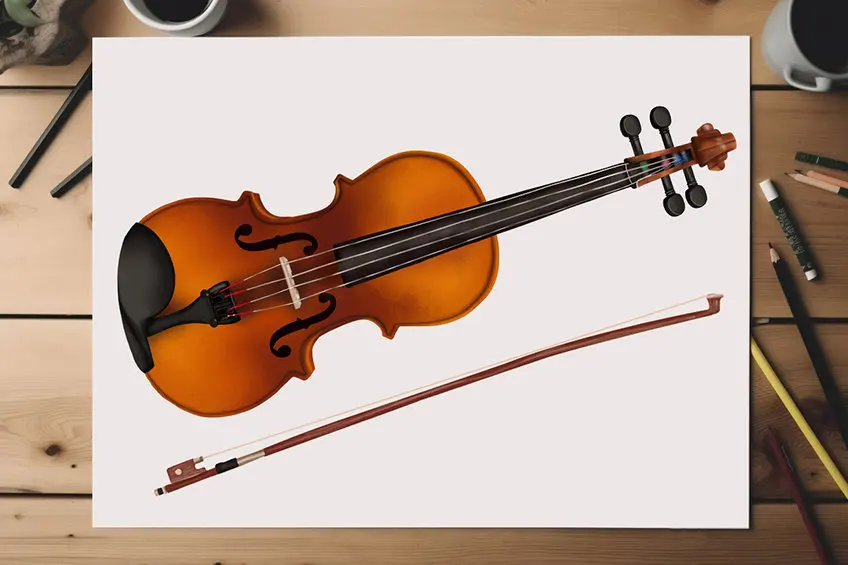
Many beginners struggle with the symmetry of the bouts, often resulting in a lopsided instrument. If the upper and lower bouts do not align with the center axis, the violin will look distorted rather than professional. Another frequent error is placing the bridge too high or too low, which disrupts the visual balance of the f-holes. Always check your proportions against the center line every few strokes to avoid these common pitfalls.
Another mistake is neglecting the thickness of the ribs, which are the sides of the violin. Without drawing a slight edge or shadow along the perimeter, the instrument will appear flat like a paper cutout. Add a thin line just inside the main outline to represent the edge of the wood, known as the purfling. This small detail adds significant realism by suggesting the three-dimensional construction of the violin’s box. Avoid making the scroll too small, as it should be a distinct, decorative feature that balances the weight of the body.
How to shade for a professional finish
Shading is the final step to transform a flat sketch into a convincing, polished illustration. Violins are made of varnished wood, which creates high-contrast highlights and deep, warm shadows. Use a soft graphite pencil to shade the edges of the bouts, as the body curves away from the viewer. Leave a thin, bright white strip along the edges to represent the reflective quality of the varnish. This technique, known as highlighting, makes the wood appear polished and smooth.
Focus your darkest shadows under the fingerboard and near the bridge, where the body is most obscured. Use a blending stump or a soft cloth to smooth out the transition between the dark shadows and the lighter surfaces of the belly. By varying your pencil pressure, you can suggest the curved, vaulted shape of the violin’s top plate. A well-shaded drawing will capture the rich, golden-brown luster of the wood, giving your violin a sense of weight and presence that elevates the entire composition.
Key facts
- A violin’s body is shaped like a figure-eight, featuring an upper bout, a narrower middle waist, and a larger lower bout.
- The two f-shaped sound holes are positioned symmetrically on the belly of the instrument, flanking the bridge.
- The neck is slender and attaches to a scroll, which is the decorative, spiral-shaped carving at the very top.
- The bridge is a small, arched piece of wood that sits perpendicular to the body, holding the four strings above the fingerboard.
- The tailpiece is located at the bottom of the body and serves as the anchor point for the strings.
- Always draw the center line first; the violin is perfectly symmetrical along its vertical axis.
The bottom line
Drawing a violin requires a focus on symmetry and proportion. By starting with a vertical guide line and building the figure-eight body around it, you ensure balance. Pay close attention to the placement of the bridge and the f-holes, as these define the instrument's character. With careful attention to the delicate neck and the spiral scroll, you can create a convincing representation of this complex stringed instrument.
People also ask
What is the most common mistake when drawing a violin?
The most frequent error is drawing the body without enough curvature, making it look like a rectangle. Ensure the waist is significantly indented to capture the classic hourglass silhouette.
Should I draw the strings individually or as a group?
Draw them as four distinct, parallel lines running from the tailpiece to the pegbox. Use a ruler to ensure they remain straight, as crooked strings will make the instrument appear warped.
How do I make the f-holes look realistic?
Focus on the curves of the "f" shape, ensuring the top and bottom circles are rounded. They should be placed in the center of the belly, pointing toward each other.
What is the purpose of the scroll at the top?
The scroll is a decorative feature that adds balance to the instrument's design. When drawing it, use a tight spiral motion to mimic the look of rolled wood.
Do I need to draw the bow separately?
It is helpful to draw the bow leaning against the violin or held at an angle. A bow is essentially a long, thin stick with a slight curve and a ribbon of horsehair.
How do I represent the shadows on the wood?
Violins have a high-gloss varnish that creates sharp highlights. Leave small white patches on the rounded bouts to suggest the reflection of light on the curved surface.
This answer was created with the help of AI research tools and reference sources. Spotted an error? Let us know — we correct mistakes quickly. See our editorial policy.