How do you draw a scooter?
Short answer
Drawing a scooter involves constructing the frame using simple geometric shapes like circles for wheels and rectangles for the deck and stem. By establishing these core proportions first, you can refine the details, such as the handlebars and folding mechanism, to create a realistic representation of a modern kick or electric scooter.
On this page
How to draw a scooter step by step
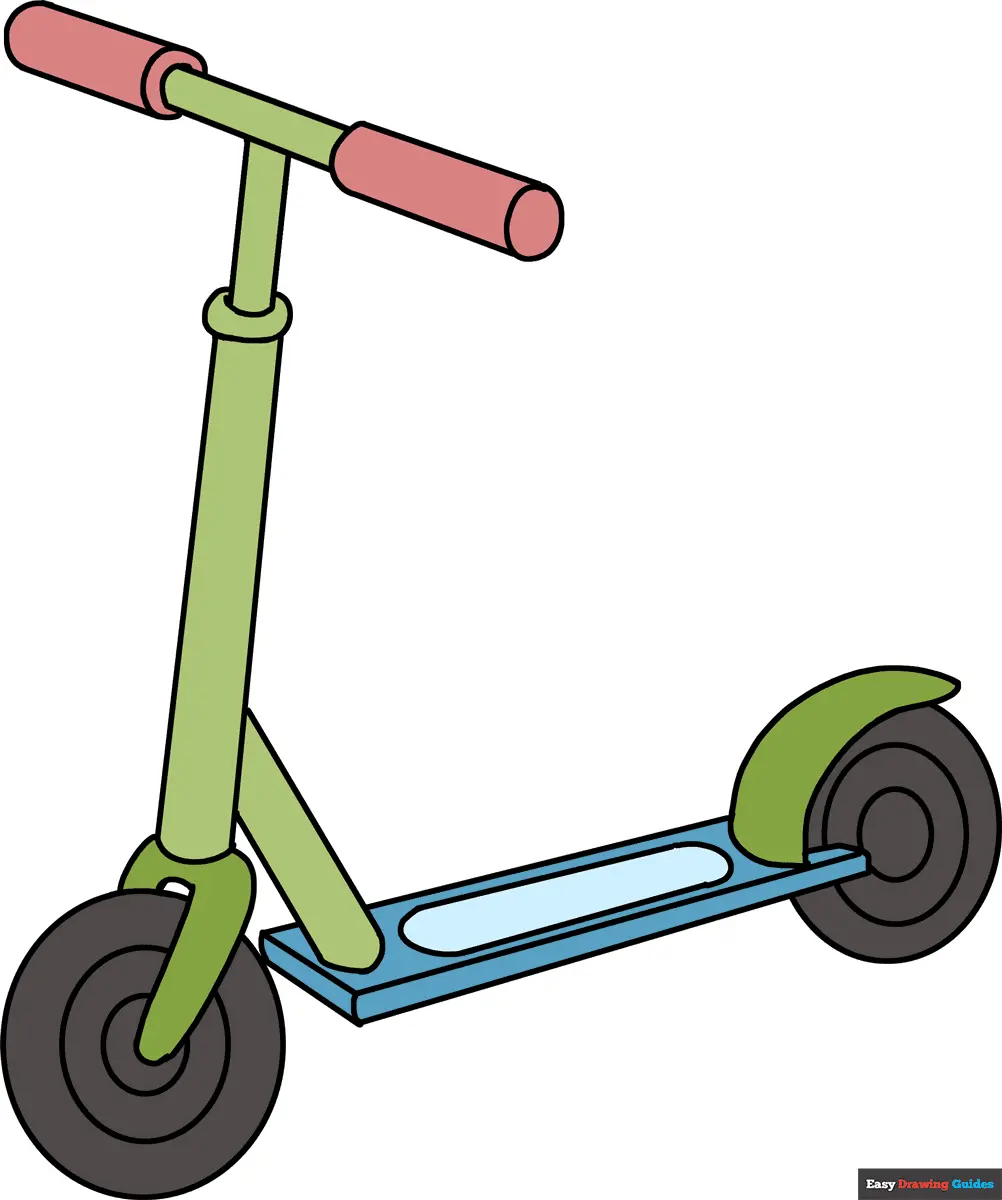
To begin your drawing, start by sketching the two wheels as circles at the bottom of your page. Place them far enough apart to accommodate the length of the scooter’s deck, which you should draw as a thin, horizontal rectangle connecting the lower halves of the wheels. Above the front wheel, draw a vertical line that extends upward to represent the steering column or stem.
Once the primary skeleton is established, add thickness to the stem by drawing a parallel line next to it. At the top of this stem, draw a horizontal T-shape to form the handlebars. You can add grips at the ends of these bars by drawing small, rounded cylinders. Finally, connect the stem to the deck using a triangular gusset to represent the folding hinge mechanism found on most commercial models.
- Draw two circles for the wheels, ensuring they are aligned horizontally.
- Connect the wheels with a narrow rectangle to form the deck.
- Draw a vertical line for the stem rising from the front wheel.
- Add a horizontal bar at the top for the steering.
- Refine the edges and add details like the brake or kickstand.
Best drawing techniques for beginners
The most effective way to approach this subject is to treat the scooter as a collection of basic mechanical parts. Beginners often struggle with perspective, so it is helpful to draw a light grid or a horizon line before starting. By visualizing the scooter from a side profile first, you avoid the complexities of foreshortening and can focus on the accurate relationship between the wheels and the deck.
Using a light graphite pencil for your initial construction lines allows you to erase and adjust proportions without damaging the paper. Once the shape is correct, use a darker lead or an ink pen to finalize the contours. Focus on the negative space between the stem and the rear wheel to ensure the scooter does not look too crowded or unbalanced. Keeping your lines clean and purposeful will make the final drawing look professional and intentional.
How to add realistic details to your scooter
Once the basic structure is complete, you can elevate the drawing by adding functional features. Start by drawing the brake assembly, which typically sits as a small, curved flap over the rear wheel. Adding spokes to the wheels or filling them in with a solid dark tone can also help differentiate the rubber tires from the metallic frame. You might also include a small kickstand extending downward from the deck.
Shading is essential for giving the scooter a three-dimensional appearance. Identify a light source and apply shadows on the side of the stem and the underside of the deck. Use cross-hatching or smooth gradients to suggest the cylindrical nature of the handlebars and the metallic sheen of the frame. Small details, such as a headlight on the stem or a textured grip tape on the deck, provide the necessary contrast to make the object feel tangible and robust.
Common mistakes when drawing scooters
One of the most frequent errors is failing to maintain the correct scale between the wheels and the deck. If the wheels are too large, the scooter will look like a toy; if they are too small, the vehicle will appear unstable. Always check that the deck is long enough to hold a person’s feet, as this provides a subconscious cue of realism to the viewer. Another common mistake is drawing the stem at an incorrect angle, which can make the scooter look like it is leaning or falling over.
- Avoid drawing the handlebars too wide, as this disrupts the balance of the frame.
- Do not forget to connect the stem to the deck securely, as a floating stem looks unnatural.
- Ensure the wheels are perfectly circular, as oval-shaped wheels suggest motion blur that might not be intended.
- Refrain from adding too many complex wires or cables until you have mastered the basic mechanical structure.
Why proportions matter in vehicle illustration
Proportion is the foundation of believable vehicle design. In the context of a scooter, the height of the handlebars relative to the deck determines the ergonomics of the design. If the stem is too short, the scooter appears uncomfortable to ride, whereas an overly long stem can make the frame look fragile. Professionals often use a "head-to-body" ratio concept similar to figure drawing, where the wheel diameter serves as the unit of measurement for the rest of the frame.
By maintaining consistent proportions, you ensure that your drawing communicates the intended size and purpose of the scooter. Whether you are drawing a small kick scooter for children or a heavy-duty electric model, the relationship between the components must remain logical. Practice sketching different styles of scooters to understand how changing the wheel size or deck length alters the overall aesthetic. Consistently measuring your work against your initial reference points will lead to a more accurate and satisfying final result.
Key facts
- Start by drawing two small circles for the wheels, connected by a horizontal line representing the deck.
- A vertical line rising from the front wheel serves as the steering column, topped with a horizontal bar for the handlebars.
- Keep the deck low to the ground to maintain the correct proportions of a standard kick scooter.
- Use geometric shapes like rectangles for the deck and cylinders for the handle grips to build structural volume.
- Add a small fender over the rear wheel to ground the design and provide realistic detail.
- Focus on the angle of the steering column, as a slight tilt forward creates a sense of motion and balance.
The bottom line
Drawing a scooter is a straightforward process that relies on basic geometric shapes. By establishing the wheels and deck first, you create a stable foundation for the steering column and handlebars. Focus on maintaining consistent proportions and adding small details like fenders or hinges to enhance realism. With practice, you can easily adjust these elements to depict various scooter styles, from classic kick models to modern electric versions.
People also ask
Should I draw the scooter from a side view or an angle?
A side view is the easiest for beginners because it clearly shows the relationship between the wheels and the deck. An angled view adds depth but requires understanding perspective to keep the wheels looking circular rather than flat.
How do I make the wheels look realistic?
Draw two concentric circles for each wheel to represent the rim and the tire. Adding a few spokes or a solid hub helps define the wheel's center point.
What is the most common mistake when drawing a scooter?
Many beginners make the steering column too short or too long relative to the deck. Always ensure the handlebars reach approximately waist height to maintain proper scale.
Do I need to include a folding hinge?
Including a hinge where the steering column meets the deck adds a professional, mechanical touch. It is typically represented as a small, thick rectangular joint at the base of the column.
How can I show that the scooter is in motion?
You can draw small horizontal lines behind the wheels to suggest speed. Adding a slight tilt to the handlebars can also imply that the rider is turning or accelerating.
Should I use a ruler for the straight parts?
Using a ruler helps maintain clean lines for the deck and the steering column. However, freehand drawing often gives the sketch a more organic and artistic feel.
This answer was created with the help of AI research tools and reference sources. Spotted an error? Let us know — we correct mistakes quickly. See our editorial policy.