How do you draw a river for beginners?
Short answer
Drawing a convincing river requires following the natural flow of the landscape while using perspective to create depth. By sketching a tapering path that widens toward the foreground and incorporating banks that follow the water's contour, you can create a realistic scene. Focus on horizontal ripples and reflections to define the surface.
On this page
How to sketch the basic shape of a river
To draw a river, start by establishing the horizon line and the vanishing point. Rivers are natural features that obey the laws of perspective; they appear narrow and straight in the distance and widen as they approach the viewer. Use light, sweeping lines to map out the general path of the water, ensuring it follows the contours of the terrain. Avoid perfectly straight lines, as natural waterways are defined by curves and irregularities caused by erosion and obstacles.
Once the path is established, draw the riverbanks on both sides. These banks should mirror the curves of the river, creating a sense of volume and space. Keep your initial sketches loose and light so you can easily adjust the width of the river as it moves toward the foreground. Remember that the river should look like it is resting within the landscape, not sitting on top of it.
Best drawing techniques for beginners
When beginning, focus on the relationship between the river and the surrounding environment. Use simple shapes to represent trees, rocks, or hills along the banks, which helps ground the river in reality. Practice using varied line weights to create interest; thicker lines can suggest the near bank, while thinner, fainter lines suggest the distant horizon. This simple contrast immediately adds depth to a two-dimensional drawing.
- Sketch a light "S" curve to represent the river's winding path.
- Draw two parallel lines that follow the curve, widening them as they get closer to the bottom of the page.
- Add small, irregular shapes along the banks to represent pebbles or vegetation.
- Use horizontal, light strokes across the water surface to indicate flow.
How to add texture and water movement
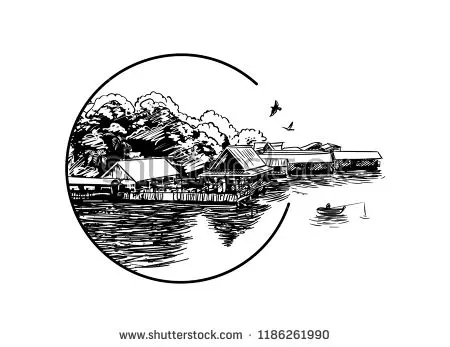
Water is a reflective, fluid surface, and capturing its movement is key to a realistic drawing. Use horizontal lines or long, thin ellipses to suggest the surface of the water, as these mimic the way light hits ripples. Keep these lines closer together in the distance and space them out as they move toward the foreground. This technique, known as foreshortening, helps the viewer perceive the river as a flat, receding plane.
Avoid drawing long, continuous lines across the entire width of the river, as this can make the water look like a solid object. Instead, use broken, intermittent strokes to suggest movement and transparency. If you want to show a faster current, create sharper, more jagged lines near rocks or bends in the river. These small details provide the necessary visual cues to distinguish between a calm, slow-moving stream and a rushing mountain river.
How to draw reflections in water
Reflections are essential for making a river feel authentic. A reflection is essentially a mirrored, slightly distorted version of the objects above the water, such as trees or mountains. To draw these, extend the vertical lines of the objects downward into the river area. Use softer, slightly wavier lines for the reflection than you used for the object itself to indicate the movement of the water surface.
- Use a darker pencil to outline the base of the object at the water's edge.
- Draw the reflection using vertical, slightly blurred strokes.
- Keep the reflection darker than the object being reflected to create a sense of depth.
- Add horizontal ripples over the reflection to break up the image, suggesting the water is shifting.
If the water is very still, the reflection can be quite clear and mirror-like. However, if the water is flowing quickly, the reflection will be heavily distorted or even absent. Practice observing real rivers to see how light and shadow interact with the surface.
Common mistakes when drawing rivers
One of the most frequent errors beginners make is drawing the river as a perfectly uniform shape. Nature rarely creates perfect symmetry, so ensure your riverbanks have different shapes and depths. Another common mistake is placing the horizon line too low, which can make the river look like it is falling off the page rather than flowing through the landscape. Always ensure the river has a clear entry and exit point within your composition.
Finally, avoid over-detailing the water surface. Beginners often try to draw every single ripple, which can make the water look cluttered or stiff. Focus on the overall flow and the way the water interacts with the banks. By keeping the center of the river relatively clear and focusing your detail work on the edges and reflections, you will create a much more professional and believable result. Patience is your best tool; take your time to observe how water behaves in the real world before committing to your final lines.
Key facts
- Rivers always flow from higher elevation to lower elevation, typically ending in a lake, sea, or ocean.
- Use horizontal, wavy lines to represent the water surface, spacing them closer together as they move toward the horizon.
- Draw the river banks wider at the bottom of your page and narrower toward the top to create a sense of perspective.
- Incorporate natural curves and bends; rivers rarely travel in perfectly straight lines due to terrain obstacles.
- Add rocks or reeds along the riverbanks to break up the smooth lines and provide visual interest.
- Reflect nearby trees or mountains in the water using vertical, slightly distorted strokes to suggest a liquid surface.
The bottom line
Drawing a realistic river relies on mastering perspective and organic movement. By narrowing the river as it recedes toward the horizon and using horizontal, flowing lines, you create depth and motion. Avoid rigid, parallel lines and embrace the natural irregularities of the landscape. With careful attention to how water interacts with banks and light, you can transform simple strokes into a convincing, tranquil waterway.
People also ask
Should a river be drawn with a single line or a double line?
A single line is sufficient for a distant stream, but a double line is necessary for a river that has width. Drawing two lines allows you to define the banks and fill the space with water textures.
How do I make a river look like it is moving?
Use horizontal strokes that follow the curve of the banks to suggest flow. Adding small "V" shapes or dashes near rocks indicates ripples and current.
Why does my river look like it is standing up on the page?
This usually happens because the river is too wide at the top or lacks proper perspective. Ensure the river narrows significantly as it reaches the vanishing point near the horizon.
What is the best way to color a river?
Use darker blues or greens for the deeper center and lighter shades near the banks. Adding a touch of white or light gray can simulate the reflection of the sky on the water's surface.
Do rivers need to be perfectly symmetrical?
No, natural rivers are asymmetrical and irregular. An organic, winding path will always look more realistic than a rigid, geometric shape.
What common mistake should I avoid when drawing banks?
Avoid drawing perfectly parallel lines for the riverbanks. Real rivers have varying widths, with wider sections in flat areas and narrower passages where the terrain is constricted.
This answer was created with the help of AI research tools and reference sources. Spotted an error? Let us know — we correct mistakes quickly. See our editorial policy.