How do you draw a mountain cabin?
Short answer
Drawing a mountain cabin involves establishing a strong geometric foundation, starting with a simple triangular roof atop a rectangular base. By incorporating perspective lines, natural textures like wood grain or stone, and atmospheric details such as distant peaks or pine trees, you can create a realistic, inviting alpine structure on paper.
On this page
How to sketch the basic structure of a cabin
To begin your drawing, focus on the fundamental geometric shapes that define a cabin. Start by drawing a rectangle to represent the main living space. Above this, add a triangle for the roof, ensuring the pitch is steep enough to suggest a snowy mountain environment where heavy precipitation requires shed-like angles. Use a light graphite pencil to sketch these lines, as you will need to refine them later.
Once the basic silhouette is established, add depth by drawing a second set of lines to create three-dimensional walls. Connect the corners of your rectangle to a vanishing point on the horizon line to ensure accurate perspective. This creates the illusion of volume, turning a flat shape into a solid structure. Remember to keep your lines clean and light during this initial phase to allow for easy adjustments.
- Draw a light horizon line across your paper.
- Sketch a rectangle for the front wall.
- Add a triangle on top for the roof gable.
- Extend lines from the corners to create the side wall.
- Define the thickness of the roof eaves.
How to add realistic architectural details
After establishing the frame, focus on the features that make the building feel like a home. Doors and windows should be placed symmetrically or in a logical functional pattern. For a mountain cabin, consider adding a porch or a stone chimney on one side. These elements break up the flat surfaces and add visual interest, grounding the structure within its environment.
When detailing the exterior, consider the materials used in mountain construction. Vertical or horizontal lines can represent log siding, while small, irregular shapes suggest stone foundations or chimneys. Add a door with a simple handle and window panes with light cross-hatching to imply glass. Keep the scale consistent; windows should be proportional to the door, typically appearing slightly smaller or equal in height to maintain structural realism.
- Use vertical strokes for log siding textures.
- Add a dark rectangle for a recessed doorway.
- Draw small squares for window panes.
- Include a stone chimney using clustered, irregular shapes.
- Add a wood grain pattern to the door surface.
Why perspective is important for cabin drawings
Perspective is the most critical element in making your cabin look professional rather than like a child’s drawing. By using one-point or two-point perspective, you ensure that the lines of the roof and walls converge correctly. If the lines do not meet at a consistent vanishing point, the cabin will appear distorted or tilted, which ruins the sense of realism you are trying to achieve.
To master this, always identify your eye level first. If the cabin is viewed from below, the roof will appear more prominent, while a high-angle view will emphasize the roof's surface area. Practice drawing a simple box from different angles to understand how lines recede. This spatial awareness allows you to place the cabin naturally within a landscape, making it look like it belongs on the mountain slope rather than floating above it.
Best shading techniques for beginners
Shading gives your cabin weight and dimension by defining where the light source hits the structure. Decide on the direction of your light—for example, coming from the upper right—and keep it consistent. Apply darker tones to the side of the cabin facing away from the light and under the roof eaves. This creates a high-contrast effect that makes the cabin pop off the page.
Use the side of your pencil lead for soft, broad shadows and the tip for sharp, dark accents. Blending stumps or a soft tissue can help smooth out the transitions between light and shadow, especially on curved logs or stone surfaces. Avoid over-shading; leave some areas of the paper white to represent bright highlights, such as sunlight reflecting off a window pane or the edge of the roof.
Common mistakes when drawing mountain cabins
One common error is ignoring the environment surrounding the cabin. A cabin placed on a flat, empty plane looks isolated and unnatural. To fix this, add foreground elements like rocks, tall grass, or pine trees. These additions provide context and scale, helping the viewer understand the cabin’s size and its rugged, high-altitude setting. Use varied line weights to push distant mountains into the background.
Another frequent mistake is using overly complex textures that clutter the drawing. Beginners often try to draw every single log or stone, which can make the cabin look busy and chaotic. Instead, suggest textures through selective detail, focusing on areas near the viewer and leaving distant or shadowed parts of the cabin simpler. Finally, ensure your roof pitch is steep; a flat roof in a mountain setting looks structurally incorrect and lacks the classic alpine aesthetic that defines a traditional mountain cabin.
Key facts
- Start by drawing a simple triangle for the roof and a rectangle for the base to establish the cabin's proportions.
- Use a vanishing point on the horizon line to ensure your perspective lines for the walls and roof are accurate.
- Add texture to the walls by drawing horizontal lines to represent wooden logs or vertical lines for board-and-batten siding.
- Include a chimney on the side of the roof using a vertical rectangular prism to add visual interest and realism.
- Draw the windows and door using rectangular shapes, ensuring they align with the perspective of the cabin walls.
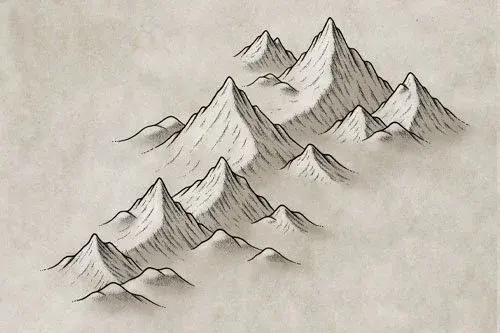
- Incorporate a jagged, irregular line behind the cabin to represent the silhouette of a mountain range.
The bottom line
Drawing a mountain cabin is a rewarding exercise in combining geometric structure with organic landscape elements. By establishing a solid perspective with basic shapes first, you provide a stable foundation for adding rustic textures and environmental details. Focus on balancing the rigid lines of the architecture with the irregular, jagged silhouettes of the mountains to create a compelling and harmonious scene that feels authentic and inviting.
People also ask
How do I make the cabin look like it is sitting on a hill?
Draw a curved or diagonal line behind the base of the cabin to represent the slope of the terrain. Adding small rocks or tufts of grass near the foundation helps anchor the structure to the ground.
What is the best way to draw realistic wooden logs?
Draw slightly wavy horizontal lines across the walls and add small circles at the corners where the logs overlap. Varying the width of the lines slightly prevents the cabin from looking too flat or mechanical.
Should I use a ruler for every line?
Use a ruler for the initial structural framework to keep the perspective correct. Freehand sketching for the final details, such as shingles or wood grain, adds a more natural and rustic aesthetic.
How do I add depth to the windows?
Draw a smaller rectangle inside the main window frame and add a thin line between them to represent the glass depth. Shading the interior of the window darker than the exterior walls suggests that the room is dimly lit.
What is the most common mistake when drawing mountains?
Many beginners draw mountains as perfect, symmetrical triangles. Instead, use uneven, jagged lines to create peaks of varying heights to mimic the natural geological formations found in nature.
How can I make the cabin look cozy?
Add details like a small wisp of smoke rising from the chimney and a porch light near the front door. These small additions provide a sense of warmth and human presence to the drawing.
This answer was created with the help of AI research tools and reference sources. Spotted an error? Let us know — we correct mistakes quickly. See our editorial policy.