How do you draw a cowboy step by step?
Short answer
Drawing a cowboy requires building a foundational skeleton using simple geometric shapes before adding iconic details like the wide-brimmed hat, chaps, and boots. By establishing the figure’s posture first, you ensure the proportions remain realistic. Focus on the silhouette of the western gear to define the character’s classic, rugged aesthetic effectively.
On this page
How to sketch the basic cowboy anatomy
To begin your drawing, start by establishing the figure’s pose using a stick-figure skeleton. Place a circle for the head, an oval for the torso, and lines for the limbs to determine if the cowboy is standing, riding a horse, or leaning against a fence. This foundational step prevents the body from looking stiff or disproportionate later in the process.
Once the skeleton is set, build volume around it using simple shapes like cylinders for the arms and legs. Keep these lines light so they can be easily erased or adjusted. Pay close attention to the center of gravity; a cowboy’s stance is typically wide and grounded, reflecting the balance required for life on the range.
- Draw a circle for the head and a slightly larger oval for the chest.
- Connect these with a short neck line.
- Use simple lines to map out the shoulders, elbows, and wrists.
- Add cylinders around the limb lines to create the thickness of the arms and legs.
Best tools for drawing cowboys
For beginners, a standard HB pencil is ideal because it allows for both light sketching and darker detailing without smearing excessively. You should also have a kneaded eraser, which is perfect for lifting graphite off the paper without damaging the surface. A smooth, medium-weight drawing paper provides the right amount of tooth to hold your lines while remaining easy to erase.
If you eventually want to add depth, consider using a set of graphite pencils ranging from 2H for light construction lines to 4B for deep shadows. Fine-liner pens are also excellent for outlining the final silhouette once your pencil work is complete. Always keep a sharpener nearby, as sharp points are essential for rendering the intricate details of a cowboy’s leather gear or facial features.
- HB pencil for initial sketching.
- Kneaded eraser for precise corrections.
- Smooth drawing paper or sketchbook.
- Fine-liner pens for final ink outlines.
How to draw cowboy clothing and accessories
The iconic look of a cowboy relies heavily on specific garments that define the silhouette. Start by drawing the wide-brimmed hat, which should sit low on the forehead. The brim should have a slight curve, and the crown can be pinched or creased to give it a lived-in, authentic appearance.
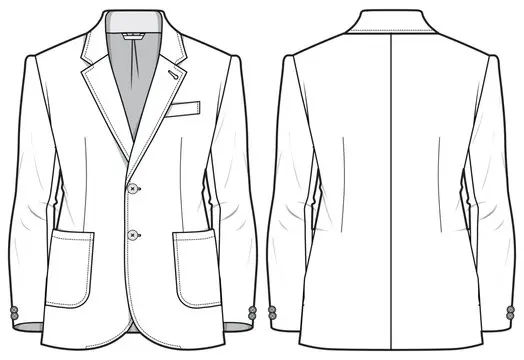
Next, focus on the torso and legs. A button-up shirt with a vest creates a classic profile, while chaps worn over denim jeans add the necessary rugged texture. Ensure the boots have a distinct heel and a pointed toe, as these are hallmark features of western footwear. Adding a bandana around the neck or a holster at the hip can further emphasize the character's role.
- Sketch the hat brim first, then add the crown on top.
- Draw the shirt and vest with folds to suggest fabric movement.
- Add chaps by drawing curved lines over the legs to show leather layers.
- Finish with boots, ensuring they look sturdy and slightly worn.
Common mistakes when drawing cowboys
One of the most frequent errors is ignoring the perspective of the cowboy’s hat. Many artists draw the brim as a flat oval, which makes the hat look like a pancake rather than a three-dimensional object. Remember that the brim should curve downward, and the crown should follow the contour of the head to look natural.
Another common mistake is failing to account for the thickness of leather gear. Chaps, belts, and holsters are made of heavy material that sits on top of the clothing. If you draw these items as flat lines against the body, the drawing will lose its sense of realism. Always add a small gap or an extra line to represent the weight and depth of the leather.
- Drawing the hat brim as a flat, two-dimensional oval.
- Making the legs too thin for the heavy chaps worn over them.
- Ignoring the weight of the boots, which should appear grounded.
- Forgetting to add folds in the fabric to show movement.
How to add texture and shading
Texture is what makes a cowboy drawing feel authentic rather than like a cartoon. Use short, cross-hatched lines to represent the rough texture of leather chaps or the worn fabric of denim jeans. For the hat, use subtle, smooth shading to show the felt or straw material, focusing on the shadow cast by the brim onto the face.
Shading also helps define the form of the body. Identify where your light source is coming from and apply darker tones on the opposite side of the limbs and torso. This contrast creates a sense of volume, making the cowboy look like a physical presence rather than a flat sketch. Take your time with the shadows, as they are the key to bringing your western character to life.
Key facts
- Start with a basic stick figure to establish the character's pose and proportions before adding volume.
- A cowboy’s hat brim should be wider than the shoulders to create the iconic silhouette.
- Draw the legs slightly bowed to realistically mimic the stance of someone who spends hours in a saddle.
- Use simple geometric shapes like cylinders for limbs and ovals for joints to maintain anatomical accuracy.
- Place the belt buckle low on the hips to emphasize the weight of the gun holster.
- Focus on the "V" shape of the torso, which conveys the rugged strength associated with the profession.
The bottom line
Drawing a cowboy requires balancing structural anatomy with iconic western accessories. By starting with a solid skeletal framework and layering on heavy items like chaps, wide-brimmed hats, and pointed boots, you create a believable figure. Focus on the stance and the weight of the clothing to capture the rugged essence of the American frontier. Consistent practice with these proportions will help you master this classic artistic subject.
People also ask
What is the most common mistake when drawing a cowboy hat?
Many beginners draw the hat sitting flat on top of the head like a cap. To look authentic, the hat should be tilted forward or slightly to the side to suggest movement and attitude.
How do I draw the chaps so they look realistic?
Chaps are essentially leather leggings worn over pants. Draw them as loose, tubular shapes that hang slightly away from the legs to show they are a separate, heavier layer of clothing.
Should the cowboy be holding a lasso or a gun?
This depends on the narrative you want to convey. A lasso requires a circular motion line to show momentum, while a gun holster should hang at a slight angle for easy access.
How do I make the cowboy's face look weathered?
Use deep lines around the eyes and mouth to suggest sun exposure and age. Adding a bit of stubble or a thick mustache further enhances the rugged, outdoor aesthetic.
What kind of boots should I draw?
Cowboy boots have a distinct pointed toe and a slanted, underslung heel. Ensure the heel is prominent, as this was historically designed to keep the rider's foot from slipping out of the stirrup.
How do I draw the bandana effectively?
Place the bandana around the neck with the triangle point facing down toward the chest. Keep the lines loose and flowing to indicate that the fabric is lightweight and moving in the wind.
This answer was created with the help of AI research tools and reference sources. Spotted an error? Let us know — we correct mistakes quickly. See our editorial policy.