What techniques did Bob Ross use?
Short answer
Bob Ross utilized the wet-on-wet oil painting technique, known as alla prima, to complete landscapes rapidly. By applying a thin layer of liquid base coat to the canvas, he allowed colors to blend directly on the surface. This method relies on specific fan brushes, palette knives, and firm paint consistency for texture.
On this page
How does the wet-on-wet technique work?
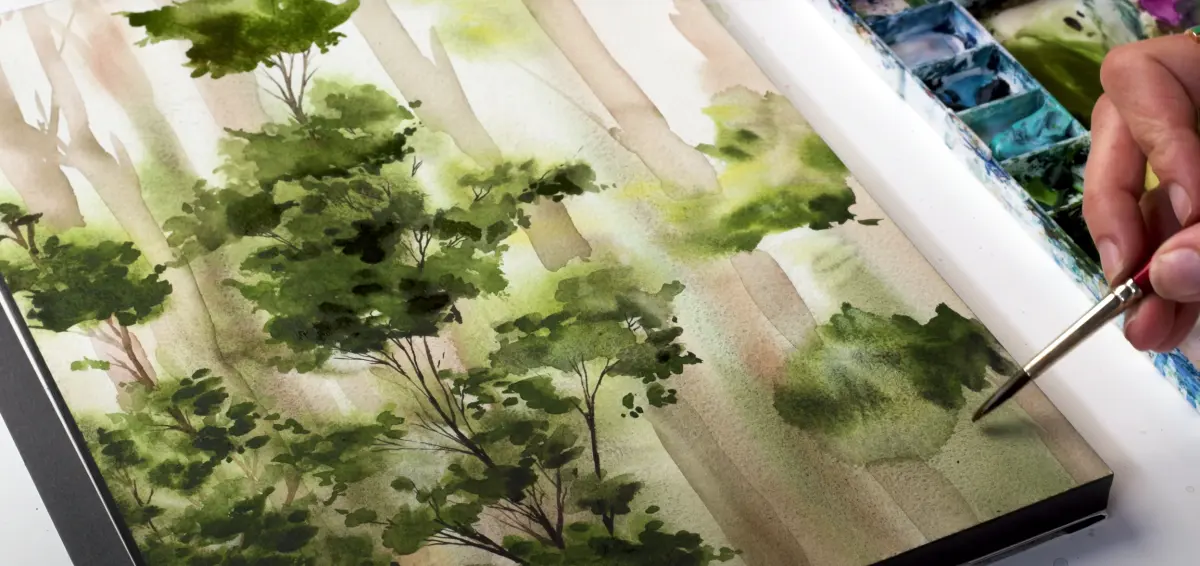
The foundation of the Bob Ross method is the application of a thin, even layer of "Liquid White" or a similar medium to a dry canvas before painting begins. This slick surface allows the artist to blend colors directly on the canvas rather than mixing them extensively on a palette. Because the base coat remains wet, subsequent layers of oil paint adhere and merge seamlessly, facilitating the creation of soft skies, misty mountains, and atmospheric depth in a single session.
This approach requires specific paint consistency. The oil paints used must be firm and dry, rather than thin or runny, to ensure they "break" correctly when applied over the wet base. By loading the brush with a heavy pigment and applying it with minimal pressure, the paint sits on top of the base layer. This allows for the rapid layering of highlights and shadows, which is essential for the signature speed associated with his televised demonstrations.
Which tools are essential for beginners?
To replicate the Ross style, artists must acquire a specific set of brushes and knives designed for heavy-duty application. Unlike delicate watercolor brushes, these tools are robust and meant to withstand the physical pressure of the wet-on-wet process. Beginners should focus on acquiring the following core items to achieve the characteristic textures found in his landscapes:
- Two-inch and one-inch natural bristle brushes for large areas like skies and water.
- A number six fan brush, which is critical for creating evergreen trees and delicate highlights.
- A sturdy metal palette knife for carving sharp mountain ridges and rocky textures.
- A large, flat brush for blending and softening edges to create a sense of distance.
Using these tools correctly involves "loading" the brush by pulling it through the paint, ensuring the bristles are saturated but not clumped. When applying paint, the angle of the brush or knife determines the shape and texture of the resulting stroke.
How to paint mountains and trees?
Creating mountains is perhaps the most iconic aspect of the Ross technique, relying heavily on the palette knife. The goal is to apply a firm, dark "under-paint" first, then use the knife to "break" a lighter highlight color over the top. By holding the knife at a slight angle and using very light pressure, the paint skips over the canvas texture, creating the jagged, rocky appearance of a mountain face.
Trees are created using the fan brush or a round brush, depending on the desired foliage density. For evergreens, the brush is held vertically, using the corner to tap in branches while moving downward. The process follows a specific order to maintain depth:
- Block in the dark silhouette of the tree using a mixture of Van Dyke Brown and Midnight Black.
- Load the fan brush with a lighter highlight color, ensuring the paint is dry enough to stick.
- Gently tap the highlight onto the outer edges of the branches, leaving the dark center visible to create depth.
- Avoid over-blending, as this will turn the highlights and shadows into a muddy gray.
Common mistakes when painting landscapes?
One of the most frequent errors beginners make is using too much liquid base coat. If the canvas is saturated with too much medium, the colors will slide around uncontrollably and turn into a muddy mess. The goal is a thin, translucent sheen that reflects light; if the canvas looks like it is dripping, it is over-saturated. Wiping the surface with a dry paper towel before starting can often correct this issue.
Another common mistake is applying too much pressure when layering highlights. Because the underlying paint is wet, heavy pressure will simply push the new paint into the old, causing the colors to mix and lose their vibrancy. Beginners should practice a "light touch," barely grazing the surface of the canvas. If the paint is not sticking, it is usually because the highlight paint is too thin or the base layer is too thick, preventing the "break" effect from occurring.
How to clean brushes properly?
Proper maintenance of brushes is vital for the wet-on-wet technique because the bristles must remain stiff and free of old, dried paint. Bob Ross famously used a bucket of odorless paint thinner to rinse his brushes between steps. After rinsing, the brush must be shaken vigorously to remove excess moisture. This step is often performed by striking the handle against a table or a specialized rack, which helps "dry" the bristles through centrifugal force.
Failure to clean brushes thoroughly will result in contaminated colors during the next application. If a brush is not completely dry, the residual thinner will thin the next color applied, causing it to run or lose its firm texture. Beginners should ensure they have a dedicated container for thinner and a clean, dry rag or paper towel to wipe the brush clean after the initial rinse. Consistent cleaning ensures that every stroke remains crisp and the colors stay true throughout the entire painting process.
Key facts
- Bob Ross utilized the "wet-on-wet" oil painting technique, known as alla prima, which allows artists to apply wet paint directly onto a wet canvas without waiting for layers to dry.
- He relied heavily on a limited set of professional-grade tools, most notably a two-inch brush for large sky areas and a fan brush for creating detailed evergreen trees.
- Ross used a "liquid clear" or "liquid white" base coat, often called magic white, to make the canvas surface slick and receptive to blending colors.
- His signature palette included a specific range of colors like Phthalo Blue, Van Dyke Brown, and Alizarin Crimson, which he thinned with odorless paint thinner.
- To create the illusion of distance, he used a "liner brush" with very thin, ink-like paint to add delicate highlights to mountain peaks and foliage.
- A common mistake is overloading the brush with too much paint, which causes colors to turn into "mud" rather than maintaining the crisp, layered look of his landscapes.
The bottom line
Bob Ross transformed landscape painting by popularizing the wet-on-wet method, a technique prioritizing speed, texture, and emotional expression over rigid detail. By using specific tools like the fan brush and palette knife, he demonstrated that anyone could create professional-looking art. The core takeaway is that by controlling paint consistency and brush pressure, an artist can build depth and light efficiently on a single, wet canvas.
People also ask
How did Bob Ross clean his brushes so quickly?
He used odorless paint thinner to wash the brushes and then vigorously beat them against the easel leg or a specialized rack to remove excess moisture. This process, which he famously called "beating the devil out of it," dried the bristles instantly for immediate reuse.
Why did Bob Ross use a palette knife?
The palette knife was essential for creating firm, textured mountain ranges and rocky cliffs that brushes could not replicate. By applying thick, stiff paint to the knife edge, he could "break" the color across the canvas to mimic natural stone formations.
What is the benefit of the wet-on-wet technique?
This method allows for rapid painting sessions, enabling an artist to complete a full landscape in under an hour. It also facilitates smooth color blending and soft gradients that are difficult to achieve with traditional, slow-drying layering techniques.
Did Bob Ross use expensive professional paints?
He used high-pigment, firm-consistency oil paints that were thicker than standard student-grade tubes. This firmness was crucial for the "breaking" effect, where paint adheres to the top of the canvas texture without mixing into the base layer.
How do you fix a "muddy" painting?
Mud occurs when colors are over-blended or too much pressure is applied. To avoid this, use a light touch, clean your brushes frequently, and ensure your base coat is not too thick before adding highlights.
Can beginners learn these techniques easily?
The wet-on-wet style is highly accessible because it encourages spontaneity and allows for easy corrections while the paint remains wet. Beginners should focus on mastering brush pressure and paint consistency before attempting complex compositions.
This answer was created with the help of AI research tools and reference sources. Spotted an error? Let us know — we correct mistakes quickly. See our editorial policy.