How do you repair a torn canvas?
Short answer
Repairing a torn canvas involves reinforcing the damaged area from the back using a patch of matching fabric and a conservation-grade adhesive. For minor tears, thread-by-thread reweaving is possible, but larger punctures require a structural lining. Proper stabilization ensures the integrity of the painting and prevents further degradation of the fibers.
On this page
How to assess canvas damage
Before beginning any repair, you must determine the nature of the tear and the value of the artwork. Small, clean cuts are generally easier to mend than jagged, multi-directional rips or areas where the canvas has become brittle due to age. If the painting is a valuable antique or has significant historical importance, consult a professional conservator rather than attempting a DIY repair, as improper techniques can permanently lower the object's market value.
Assess the tension of the canvas on its stretcher bars. If the canvas is sagging significantly, the tear may widen or distort over time. You should also check for signs of mold, rot, or severe oxidation, as these conditions indicate that the fabric is too weak to support a patch. If the canvas crumbles when touched, it is likely beyond simple repair and requires a full lining or professional stabilization.
What materials are needed for canvas repair
To perform a standard patch repair, you need specific supplies that will not react chemically with the paint or the fabric over time. Avoid using standard household glues, such as super glue or hot glue, as these become brittle and can cause discoloration. Instead, prioritize archival-quality materials that remain flexible throughout the life of the painting.
- A piece of fine-weave linen or cotton canvas that matches the weight of the original.
- Beva 371 film or a reversible archival adhesive like rabbit skin glue (for traditionalists) or synthetic resins.
- A small palette knife or spatula for applying adhesive.
- A smooth, flat weight, such as a heavy book or a professional marble block.
- Silicon release paper to prevent the patch from sticking to the work surface.
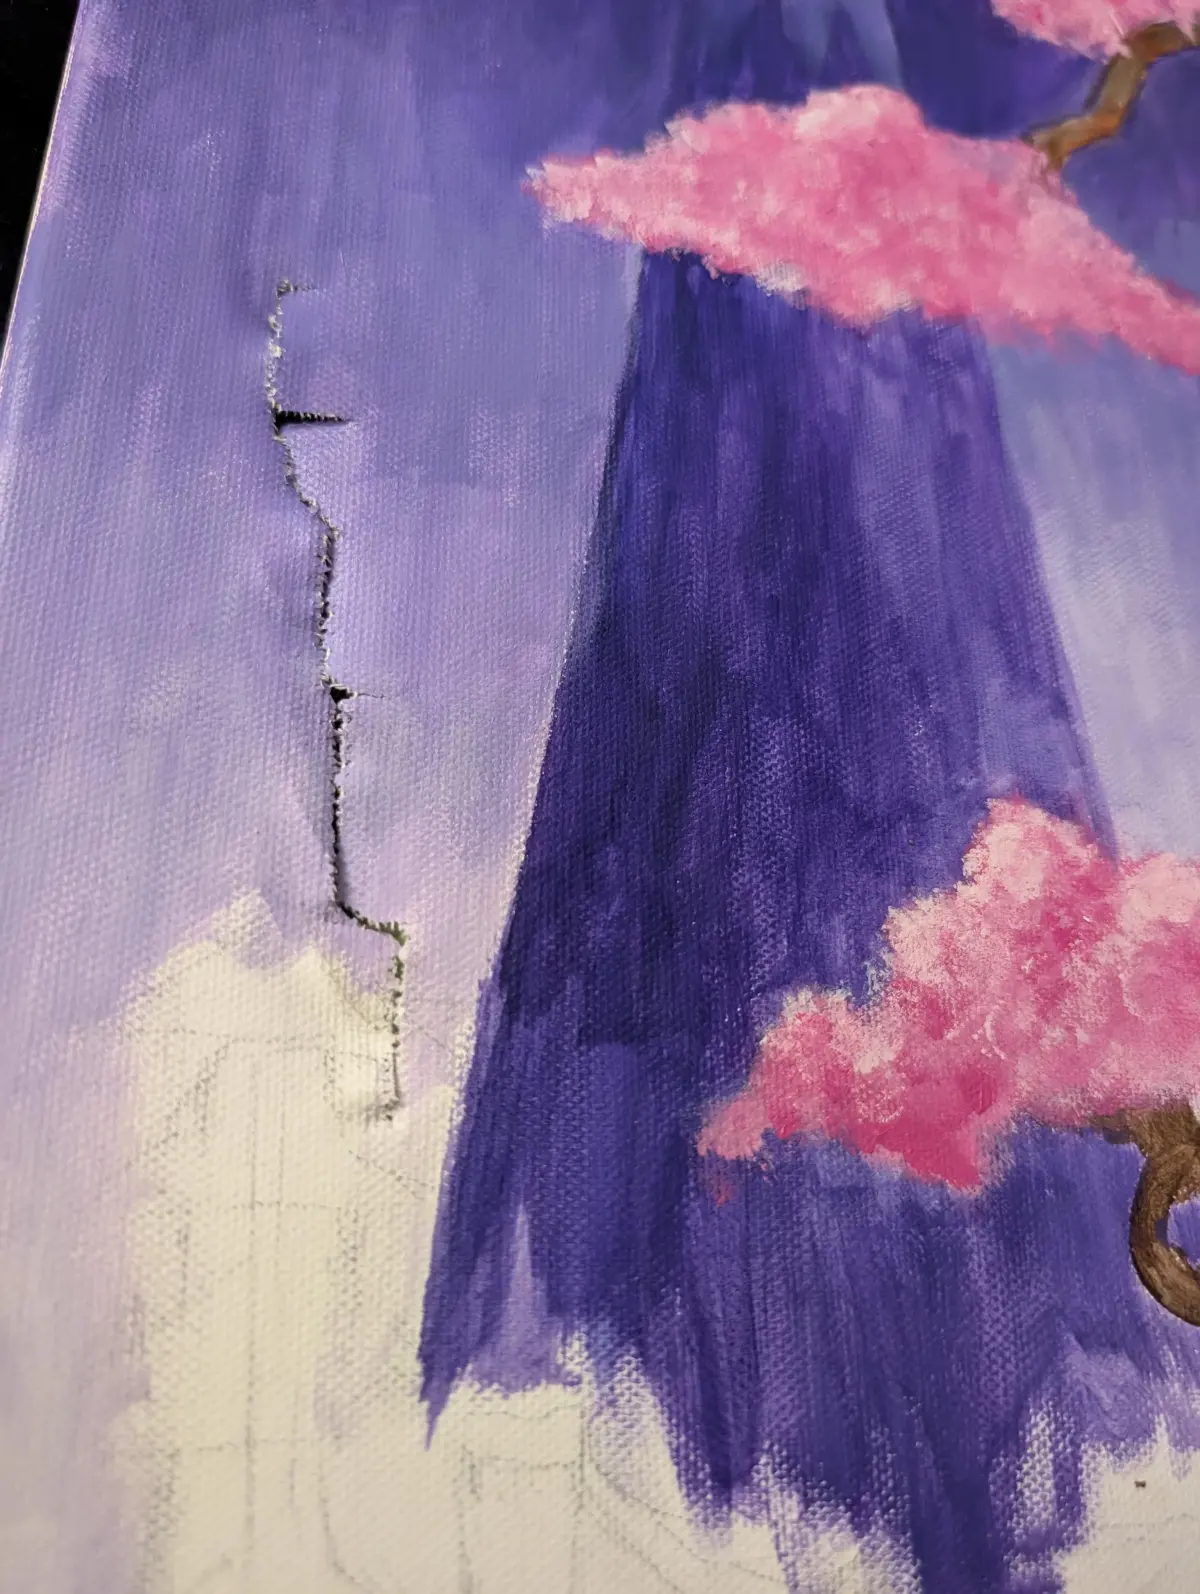
How to patch a torn canvas step by step
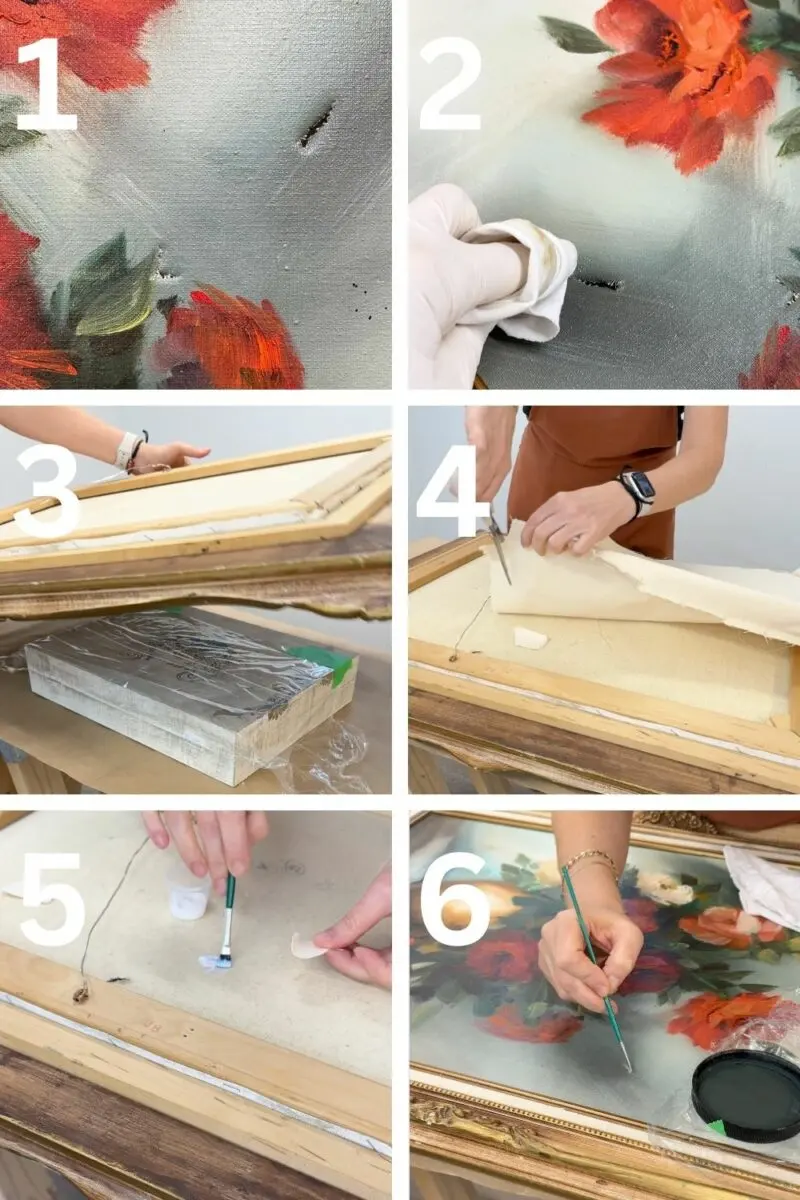
The goal of a patch is to bridge the gap between the torn edges without creating a visible bump on the front of the painting. Work from the back of the canvas, ensuring the area is clean and free of dust before starting. If the edges of the tear are frayed, carefully align them so they sit flush against each other before applying any reinforcement.
- Cut a patch of canvas slightly larger than the tear, ensuring the weave direction matches the original.
- Apply a thin, even layer of adhesive to the patch, or use a pre-coated Beva film.
- Place the patch over the tear on the reverse side, aligning the threads accurately.
- Cover the area with silicon release paper and place a flat weight over it to ensure consistent pressure.
- Allow the adhesive to cure for at least 24 hours before removing the weight.
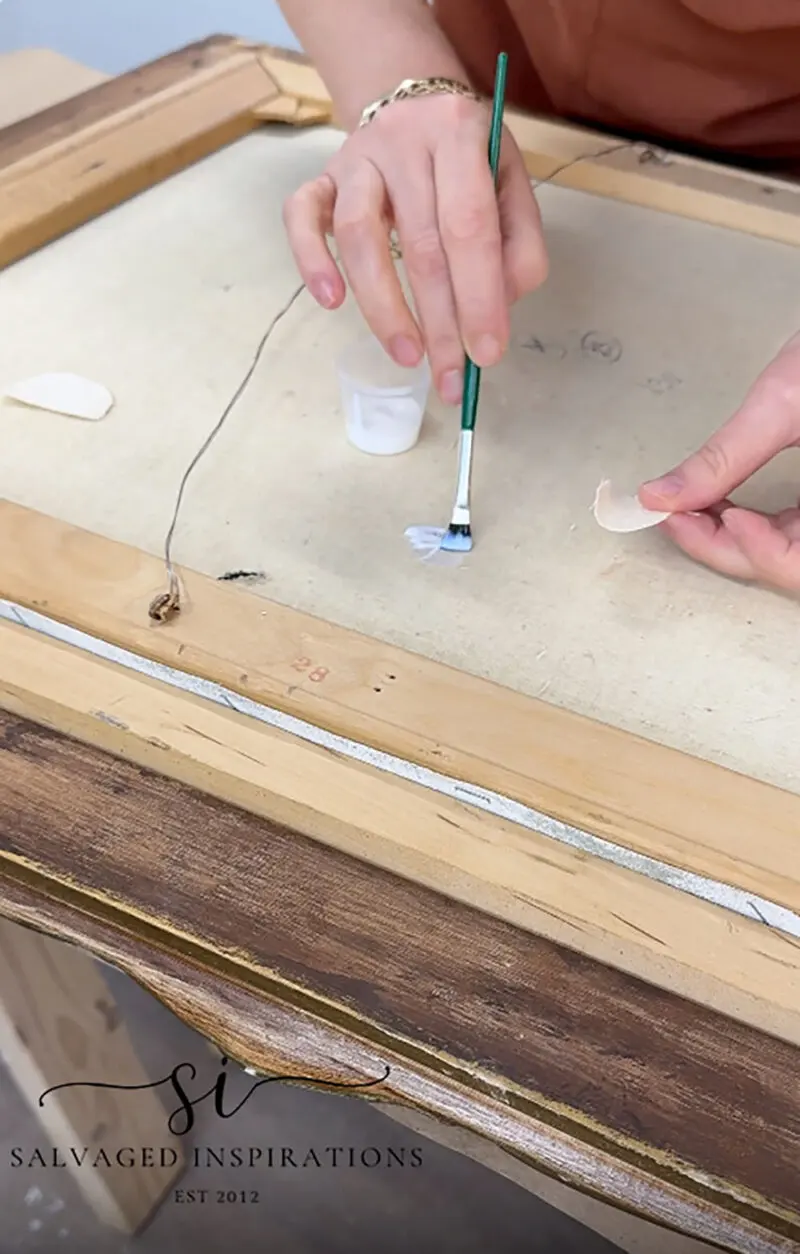
Common mistakes when repairing canvas
One of the most frequent errors is using too much adhesive, which can seep through the tear and stain the front of the painting. This is particularly problematic with oil paints, as the oil in the binder can react unpredictably with excess moisture or synthetic glues. Always test your adhesive on a scrap piece of canvas first to ensure it does not bleed through or cause the paint layers to lift.
Another common mistake is failing to align the threads of the patch with the original canvas. If the weave is misaligned, the tension across the tear will be uneven, leading to future buckling or a visible ridge. Additionally, avoid pulling the edges of the tear too tightly together during the repair. If the canvas is under too much tension, the patch may pull away from the original fabric as the painting expands and contracts with changes in humidity.
How to prevent further canvas tears
Environmental control is the most effective way to protect your canvas from future damage. Fluctuations in humidity cause the wooden stretcher bars to expand and contract, which places immense stress on the canvas fibers. Keep your artwork in a stable environment with a relative humidity between 45 and 55 percent. Avoid hanging paintings near heat sources, air conditioning vents, or on exterior walls where temperature changes are more extreme.
Physical handling is another major risk factor for tears. When moving a painting, always hold it by the stretcher bars rather than the frame or the canvas itself. If you are storing a canvas, keep it in a vertical, climate-controlled space rather than stacking it horizontally, which can cause punctures or pressure marks. By maintaining a stable environment and handling the piece with care, you significantly reduce the likelihood of needing future structural repairs.
Key facts
- Use conservation-grade BEVA 371 film or rabbit-skin glue for patching, as these are reversible and archival.
- Always work on the back of the canvas to ensure the repair remains invisible from the front.
- Avoid using duct tape or household super glues, as these contain acidic chemicals that permanently damage fibers.
- A "thread-by-thread" weave repair is the gold standard for small tears but requires a steady hand and magnification.
- Ensure the canvas tension is slightly relaxed before applying a patch to prevent future puckering or stress.
- Keep the humidity in your workspace stable at approximately 50 percent to prevent the canvas from expanding or shrinking during the repair.
The bottom line
Repairing a torn canvas requires patience, the right archival materials, and a focus on reversibility. By working from the back and using professional-grade adhesives, you can stabilize the fibers without compromising the painting's aesthetic integrity. Always prioritize non-invasive methods, and if the damage is extensive, seek expert help to ensure the longevity of your artwork. Careful, methodical intervention remains the best practice for preserving damaged canvases.
People also ask
Can I use a standard iron to set a canvas patch?
Yes, but you must use a low-heat setting and a piece of silicone release paper between the iron and the patch. Excessive heat can scorch the canvas fibers or melt the existing paint layer on the front.
How do I know if a tear is too large to fix myself?
If the tear is longer than three inches or involves significant paint loss, it is best to consult a professional conservator. Large structural damage often requires re-lining the entire canvas to maintain its integrity.
Is it necessary to remove the canvas from the wooden stretcher bars?
Not always, but removing it provides better access and allows you to lay the canvas flat on a hard surface. If the tear is near the edge, removing the canvas is essential for a clean repair.
What is the purpose of a "bridge" in canvas repair?
A bridge is a temporary support used to hold the edges of a tear together while the adhesive cures. It prevents the edges from overlapping or gapping during the drying process.
Can I paint over the repaired area immediately?
No, you should wait at least 24 to 48 hours for the adhesive to fully set and stabilize. Once cured, use only artist-grade acrylic or oil paints to touch up the surface.
Does repairing a canvas lower its monetary value?
A professional, reversible repair generally maintains or preserves the value of an artwork. However, amateur repairs using non-archival materials can significantly decrease the value and make future conservation more difficult.
This answer was created with the help of AI research tools and reference sources. Spotted an error? Let us know — we correct mistakes quickly. See our editorial policy.