Do you need to varnish an oil painting?
Short answer
Varnishing an oil painting is essential for long-term preservation, though not strictly required for the artwork to exist. It acts as a protective barrier against dust, ultraviolet light, and atmospheric pollutants. Furthermore, varnish unifies the surface sheen, correcting dull patches caused by uneven oil absorption during the initial drying process.
On this page
Why do oil paintings need varnish?
Oil paint consists of pigment suspended in a drying oil, typically linseed or walnut. As these oils oxidize over many years, the paint film can become brittle and susceptible to environmental damage. Varnish provides a sacrificial layer that sits atop the paint, shielding it from pollutants, smoke, and grime that would otherwise embed directly into the porous surface of the paint.
Beyond protection, varnish is a critical aesthetic tool for the artist. Oil paint often dries with an uneven finish, where some areas appear glossy while others look matte, a phenomenon known as "sinking in." A final coat of varnish saturates the colors, restoring the deep, vibrant appearance the paint had while wet. It provides a consistent refractive index across the entire surface, ensuring the viewer sees the composition as intended.
How long does it take to dry before varnishing?
Oil paintings require a significant curing period before they are ready for a final varnish. While the surface may feel dry to the touch in a few weeks, the internal structure of the paint film continues to oxidize and harden for months. Applying varnish too early can trap solvents or moisture, potentially causing the paint to crack or the varnish to cloud over time.
Most professional conservators recommend waiting at least six months to a year before applying a final, permanent varnish. This timeframe allows the oil to fully polymerize and stabilize. If you must display a painting sooner, use a temporary "retouch varnish," which is designed to be breathable and easily removable.
- Ensure the painting is kept in a clean, dust-free environment during the curing phase.
- Gently clean the surface with a soft, lint-free cloth to remove accumulated dust.
- Verify that the paint is completely dry by checking for any lingering tackiness in thick impasto areas.
Best types of varnish for beginners
Choosing the right varnish is vital for the longevity of your work. Modern synthetic varnishes, such as those based on polycyclohexanone or acrylic resins, are generally preferred over traditional natural resins like damar. Synthetic options are chemically stable, meaning they do not yellow or become brittle as quickly as natural resins, and they remain soluble in mild solvents for future removal.
When selecting a product, consider the desired final sheen. Most manufacturers offer three primary finishes:
- Gloss: Provides the highest color saturation and depth but can cause glare under direct lighting.
- Satin: Offers a balanced look that reduces glare while maintaining good color intensity.
- Matte: Minimizes reflections, which is ideal for paintings displayed in brightly lit rooms or under glass.
Always choose a varnish labeled specifically for oil paintings. Avoid products intended for crafts or wood finishing, as these may contain chemicals that react negatively with oil pigments or are impossible to remove without damaging the underlying artwork.
Common mistakes when varnishing
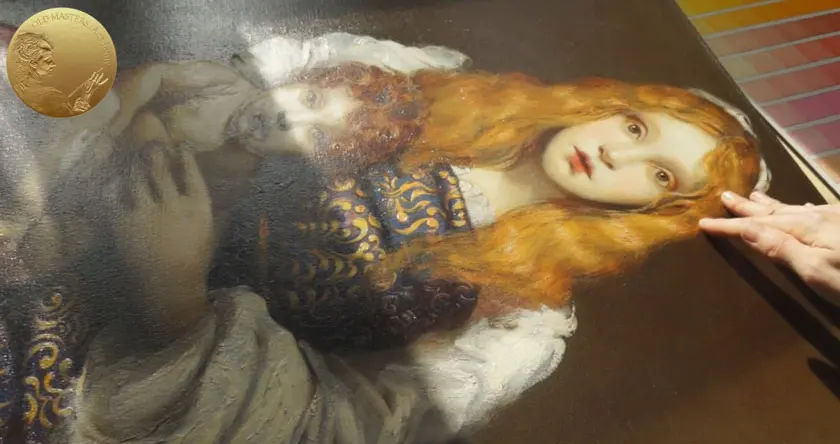
One of the most frequent errors is applying the varnish in a room that is too cold or humid. High humidity can cause the varnish to turn cloudy or "bloom," ruining the clarity of the painting. Additionally, applying the varnish too thickly can lead to drips, pooling, or an uneven, streaky finish that is difficult to correct once the product begins to set.
Another common mistake is failing to prepare the surface properly. Any dust, pet hair, or debris left on the canvas will be permanently sealed under the varnish layer. It is also important to avoid "over-brushing" the varnish, as this can introduce air bubbles or disturb the paint layer beneath, particularly if the paint is not perfectly cured.
- Avoid using a low-quality brush that sheds bristles onto the wet surface.
- Never shake the varnish bottle, as this creates bubbles; stir it gently if necessary.
- Do not attempt to re-apply or "touch up" a partially dried varnish layer, as this will cause visible streaking.
How to apply varnish safely
The application process requires a clean environment and a steady hand. Place the painting flat on a table to prevent the varnish from running, and ensure the room is well-ventilated. Using a wide, soft-bristled brush, apply the varnish in long, even strokes, working from one side of the canvas to the other. Overlap each stroke slightly to ensure full coverage without leaving gaps.
Once the entire surface is covered, inspect the painting under a raking light to identify any missed spots or areas where the varnish has pooled. If you find a pool of excess varnish, use a clean, dry brush to gently lift the excess away. Allow the painting to dry in a horizontal, dust-free position for at least 24 hours before hanging it. Following these precise steps ensures a professional, durable finish that will protect your artwork for generations to come.
Key facts
- Varnish acts as a protective shield against dust, smoke, and pollutants that settle on oil paintings over time.
- You must wait at least six to twelve months for an oil painting to fully cure before applying varnish.
- Applying varnish too early can trap moisture, causing the paint film to crack or become cloudy.
- Use a dedicated picture varnish, such as Damar or a modern synthetic resin like Gamvar, which is removable for future cleaning.
- Always apply varnish in a clean, dust-free environment to prevent debris from becoming permanently embedded in the finish.
- Varnish saturates the colors, restoring the deep, rich appearance of wet paint that often dulls as oil colors dry.
The bottom line
Varnishing is an essential final step for oil paintings, serving both as a protective barrier against environmental damage and a visual enhancer that restores color depth. While it requires patience to wait for the paint to cure, the long-term benefits for preservation are significant. By choosing a removable, artist-grade varnish and applying it carefully, you ensure your artwork remains vibrant and protected for generations to come.
People also ask
Can I use spray varnish instead of brushing it on?
Yes, spray varnish is an excellent option for beginners because it eliminates brush marks and provides an even coat. Ensure you use a high-quality artist-grade spray and work in a well-ventilated area to avoid inhaling fumes.
What happens if I varnish a painting that is still wet?
Sealing a painting before it is fully oxidized can cause the paint to remain soft and tacky indefinitely. This leads to long-term structural damage, including yellowing, cracking, and potential peeling of the varnish layer.
Should I use a matte or gloss varnish?
The choice is purely aesthetic, as both offer the same level of protection. Gloss varnish increases color saturation and reflection, while matte varnish reduces glare, making it ideal for paintings displayed in rooms with strong direct lighting.
How do I remove old, yellowed varnish?
Professional conservators remove old varnish using specific solvents that dissolve the resin without harming the underlying oil paint. This process is delicate and should generally be left to experts to avoid stripping the original pigment.
Do I need to clean the painting before varnishing?
Yes, you must gently remove any dust or loose debris with a soft, lint-free cloth or a clean, dry brush. Any particles left on the surface will be permanently trapped under the varnish layer once it dries.
Can I apply multiple coats of varnish?
It is generally recommended to apply one or two thin, even coats rather than a single thick layer. Allow the first coat to dry completely according to the manufacturer’s instructions before deciding if a second coat is necessary.
This answer was created with the help of AI research tools and reference sources. Spotted an error? Let us know — we correct mistakes quickly. See our editorial policy.