How do you measure proportions in drawing?
Short answer
Measuring proportions involves comparing the relative sizes of objects within your field of view to ensure accurate representation. Artists typically use a sighting tool, such as a pencil or a knitting needle, to gauge distances and angles. By establishing a primary unit of measurement, you can scale the entire composition proportionally.
On this page
How to measure proportions using a pencil
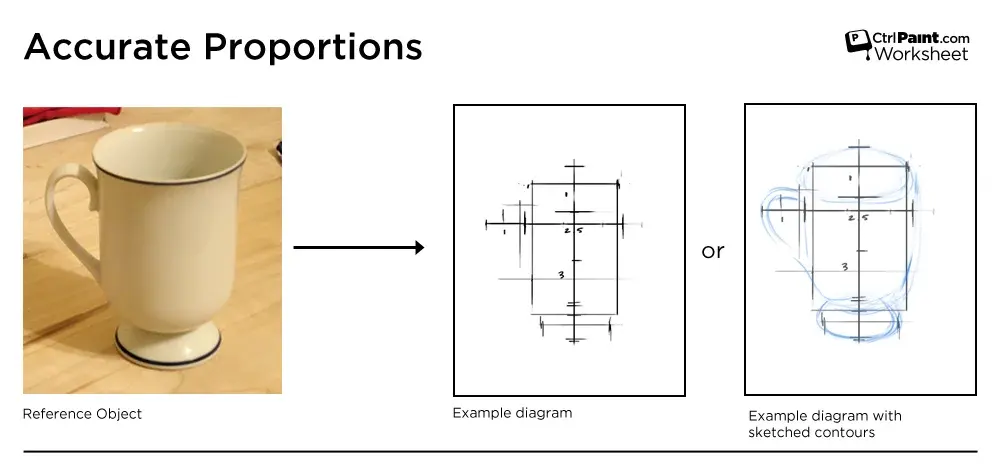
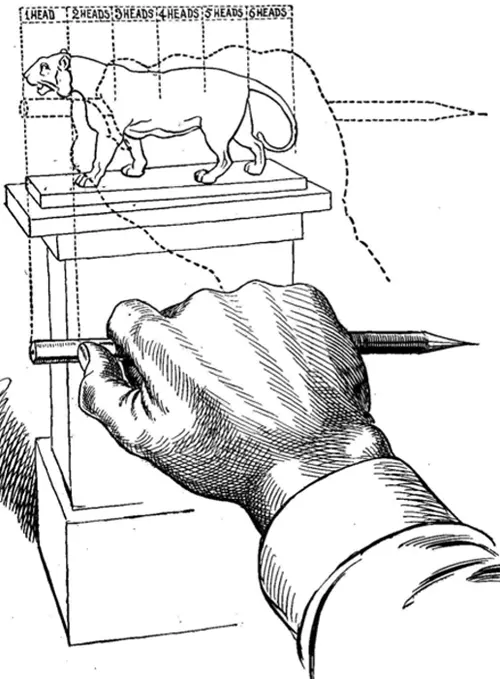
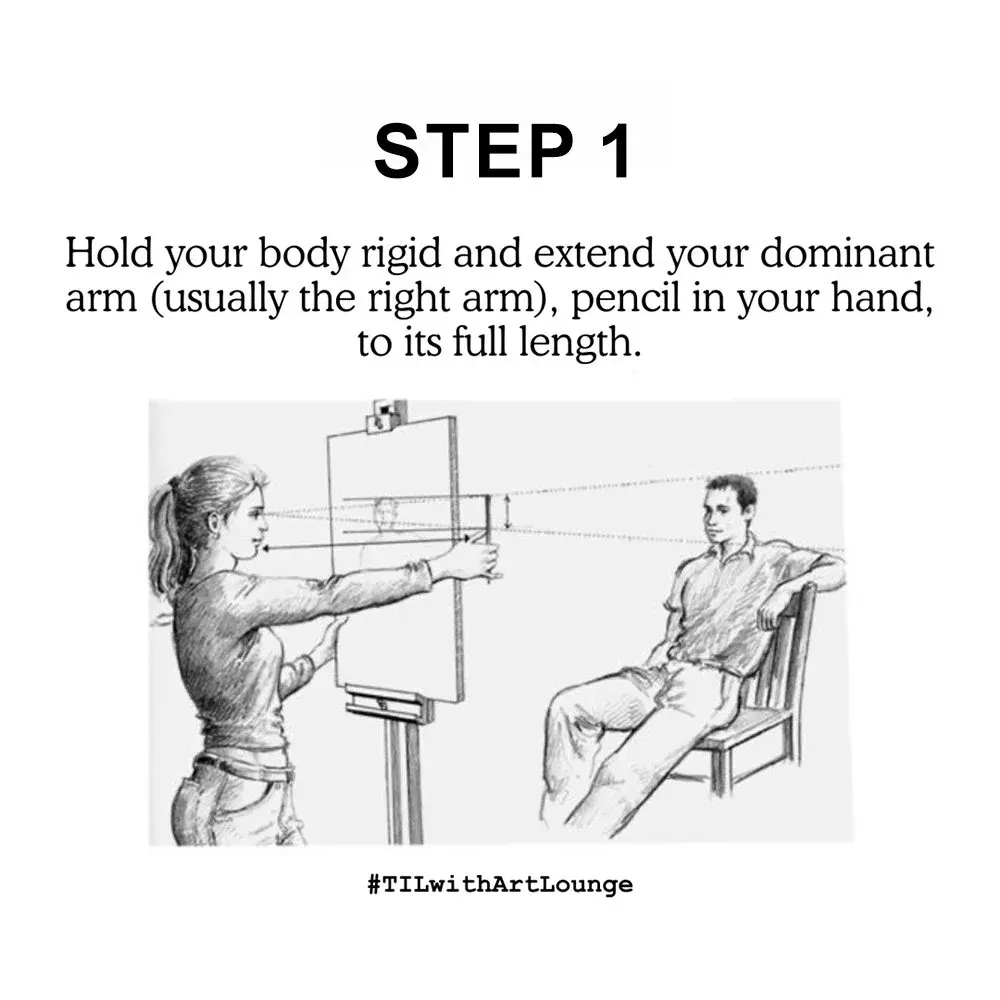
The most traditional method for measuring proportions is the "sighting" technique. Hold your arm fully extended toward the subject, keeping your elbow locked to ensure a consistent distance from your eye. Close one eye and align the tip of your pencil with the top of your subject, then slide your thumb down the shaft until it marks the bottom of the object. This distance becomes your "unit of measure" for the rest of the drawing.
Once you have established this unit, you can compare other elements of the subject against it. For example, if you are drawing a human figure, you might find that the head is exactly one-seventh of the total height. By holding your pencil up to the subject and then transferring that measurement to your paper, you maintain the correct relationship between parts. Always measure from the same fixed position to prevent perspective distortion.
How to use grids for accurate drawing
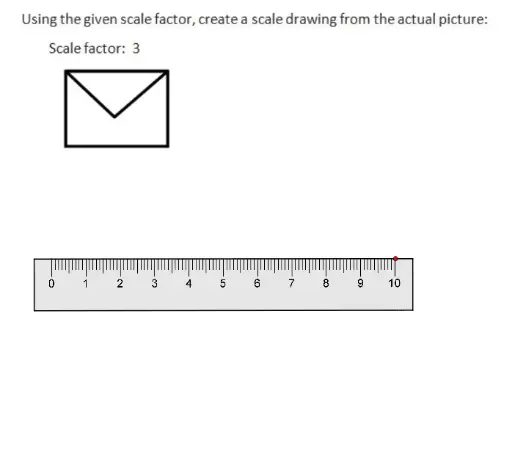
The grid method is an effective way to break down complex subjects into manageable sections. By drawing a light grid over your reference photo and a corresponding grid on your drawing paper, you can focus on the contents of each individual square. This approach forces your brain to see shapes and lines rather than interpreting the subject as a whole, which often leads to errors in scale.
To implement this technique effectively, follow these steps:
- Divide your reference image into equal, numbered squares using a ruler.
- Draw a grid on your paper with the exact same number of squares, ensuring the ratio is consistent.
- Sketch the contours visible within each square, checking that lines crossing grid boundaries align perfectly.
- Erase the grid lines once your primary proportions are established and you begin shading.
Why proportions look wrong in drawings
Proportions often appear distorted because artists tend to draw what they think they see rather than what is actually there. The brain often relies on symbols for objects, such as drawing eyes as almond shapes rather than observing their true, flattened perspective. When you focus on the conceptual idea of an object, you ignore the subtle shifts in angle and length that define its physical reality.
Another common reason for inaccurate proportions is the failure to maintain a consistent viewpoint. If you shift your head or move your body while measuring, the spatial relationship between objects changes instantly. Furthermore, working on a flat surface while the subject is upright can create foreshortening errors. To correct this, try standing back from your work frequently to view the drawing from a distance, which helps reveal imbalances that are not visible when you are hunched over the page.
Best tools for measuring proportions
While a simple pencil is sufficient for most artists, several specialized tools can improve your accuracy. A viewfinder, which is a small cardboard frame with a grid, helps you isolate your composition and understand the boundaries of your subject. Proportional dividers are another excellent investment; these are two-sided calipers that allow you to automatically scale measurements up or down when transferring them from a reference to your paper.
When selecting tools, consider these options:
- A clear plastic ruler for marking precise intervals on your paper.
- A plumb line, which is a string with a weight, to check vertical alignment.
- A mirror placed behind your drawing, which provides a fresh perspective and highlights skewed proportions.
- A viewfinder to help you crop your subject and establish the outer limits of your composition.
Common mistakes when measuring proportions
A frequent error is failing to keep your arm fully extended during the sighting process. If your arm bends, your eye-to-pencil distance changes, rendering every measurement inconsistent. Beginners also often forget to measure the negative space between objects. By observing the shapes created by the empty air around a subject, you can often identify proportion errors that are otherwise difficult to spot.
Another mistake is focusing too much on details before the overall structure is correct. If you spend time shading an eye before ensuring the head is the right size relative to the torso, you will likely have to erase your work later. Always prioritize the "big shapes" first, using light, gestural lines to map out the composition. Once the major landmarks—such as the center line of the face or the horizon line—are accurately placed, you can confidently proceed to the smaller details without fearing that the entire drawing will become lopsided.
Key facts
- Use your arm as a measuring tool by extending it fully to ensure a consistent distance between your eye and your subject.
- Close one eye to eliminate depth perception, which flattens the three-dimensional subject onto a two-dimensional plane for easier comparison.
- Select a "unit of measurement," such as the length of a head or the width of an eye, to compare the sizes of other features.
- Align your thumb with the edge of the object you are measuring and slide it to mark the specific length against your pencil.
- Check vertical and horizontal alignments by holding your pencil perfectly level or plumb to see how features line up across the subject.
- Compare negative space—the empty areas around the subject—to verify that your proportions are accurate rather than focusing only on the object itself.
The bottom line
Measuring proportions is a fundamental skill that relies on relative comparison rather than absolute numbers. By using your arm as a consistent anchor and selecting a base unit of measurement, you can accurately translate three-dimensional reality onto a flat surface. Consistent practice with sighting techniques helps train your eye to see relationships between shapes, ultimately leading to more realistic and balanced drawings over time.
People also ask
Why do my drawings look distorted even when I measure carefully?
Distortion often occurs if your arm is not fully extended or if you change your head position while measuring. Maintaining a consistent posture ensures that the scale remains uniform throughout the entire drawing process.
Should I use a ruler to measure my subject?
Using a ruler is generally discouraged for beginners because it focuses on absolute measurements rather than relative proportions. Drawing is about capturing the relationship between shapes, which is best learned through visual estimation and comparison.
What is the "sighting" technique?
Sighting is the practice of using a tool, like a pencil or a knitting needle, to gauge the angles and proportions of a subject. By holding the tool at arm's length, you translate real-world dimensions into a manageable scale for your paper.
How do I measure angles accurately?
Hold your pencil at arm's length, align it with the angle of the subject, and then bring that same angle directly to your paper without rotating your wrist. This "transfer" method helps capture the tilt of shoulders or the slope of a roof correctly.
Is it better to measure from the top down or the center out?
Most artists prefer starting with a large, central landmark and measuring outward to maintain balance. This prevents the common mistake of running out of space on the paper by starting too large at the top.
How can I tell if my drawing is out of proportion?
Turn your drawing upside down or look at it in a mirror to see the composition with fresh eyes. These methods disrupt your brain's tendency to "correct" errors, making mistakes in scale and alignment immediately obvious.
This answer was created with the help of AI research tools and reference sources. Spotted an error? Let us know — we correct mistakes quickly. See our editorial policy.