How do you draw poses?
Short answer
Drawing poses begins with identifying the "line of action," which establishes the movement and flow of the figure. By breaking the body into simple geometric shapes like spheres and cylinders, you can construct complex forms. Consistent practice with gesture drawing exercises will improve your ability to capture dynamic human anatomy effectively.
On this page
How to start drawing poses for beginners
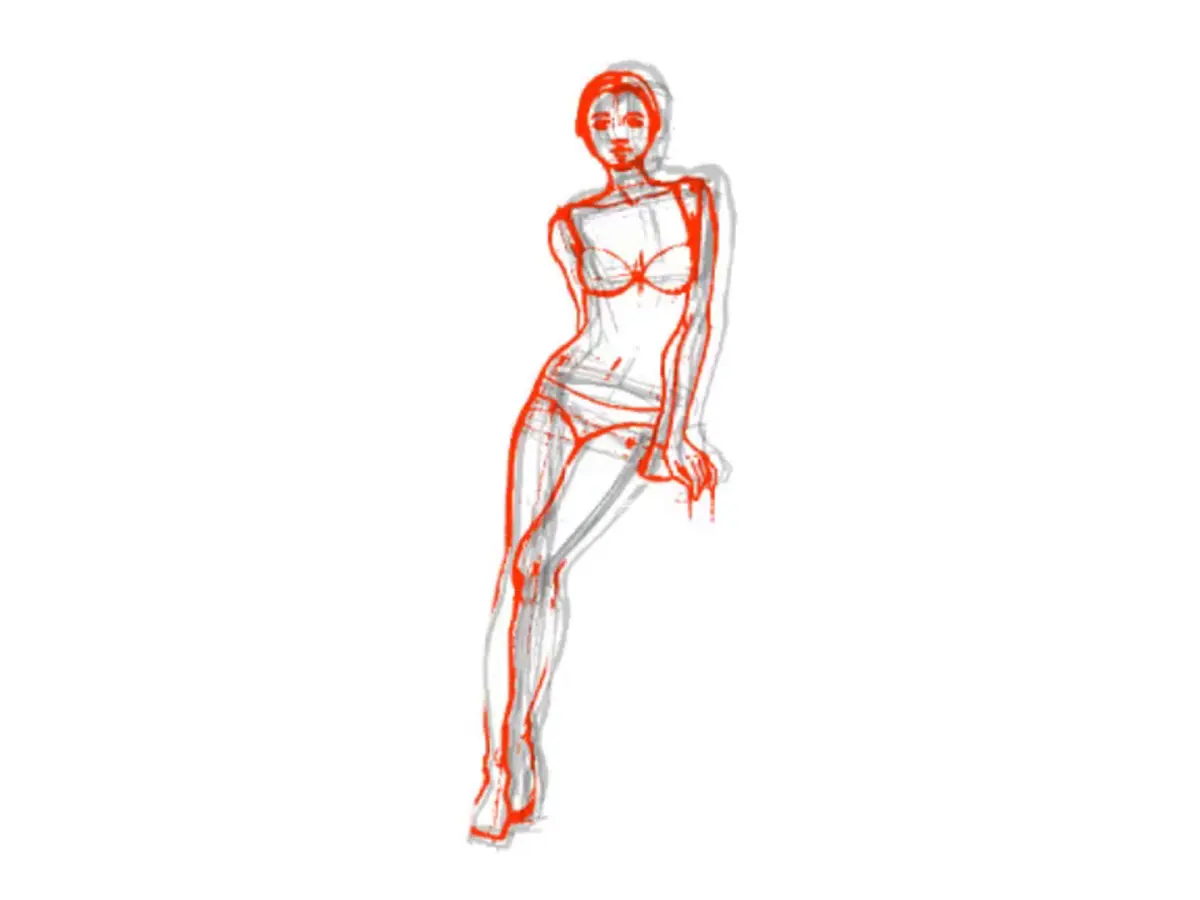
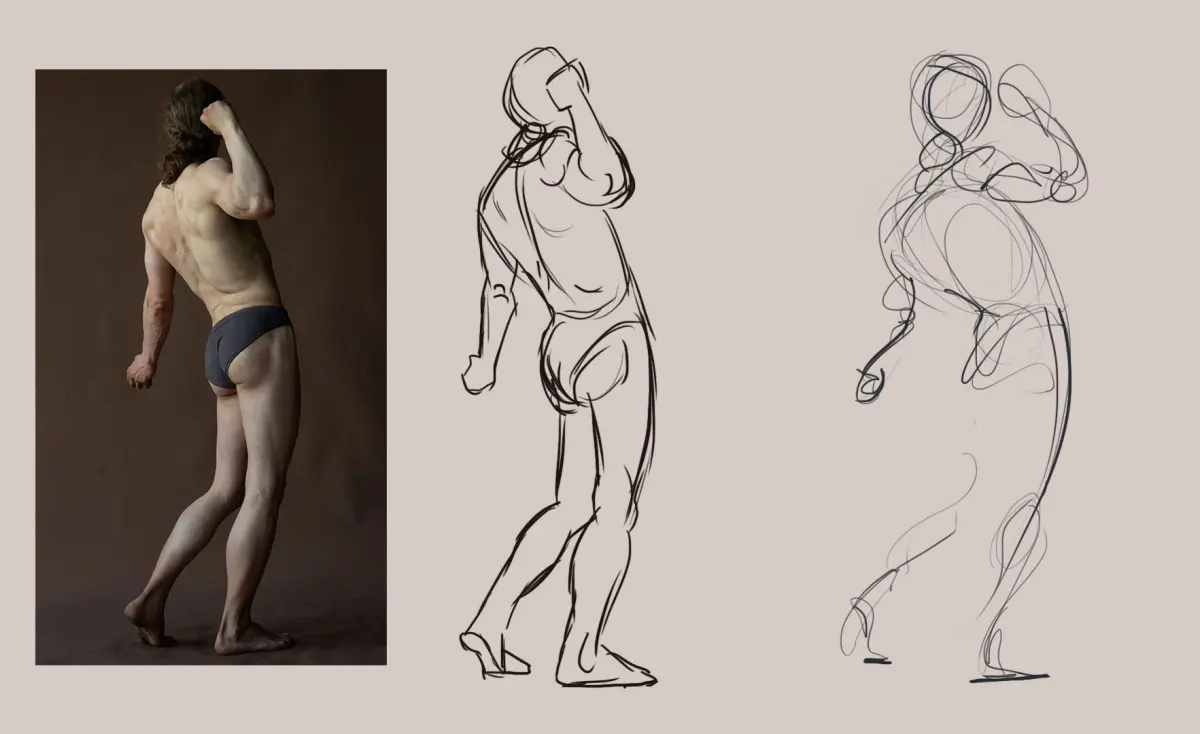
The most effective way to begin drawing poses is to focus on gesture rather than detail. Gesture drawing is a technique that captures the essence, energy, and movement of a figure within a short timeframe, typically ranging from 30 seconds to two minutes. Instead of worrying about muscles or facial features, prioritize the overall shape and the direction of the body.
To begin, look for the "line of action," which is the primary curve that defines the pose. This imaginary line runs through the spine or the main axis of the body, dictating the flow of the movement. Once this line is established, build the rest of the figure around it using basic shapes. Use ovals for the rib cage and pelvis, and simple lines for the limbs. This foundational approach ensures your proportions remain balanced while keeping the pose dynamic and readable.
How to use basic shapes to construct figures
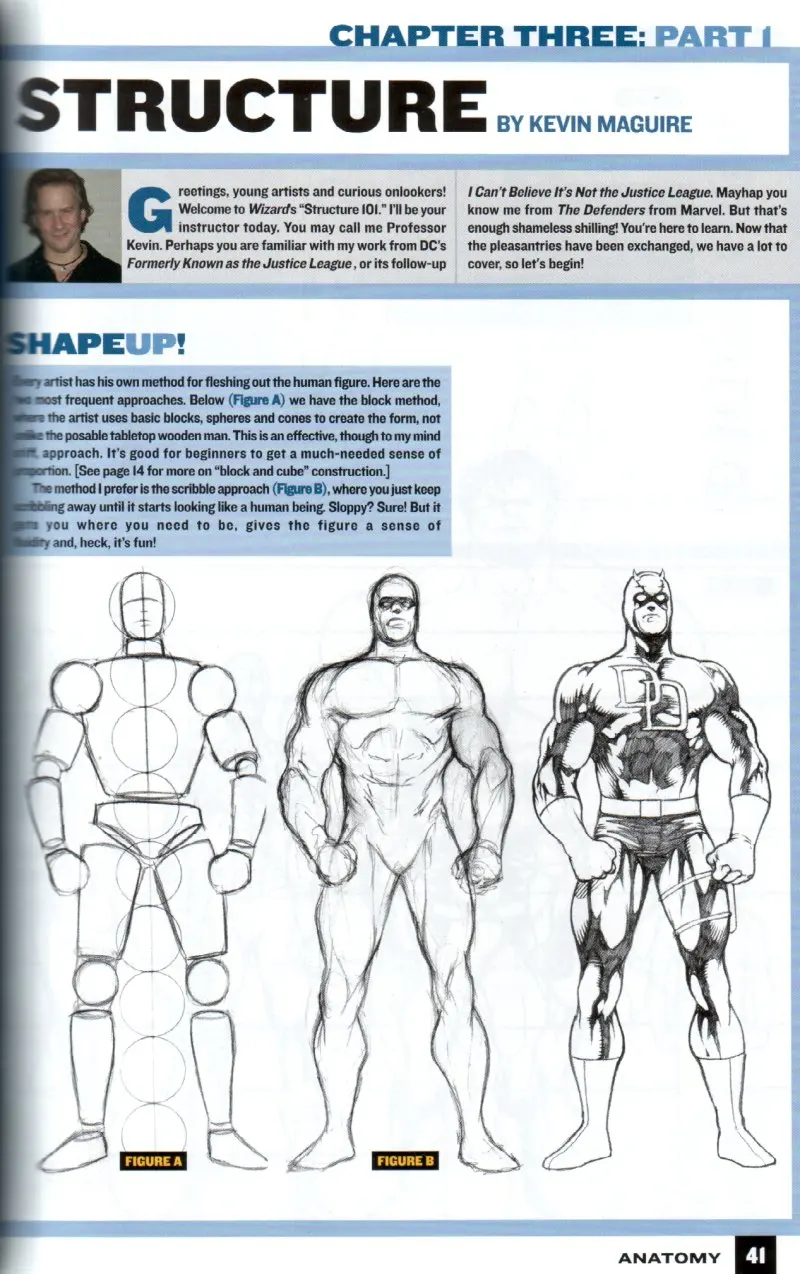
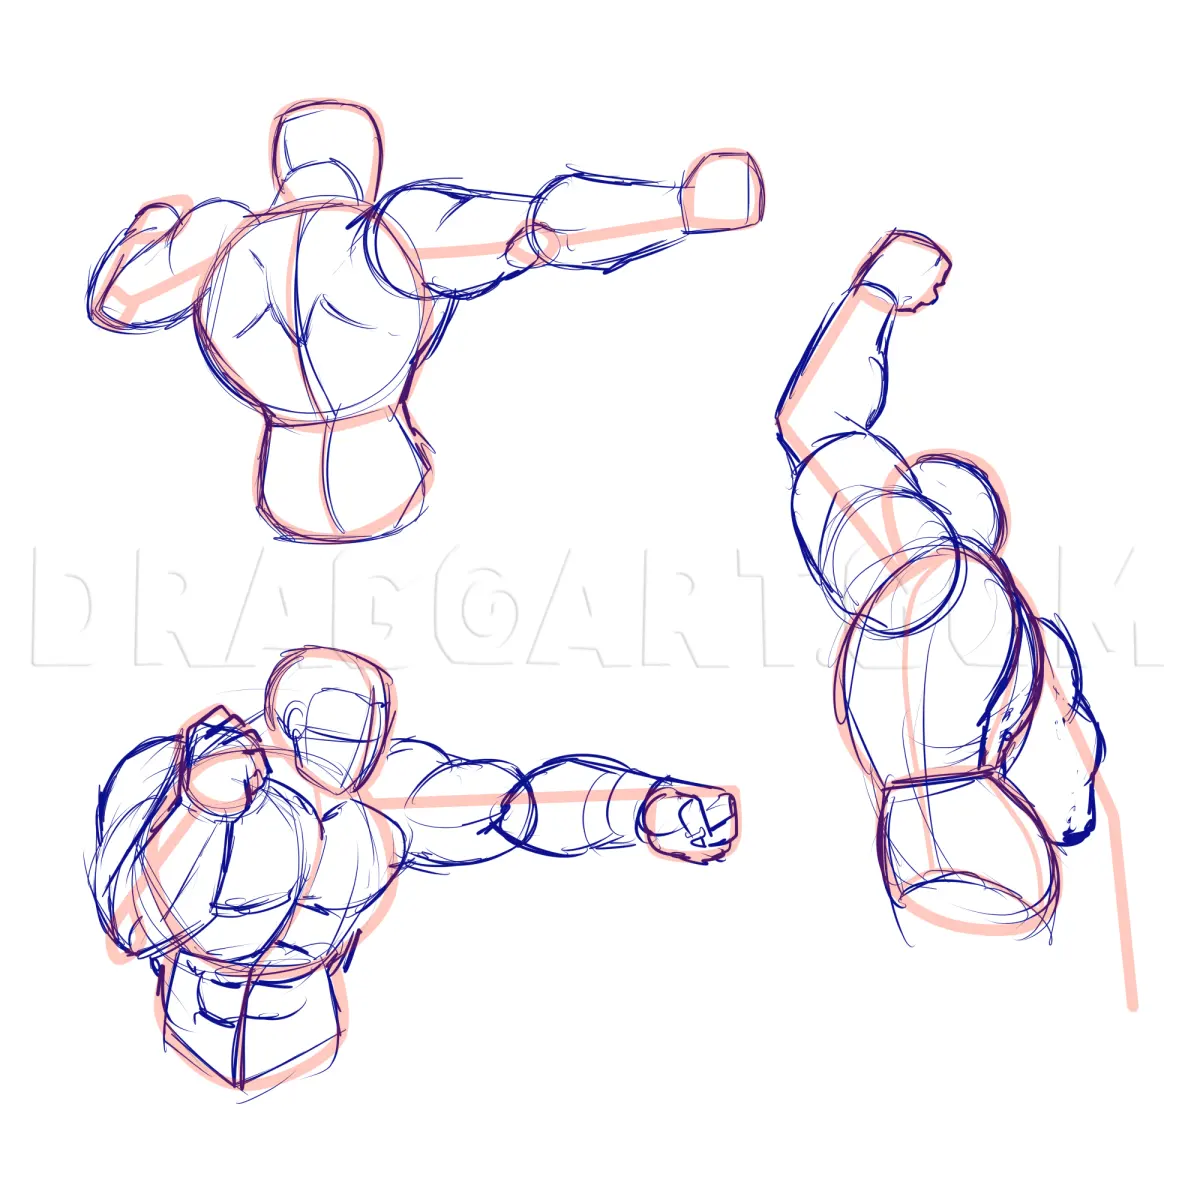
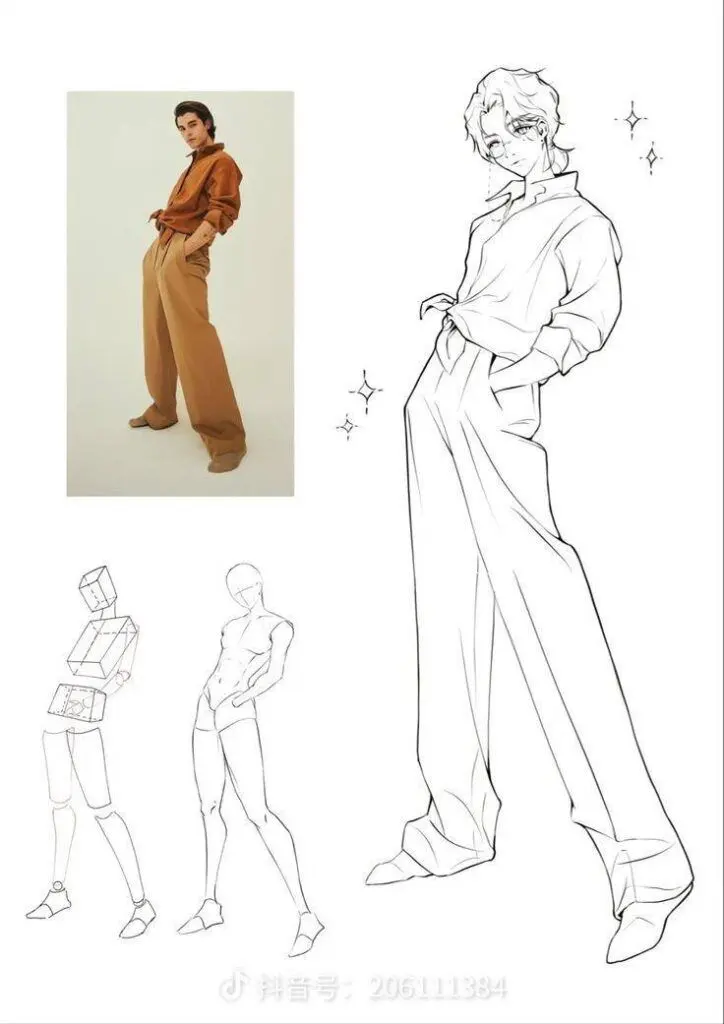
Constructing a figure relies on the principle of simplification. By viewing the human body as a collection of simple geometric primitives, you can easily manipulate the figure into any complex position. This method, often called "mannequinization," allows you to understand how different parts of the body occupy space in three dimensions before you attempt to add anatomical details.
Follow these steps to construct a pose using basic shapes:
- Identify the tilt of the shoulders and the hips, representing them as two separate lines.
- Draw a sphere for the rib cage and a smaller, box-like shape for the pelvis.
- Connect these shapes with a curved line representing the spine.
- Use cylinders to represent the upper and lower arms and legs, noting the joints as small circles.
- Check the alignment of the joints to ensure the pose is physically plausible and balanced.
Why anatomy matters in pose drawing
While gesture and shape provide the structure, anatomy provides the weight and realism that make a pose convincing. Understanding the skeletal structure and major muscle groups helps you avoid drawing figures that look stiff or "rubbery." You do not need to memorize every muscle, but you must understand how limbs rotate at the joints and how muscles stretch or compress during movement.
Pay close attention to the points of articulation, such as the shoulders, elbows, hips, and knees. When a limb bends, the muscles on one side of the joint contract while the muscles on the opposite side stretch. Observing these changes allows you to add depth to your drawings. Studying the work of masters like Andrew Loomis or George Bridgman can provide excellent insights into how skeletal landmarks, such as the collarbone or the kneecap, dictate the outer contours of the human form.
Common mistakes when drawing poses
One of the most frequent errors is "stiffening," which occurs when an artist focuses too much on rigid outlines rather than the underlying rhythm of the body. This often happens when you draw the figure as a flat silhouette instead of a three-dimensional object. Another common mistake is ignoring the center of gravity; if a figure is leaning, the weight must be supported by a limb, or the pose will appear to be floating or falling unnaturally.
To avoid these common pitfalls, keep these guidelines in mind:
- Avoid drawing perfectly straight limbs, as human joints rarely lock into perfectly straight lines.
- Do not spend too much time on the head or face early in the process, as this distracts from the overall pose.
- Ensure the weight is clearly shifted onto one leg if the figure is standing, which creates a natural "contrapposto" pose.
- Check your proportions frequently by comparing the length of the limbs to the size of the torso.
How to practice drawing poses effectively
Consistency and variety are the keys to mastering pose drawing. Dedicate time to daily practice sessions, even if they only last 15 to 30 minutes. Use resources like timed life drawing websites or observe people in public places, such as parks or cafes, to sketch quick, fleeting movements. This helps train your eye to see the "big picture" before getting bogged down in the minutiae of individual fingers or toes.
As you progress, increase the complexity of the poses you attempt. Start with simple standing figures, then move to sitting, crouching, and eventually action-oriented poses like running or jumping. Review your old sketches periodically to track your improvement; you will likely notice that your lines become more confident and your figures more expressive over time. By combining structural knowledge with the fluid energy of gesture drawing, you will develop the ability to render any pose with clarity, accuracy, and a distinct sense of life.
Key facts
- Use the "line of action" technique by drawing a single, sweeping curve that defines the primary movement or gesture of the pose.
- Establish proportions using the head as a unit of measurement; an average adult figure is typically seven to eight heads tall.
- Construct the body using simple 3D primitives like spheres for joints, cylinders for limbs, and boxes for the torso and pelvis.
- Focus on weight distribution by ensuring a vertical line dropped from the pit of the neck falls within the base of support.
- Practice "gesture drawing" with timed intervals of 30 to 60 seconds to capture movement rather than focusing on fine details.
- Use anatomical landmarks, such as the collarbone, rib cage, and pelvic crest, to anchor the limbs and define the skeletal structure.
The bottom line
Drawing effective poses requires shifting your focus from surface details to the underlying structure and movement. By starting with a clear line of action, establishing correct proportions, and using simple geometric shapes, you create a solid foundation for any figure. Prioritize capturing the weight and energy of the pose before refining anatomy, as this approach ensures your characters appear dynamic, balanced, and physically grounded in space.
People also ask
How do I make my poses look less stiff?
Incorporate "contrapposto," a technique where the shoulders and hips tilt in opposite directions to create a natural, dynamic curve in the spine. Avoid drawing figures perfectly symmetrical, as slight variations in limb placement add life and realism.
What is the best way to practice anatomy for drawing?
Study the skeletal system first to understand the rigid structure, then layer muscle groups over the bones. Use reference photos or live models to observe how muscles stretch and compress during different movements.
Should I draw the outline first or the internal structure?
Always start with the internal structure, such as the spine and joints, before adding volume or contours. Drawing outlines too early often leads to flattened figures that lack depth and proper anatomical placement.
How do I draw foreshortening accurately?
Visualize limbs as overlapping cylinders or boxes receding into space. Keep the parts of the limb closer to the viewer larger and more detailed, while parts further away should be smaller and less defined.
Why do my drawings look out of proportion?
You are likely focusing on individual features like eyes or hands before establishing the overall silhouette. Use a "mannequin" approach to map out the entire figure's scale before refining any specific body parts.
How often should I practice gesture drawing?
Aim for daily sessions of 15 to 30 minutes to build muscle memory and improve your observational speed. Consistent, short bursts of practice are more effective for developing an intuitive sense of movement than long, infrequent sessions.
This answer was created with the help of AI research tools and reference sources. Spotted an error? Let us know — we correct mistakes quickly. See our editorial policy.