How do you draw a playground?
Short answer
Drawing a playground involves establishing a spatial layout, sketching core equipment like slides and swings, and adding structural details. Start by defining the ground area, then place major structures using basic geometric shapes. Refine these forms with perspective lines and finish by adding safety surfaces, landscaping, and playful textures for realism.
On this page
How to plan a playground layout
A well-designed playground begins with a clear site plan that accounts for safety zones and accessibility. Before sketching equipment, draw the perimeter of the play area using a light pencil to represent the boundaries. Consider the flow of movement, ensuring that high-traffic areas like the entrance and the base of slides remain unobstructed by other structures.
When mapping out the space, incorporate distinct zones for different age groups to ensure safety. Use simple shapes to mark where large items will sit, such as rectangles for climbing frames or circles for merry-go-rounds. This foundational step prevents the drawing from looking cluttered and ensures that every piece of equipment has enough clearance for children to move around safely.
- Measure the total area to determine the scale of your drawing.
- Sketch the boundary lines lightly to allow for adjustments.
- Place larger structures first, keeping them away from the edges.
- Add paths or walkways to connect different zones within the park.
How to draw playground equipment
Drawing specific equipment requires breaking down complex structures into basic geometric forms. Start with the "skeleton" of the item, such as a triangle for an A-frame swing set or a series of cubes for a jungle gym. Once the primary structure is established, you can add details like chains, handrails, and platform levels to give the drawing depth and character.
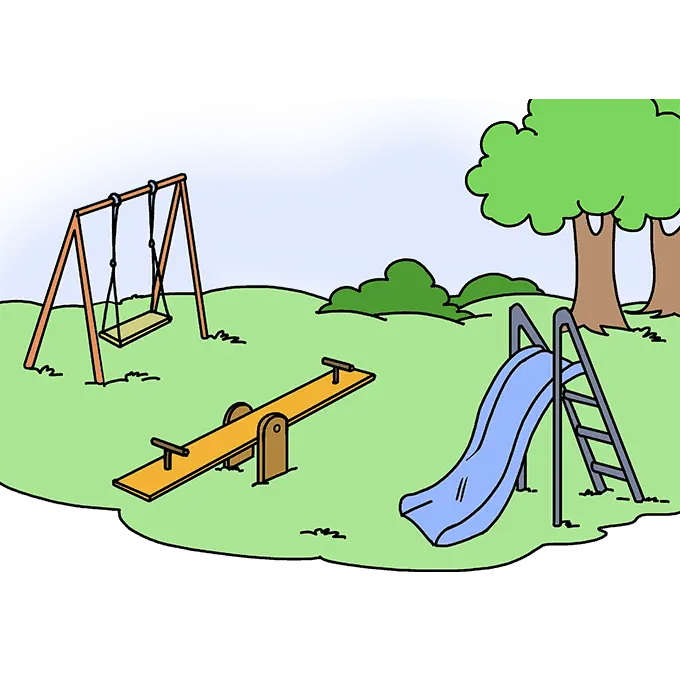
For slides, draw a curved line to represent the chute and add side railings to show height. When drawing swings, depict the seats at different heights to create a sense of motion and life. Consistency in your perspective is vital here; ensure all equipment aligns with the same vanishing point so the playground looks like a cohesive, three-dimensional space rather than a collection of floating objects.
- Use cylinders for support poles and vertical posts.
- Apply parallel lines to create the rungs of a ladder.
- Vary the line weight to emphasize the foreground structures.
- Add small circles to represent bolts or connection points on frames.
How to add details and safety features
Details transform a basic outline into a recognizable playground environment. Safety surfacing is a critical component, so illustrate this by using textures like stippling for wood chips or a cross-hatch pattern for rubberized tiles. Adding these textures helps the viewer understand the ground material and adds a professional level of detail to your architectural sketch.
Beyond the equipment, include safety features like guardrails on elevated platforms and soft landing zones at the bottom of slides. These elements are not just decorative; they provide context for how the playground functions in the real world. You might also include benches, trash receptacles, and lighting fixtures to complete the scene, ensuring the playground looks like a fully realized public space.
- Draw fences around the perimeter to define the play area.
- Add shade structures like canopies to protect against sunlight.
- Include small signs or informational boards near the entrance.
- Use shading to indicate the depth of tunnels or crawl spaces.

Best materials for drawing playgrounds
Choosing the right tools depends on whether you are creating a quick conceptual sketch or a detailed architectural rendering. For beginners, a standard HB pencil and a fine-liner pen are sufficient for establishing shapes and outlining edges. Using a ruler is essential for maintaining the straight lines required for metal or wooden support structures, which are common in modern playground design.
If you want to add color, colored pencils or markers work well to distinguish between different materials, such as blue for plastic slides and brown for wooden climbing walls. Applying a light wash of watercolor can also help represent the grassy areas surrounding the equipment. Always keep an eraser handy to clean up construction lines once the main features are inked, which keeps the final drawing crisp and professional.
- Select a high-quality sketchbook with smooth paper.
- Use a drafting pencil for light, initial construction lines.
- Apply ink over the pencil lines to define the final structure.
- Use a kneaded eraser to remove stray marks without damaging the paper.
Common mistakes when drawing playgrounds
One of the most frequent errors is ignoring the scale of the equipment relative to the children who use it. If the slides are too tall or the climbing bars are spaced too far apart, the drawing will lack realism. Always imagine a child standing next to the equipment to ensure the proportions remain accurate. A standard slide is typically about three to four feet high for younger children, while larger ones can reach six feet.
Another mistake is failing to account for the "fall zone," which is the area around equipment where children might land. Neglecting this space makes the playground look cramped and unsafe. Furthermore, avoid drawing equipment that lacks structural support, such as floating monkey bars or unsupported platforms. Every piece of equipment must have a clear connection to the ground or a support frame to look authentic and grounded in reality.
Key facts
- Start by drawing a bird's-eye view to establish the boundaries and flow of the playground area.
- Use simple geometric shapes like rectangles for sandboxes and circles for merry-go-rounds to map out equipment.
- Incorporate a "safety zone" of at least 6 feet around all equipment to ensure realistic spatial planning.
- Group equipment by age appropriateness, placing toddler structures away from high-speed slides or swings.
- Include natural elements like trees or benches to provide shade and seating for parents and caregivers.
- Use a consistent scale, such as one inch representing five feet, to ensure the drawing remains proportional.
The bottom line
Drawing a playground requires balancing creative fun with strict safety standards. By mapping out zones for different age groups, maintaining clear safety buffers, and ensuring inclusive access, you can create a functional and engaging space. Always prioritize the spatial relationships between equipment to prevent accidents. With a consistent scale and attention to surfacing needs, your sketch will serve as a professional foundation for any project.
People also ask
What is the most important safety feature to include in a playground design?
The most critical feature is the impact-absorbing surface material, such as wood chips, rubber tiles, or sand. A well-designed drawing should indicate a depth of at least 9 to 12 inches for loose-fill materials to prevent injuries.
How much space should be between a swing set and other equipment?
Swings require a large clearance zone in front and behind the seats to prevent collisions. Experts recommend a minimum distance of twice the height of the top support bar to ensure users remain safe while swinging.
Should I draw the playground equipment to scale?
Yes, using a consistent scale is essential for determining if the equipment will actually fit in your designated area. Without a scale, you risk designing a layout that is too crowded and violates safety guidelines.
What are the common mistakes to avoid when sketching a playground?
A frequent error is failing to account for accessibility, such as wheelchair-friendly paths. Additionally, designers often neglect to include proper drainage, which can turn a play area into a mud pit after rain.
How can I make a playground more inclusive for children with disabilities?
Include sensory-rich stations, ground-level play panels, and wide, paved pathways that connect all major structures. Ensure that at least one route through the playground is barrier-free to accommodate mobility devices.
What is the best way to represent ground cover in a drawing?
Use different textures or light shading patterns to distinguish between grass, rubber matting, and sand. Labeling these zones clearly helps identify where specific safety requirements must be met during the construction phase.
This answer was created with the help of AI research tools and reference sources. Spotted an error? Let us know — we correct mistakes quickly. See our editorial policy.