What is directed drawing?
Short answer
Directed drawing is a structured instructional method where an artist or teacher provides step-by-step guidance to help students create a specific image. By breaking complex subjects into simple geometric shapes and sequential lines, this technique builds foundational drawing skills, boosts artistic confidence, and ensures that participants achieve a recognizable final result.
On this page
How does directed drawing work?
Directed drawing functions by deconstructing a complex subject into a series of manageable, sequential steps. Instead of asking a student to draw a complete animal or object intuitively, the instructor guides them through the process one line at a time. This usually involves identifying basic shapes like circles, triangles, or rectangles that form the foundation of the image. The process relies on immediate imitation, where the student observes a demonstration and replicates the stroke on their own paper.
This approach is highly effective because it removes the intimidation factor often associated with starting a blank page. By focusing on individual components rather than the finished product, students learn how to observe proportions and spatial relationships. It serves as a bridge between abstract observation and technical execution, allowing learners to see how simple geometric building blocks combine to create intricate, realistic, or stylized representations of the world around them.
Why is directed drawing used in schools?
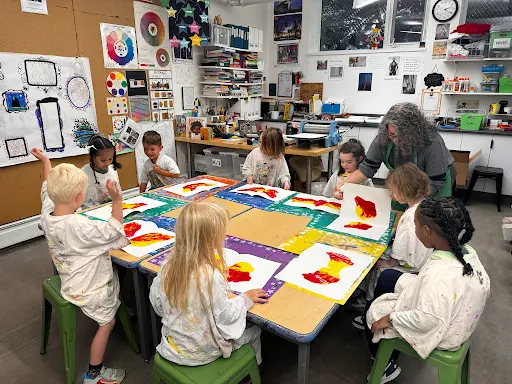
Educators frequently utilize directed drawing to teach fundamental motor skills and spatial awareness in early childhood development. It provides a structured environment where students can practice pencil control, pressure, and line quality. Because the steps are uniform, it allows teachers to manage a classroom effectively while ensuring that every student experiences a sense of success. This consistency helps build confidence, particularly for children who feel they lack natural artistic talent.
Beyond technical skill, this method is often used to reinforce thematic learning or literacy goals. For instance, a teacher might lead a directed drawing session of a specific animal while reading a book about biology or habitats. This cross-disciplinary approach helps students visualize concepts they are studying in other subjects. It also fosters patience and listening skills, as students must follow verbal instructions precisely to achieve the desired outcome during the creative process.
How to lead a directed drawing session
Leading a successful session requires careful preparation and clear, rhythmic communication. The goal is to maintain a pace that allows for both observation and execution without causing frustration or boredom.
- Select a subject that can be broken down into 6 to 10 distinct, simple steps.
- Prepare your own drawing surface, such as a whiteboard or large paper, so students can see your process clearly.
- Begin by drawing the largest, most central shape first to establish the composition.
- Add smaller details incrementally, using descriptive language to explain the size and placement of each new line.
- Pause after each step to allow students to catch up and ask questions if they feel lost.
- Encourage personal expression at the end by allowing students to add their own colors, textures, or background elements.
Common mistakes when teaching directed drawing
One of the most frequent errors is moving through the steps too quickly. When an instructor rushes, students often become anxious, which leads to messy work and a loss of interest. Another common pitfall is over-emphasizing perfection. Directed drawing should be a tool for learning, not a test of accuracy. If a student’s circle is slightly lopsided or a line is crooked, it is important to reinforce that the process of drawing is more valuable than the final product.
Instructors should also avoid making the steps too complex. If a single step involves adding too many details at once, the student may feel overwhelmed and lose their place in the sequence. To avoid these issues, consider the following best practices:
- Keep verbal instructions concise, focusing on shape and location rather than artistic theory.
- Check the room frequently to ensure everyone is on the same step.
- Provide encouragement for unique variations during the final coloring phase.
- Use simple vocabulary that matches the age group of the participants.
Best strategies for directed drawing success
To achieve the best results, create an environment that prioritizes exploration over rigid adherence to the instructor's model. While the steps provide a guide, the final image should reflect the student's own hand. You can encourage this by offering choices during the process, such as allowing students to decide what the subject is doing or what environment it inhabits. This small amount of autonomy keeps the activity engaging and prevents it from feeling like a rote mechanical exercise.
Additionally, consider incorporating directed drawing into a broader curriculum of artistic exploration. Use it as a warm-up activity before moving into free-drawing sessions where students apply the shapes they learned to new, original subjects. By transitioning from directed to independent work, you help students internalize the deconstruction process. This ensures that they eventually develop the ability to break down any subject they see into simple forms, effectively moving from guided instruction to independent artistic mastery.
Key facts
- Directed drawing is a teaching method where an instructor provides step-by-step verbal or visual instructions to create a specific image.
- It is most commonly used in early childhood education to build confidence, fine motor skills, and hand-eye coordination.
- The process typically breaks down complex figures into simple geometric shapes like circles, triangles, and rectangles.
- Educators often use this technique to teach spatial reasoning and how to follow multi-step directions in a sequence.
- A common practice is to start with a light pencil sketch for structural shapes before adding details and permanent outlines.
- The primary goal is not artistic perfection, but rather the development of drawing habits and the ability to represent objects visually.
The bottom line
Directed drawing serves as a foundational pedagogical tool that simplifies complex visual information into manageable steps. By guiding learners through the construction of shapes and lines, it builds essential motor skills and boosts artistic confidence. While it functions as a structured introduction to drawing, it is most effective when paired with creative freedom, ensuring students develop both technical proficiency and a personal sense of artistic expression.
People also ask
Is directed drawing considered creative or restrictive?
It is often debated as both; while it provides a structured path for beginners to gain confidence, it can limit individual expression if used exclusively. Experts recommend balancing these lessons with open-ended art sessions to foster personal creativity.
At what age should children start directed drawing
Most children can begin participating in simple directed drawing activities around ages four or five. At this stage, the focus remains on basic shape recognition and developing the muscle control needed to manipulate drawing tools.
What materials are best for directed drawing?
Standard white paper, pencils with erasers, and black markers are the most effective tools for these sessions. Using a marker for the final step helps children commit to their lines and builds confidence in their decision-making.
How can I prevent students from feeling frustrated by their drawings?
Emphasize that every artist has a unique style and that mistakes are simply opportunities to modify the drawing. Remind participants that the objective is to learn the process of breaking down an image rather than producing a masterpiece.
Can directed drawing be used for subjects other than art?
Yes, it is frequently used in literacy and science lessons to help students illustrate vocabulary words or biological diagrams. This visual reinforcement helps cement concepts by connecting verbal descriptions with physical representations.
How long should a typical directed drawing session last?
A productive session usually lasts between 15 and 30 minutes. Keeping the time short helps maintain engagement and prevents the frustration that can arise from overworking a single drawing.
This answer was created with the help of AI research tools and reference sources. Spotted an error? Let us know — we correct mistakes quickly. See our editorial policy.