How do you draw straight lines in Procreate?
Short answer
You can draw straight lines in Procreate by using the QuickShape feature. Simply draw a line with your stylus and hold the tip of the pen on the canvas at the end of the stroke. The line will automatically snap into a perfectly straight path that you can then adjust and position.
On this page
How to use the QuickShape tool
The QuickShape tool is the primary method for creating precise geometric lines and shapes in Procreate. When you draw a line, arc, or shape, holding your stylus down for a brief moment allows the software to recognize your intent. Once the line snaps, you can lift your stylus and tap with another finger to snap the line to 15-degree increments. This is particularly useful for creating perfect horizontal, vertical, or diagonal lines.
To edit a line after it has snapped, tap the "Edit Shape" button that appears at the top of the interface. This reveals nodes at the ends of your line, which you can drag to change the length or angle. You can also convert the line into a curve or a different geometric shape by selecting the options displayed in the menu. This functionality ensures that your technical drawings remain clean and professional without requiring a physical ruler.
How to draw straight lines with the Drawing Guide
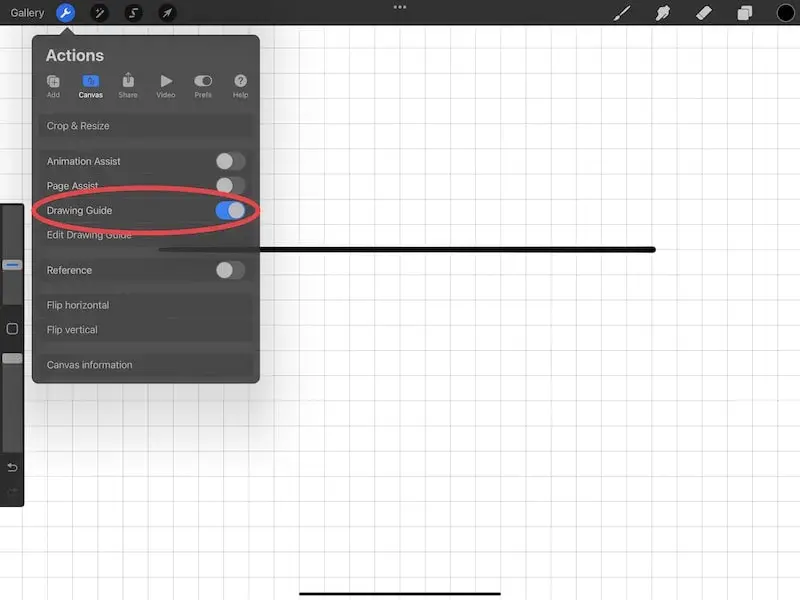
For projects requiring consistent grids or perspective, the Drawing Guide is an essential feature. You can activate this by opening the Actions menu, selecting the Canvas tab, and toggling on Drawing Guide. Once enabled, tap "Edit Drawing Guide" to choose between 2D Grid, Isometric, Perspective, or Symmetry modes. These guides provide a visual framework that helps you maintain alignment across your entire composition.
When "Drawing Assist" is enabled within the guide settings, your strokes will automatically snap to the grid lines. This is the most efficient way to draw complex architectural plans or technical diagrams. To use this effectively, follow these steps:
- Open the Actions menu and tap Canvas.
- Toggle on Drawing Guide and tap Edit Drawing Guide.
- Select your preferred grid type and tap Done.
- Open your Layers panel and tap the active layer.
- Select Drawing Assist to lock your strokes to the grid.
Why lines might look wobbly or jagged
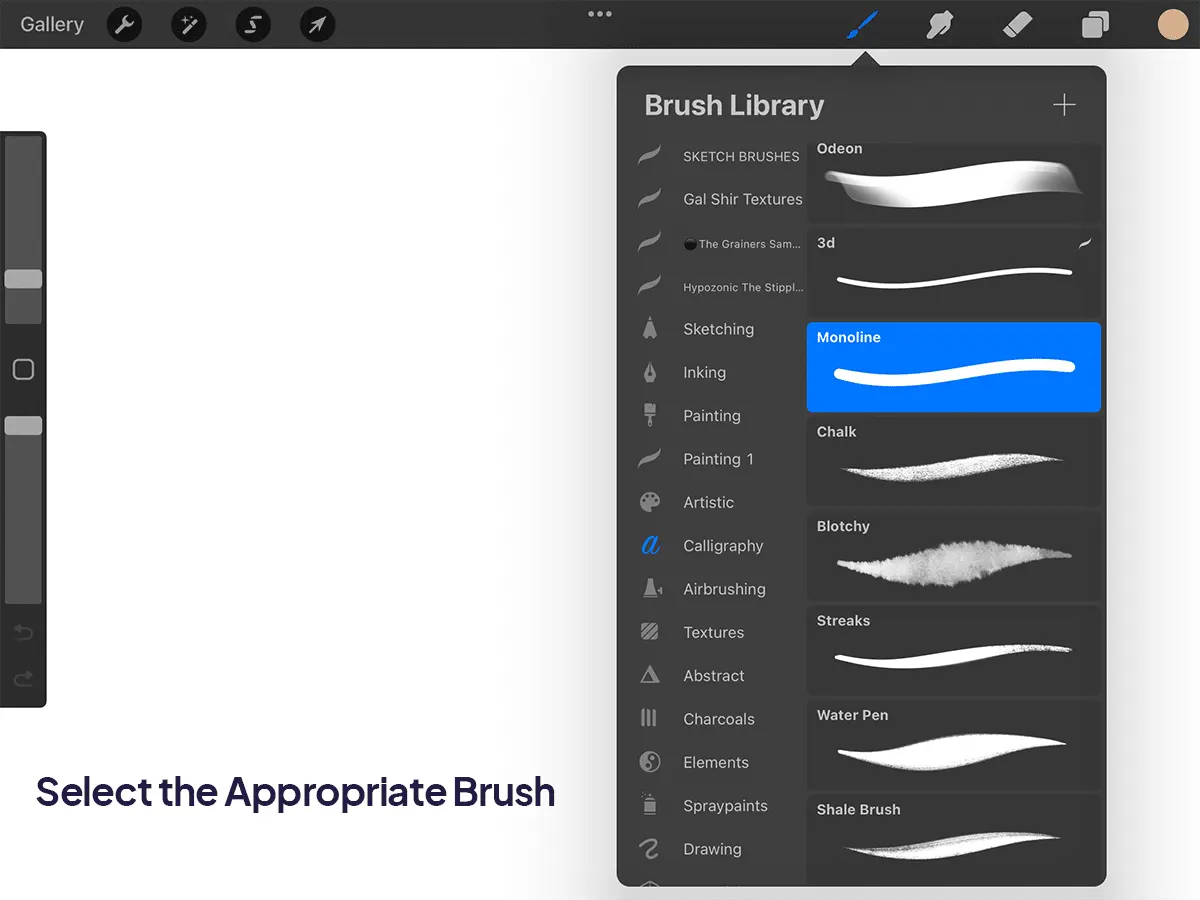
If your lines appear shaky, it is often due to the Streamline setting or a lack of stabilizer usage. Procreate includes a feature called Streamline that smooths out your strokes by compensating for small hand tremors. You can adjust this setting by opening the Brush Library, tapping on a specific brush, and navigating to the Stabilization menu. Increasing the amount of Streamline will force the brush to follow a smoother, more calculated path.
Another common cause for jagged lines is the resolution of your canvas. If your canvas dimensions are too small, the pixels become visible, creating a stair-step effect known as aliasing. Always ensure your canvas is set to a high DPI, such as 300, and an appropriate pixel size for your final output. Working on a larger canvas allows the software to calculate the curve and line data with greater precision, resulting in much cleaner edges.
Common mistakes when drawing straight lines
One frequent error is failing to wait long enough for the QuickShape snap to trigger. If you lift your stylus too quickly, the software will treat the stroke as a standard freehand line, leaving it uneven. You must keep the tip of your stylus in contact with the screen until the line snaps into place. Additionally, users often forget to tap the screen with a second finger, which is necessary to constrain the angle of the line to specific increments.
Another mistake involves drawing on the wrong layer while Drawing Assist is active. If you try to draw freehand on a layer that has Drawing Assist enabled, the software will force every stroke to snap to the grid. This can be frustrating if you are trying to sketch organically. Always check the layer thumbnail for the "Assisted" label to ensure you are not accidentally restricting your brush strokes when you intend to draw freely.
Best practices for professional line work
To achieve the best results, combine the use of brushes with high-opacity settings and proper stabilization. For technical illustrations, use brushes with a hard edge, such as the Monoline brush found in the Calligraphy set. These brushes do not vary in thickness based on pressure, which helps maintain a uniform, mechanical appearance. You can also adjust the pressure curve in the Procreate settings to match your specific drawing style and hand strength.
Consistency is key when working on complex illustrations. Organize your work by placing different types of lines on separate layers, which allows you to edit or erase them without affecting the rest of your composition. If you find yourself drawing many straight lines, consider using the "Selection" tool to move or transform existing lines rather than redrawing them. By mastering these tools and settings, you can significantly improve the speed and accuracy of your digital workflow while maintaining a high level of artistic control.
Key facts
- Use the QuickShape feature by drawing a stroke and holding your finger or stylus on the canvas for a second to snap it into a straight line.
- You can adjust the line's angle or length by tapping the "Edit Shape" button that appears at the top of the screen after the line snaps.
- Holding a second finger on the canvas while drawing a line forces it to snap to 15-degree increments for precise angles.
- The Drawing Guide tool, found in the Actions menu under Canvas, allows you to overlay a grid or perspective guide for manual straight-line accuracy.
- Enabling "Drawing Assist" on a specific layer forces every stroke made on that layer to follow the active grid lines automatically.
- Procreate’s "Streamline" setting, located in the brush studio, helps smooth out shaky hand movements to make freehand lines appear straighter.
The bottom line
Mastering straight lines in Procreate relies primarily on the QuickShape gesture, which transforms shaky strokes into precise geometric paths. By combining this with the Drawing Guide and the 15-degree snap feature, artists can achieve technical accuracy without sacrificing creative flow. Practice holding the stylus steady after each stroke to trigger the snapping mechanism, and utilize Drawing Assist to maintain strict alignment across your entire canvas.
People also ask
Can I draw perfect circles or squares using the same method?
Yes, the QuickShape feature works for various geometric forms. Simply draw the rough shape and hold your stylus still until it snaps into a perfect circle, square, or triangle.
Why does my line disappear or change shape when I lift my stylus?
If the line changes, you likely did not hold the stylus still long enough for QuickShape to activate. Ensure you keep the tip touching the screen until the shape snaps into place.
How do I turn off the snapping feature if I want to draw freely?
You can disable QuickShape by navigating to the Actions menu, selecting Prefs, and tapping Gesture Controls. From there, you can toggle off the QuickShape activation settings.
Does the Drawing Guide affect the final exported image?
No, the Drawing Guide is a visual overlay meant to assist your workflow. It will not appear on your exported image file unless you specifically choose to include the background or guide layers.
What is the difference between a grid and a perspective guide?
A grid provides a simple 2D reference for alignment, while a perspective guide uses vanishing points to help you draw 3D objects. Both are accessible through the Canvas menu.
Can I change the color of my drawing guides?
Yes, when you edit your drawing guide, a color bar appears at the bottom of the screen. You can slide this to choose any color that contrasts well with your current artwork.
This answer was created with the help of AI research tools and reference sources. Spotted an error? Let us know — we correct mistakes quickly. See our editorial policy.