How do you draw light rays?
Short answer
Drawing light rays requires representing light as straight lines originating from a source. Use a ruler to ensure precision, drawing arrows along the lines to indicate the direction of travel. When light hits an object, reflect or refract the lines according to the laws of physics to visualize optical behavior accurately.
On this page
How to draw light rays for beginners
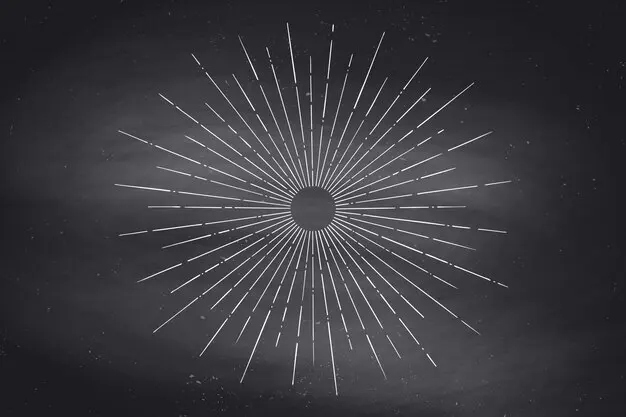
To draw light rays, you must treat light as a series of straight-line paths called rays. Start by identifying your light source, such as a lightbulb or the sun, and draw a point or a small circle to represent it. From this origin, use a sharp pencil and a ruler to draw straight lines radiating outward in various directions. These lines represent the path that photons take through space.
When drawing these rays, remember that they always travel in a straight line unless they encounter an obstacle. You should add an arrowhead to the middle of each line to show the direction of the light’s travel. This simple technique, known as ray tracing, is the foundation for understanding how shadows are cast and how images are formed in mirrors or lenses.
- Mark the light source clearly on your paper.
- Place your ruler against the source and draw a straight line.
- Add an arrowhead pointing away from the source.
- Repeat this process at different angles to show the spread of light.
How light rays behave when hitting surfaces
When light rays strike a surface, their behavior changes based on the material. If a ray hits a smooth, reflective surface like a mirror, it follows the law of reflection. This law states that the angle of incidence—the angle at which the ray hits the surface—is exactly equal to the angle of reflection. To draw this, you must first draw a "normal" line, which is an imaginary line perpendicular to the surface at the point of impact.
If the light ray enters a different medium, such as moving from air into water, it undergoes refraction. Refraction causes the light to bend because the speed of the light changes. When drawing this, the ray should change direction at the boundary between the two materials. If the light moves into a denser medium, it bends toward the normal line; if it moves into a less dense medium, it bends away.
- Reflection: The angle of incidence equals the angle of reflection.
- Refraction: The ray bends when passing through different materials.
- Absorption: The ray stops when it hits an opaque, non-reflective object.
Why light rays create shadows
Shadows are created when an opaque object blocks the path of light rays. To draw this accurately, you must draw rays from the light source that graze the edges of the object. These rays, known as boundary rays, define the outer limits of the shadow. The area between these boundary rays, where no light reaches, is the shadow.
You can observe two parts of a shadow: the umbra and the penumbra. The umbra is the darkest part where the light source is completely blocked. The penumbra is the lighter, outer region where the light source is only partially obscured. To illustrate this, draw a larger light source rather than a single point. You will see that the rays from the top and bottom of the source create a gradient of darkness, which is essential for realistic diagrams.

Common mistakes when drawing light rays
A frequent error is drawing light rays as curved lines. Unless light is passing through a gravitational field, it always travels in a straight line. Another common mistake is failing to include arrowheads, which makes it impossible to distinguish between the source and the destination of the light. Without arrows, the diagram lacks the necessary information about the direction of energy flow.
Additionally, many beginners forget to draw the normal line when calculating reflection or refraction. Without this reference line, it is nearly impossible to measure the angles accurately. Another oversight is ignoring the scale of the light source. If you represent a large source like a lamp as a single point, you will fail to show the penumbra, leading to a less accurate representation of how shadows actually function in the real world.
How to use light rays in optical diagrams
Optical diagrams use light rays to show how lenses and mirrors focus light. For a convex lens, draw rays entering parallel to the principal axis. Once these rays hit the lens, they should bend toward a single point called the focal point. This demonstrates how a magnifying glass or a human eye focuses light to create a clear image on a surface.
When drawing concave mirrors, the rays behave differently by converging toward a focal point in front of the mirror. By practicing these diagrams, you can visualize complex optical systems like telescopes or cameras. Always use a protractor to measure your angles if you want your diagrams to be scientifically precise. Consistent practice with these geometric rules will allow you to predict exactly where an image will appear and how large it will be.
Key facts
- Light rays are represented as straight lines indicating the direction of electromagnetic wave propagation.
- Always draw rays with an arrowhead pointing away from the light source to show the direction of travel.
- Use a sharp pencil and a straightedge to ensure accuracy, as light travels in perfectly straight paths in a uniform medium.
- When light hits a surface, draw a "normal" line perpendicular to the boundary to calculate angles of reflection or refraction.
- For reflection, the angle of incidence must equal the angle of reflection relative to the normal line.
- When drawing refraction, bend the ray toward the normal when entering a denser medium and away when entering a less dense one.
The bottom line
Drawing light rays is a fundamental skill in physics that relies on straight lines and geometric precision. By consistently using a ruler, marking the direction of travel with arrowheads, and referencing the normal line at surfaces, you can accurately predict how light reflects or refracts. Mastering these simple conventions allows you to visualize complex optical interactions and understand how lenses and mirrors shape the world around us.
People also ask
Why do we use rays instead of waves to represent light?
Rays simplify complex wave phenomena into geometric lines, making it easier to calculate how light interacts with lenses and mirrors. This method, known as geometric optics, is highly accurate for systems where the light wavelength is much smaller than the objects it encounters.
What is the difference between a real and virtual image?
A real image is formed where light rays actually converge at a point, allowing the image to be projected onto a screen. A virtual image occurs when rays appear to originate from a point behind a mirror or lens, but do not physically meet there.
How do I draw light passing through a convex lens?
Draw a ray parallel to the principal axis that bends through the focal point on the other side. Draw a second ray through the center of the lens, which continues in a straight line without bending.
What happens to light rays when they hit a rough surface?
Rough surfaces cause diffuse reflection, where rays scatter in many different directions rather than bouncing off at a uniform angle. This is why you cannot see a clear reflection on surfaces like paper or concrete.
Can light rays cross each other?
Yes, light rays can pass through the same point in space simultaneously without affecting one another. This principle of superposition allows multiple light sources to illuminate a room without the beams bouncing off each other.
What is the purpose of the "normal" line in diagrams?
The normal is an imaginary line drawn at a 90-degree angle to the surface where light strikes. It serves as the reference point for measuring angles, ensuring consistency in calculating how light changes direction.
This answer was created with the help of AI research tools and reference sources. Spotted an error? Let us know — we correct mistakes quickly. See our editorial policy.