How do you draw a realistic owl?
Short answer
Drawing a realistic owl requires focusing on the bird’s unique skeletal structure, specifically the large, forward-facing eyes and the compact, rounded body. By building the form with basic geometric shapes and layering intricate feather textures, you can create a lifelike representation that captures the intense, observant nature of these nocturnal hunters.
On this page
How to structure an owl drawing
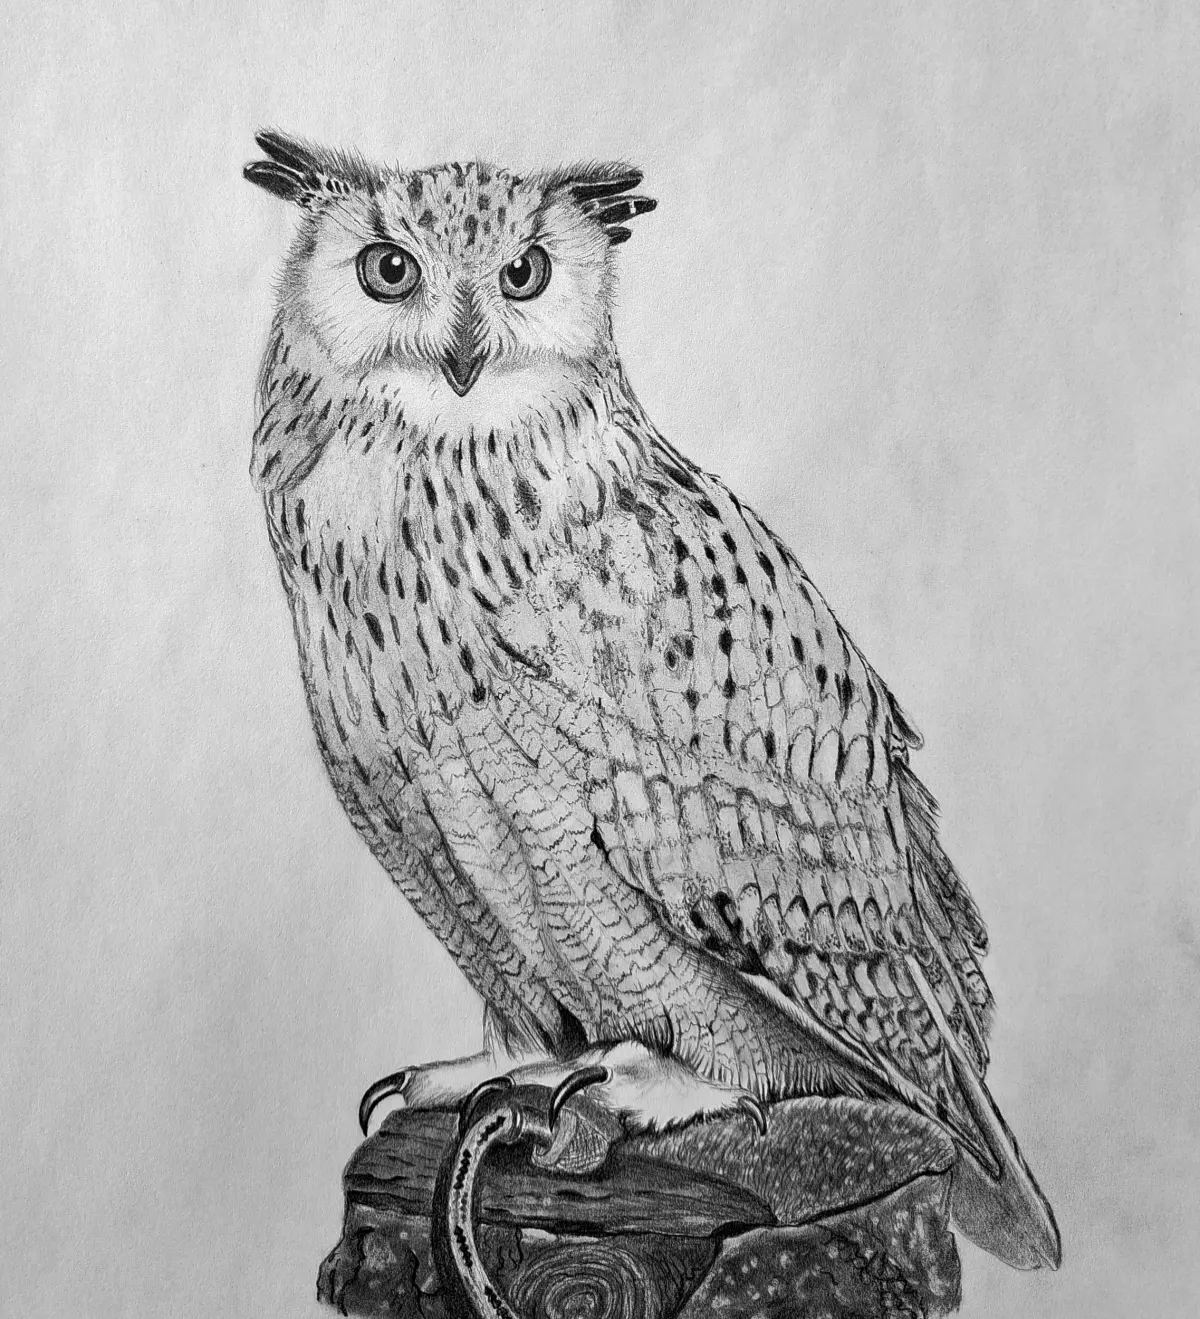
To begin a realistic owl, you must first establish the underlying geometry of the bird. Most owls, such as the Great Horned Owl or the Barn Owl, possess a silhouette defined by a large, rounded head and a tapered, teardrop-shaped body. Start by sketching a large circle for the head and a slightly elongated oval for the torso, ensuring the head overlaps the body slightly. This foundational framework prevents the common error of making the neck too long or the body too thin.
Once the basic shapes are set, map out the facial disc. This is the concave area surrounding the eyes that acts like a satellite dish to funnel sound. Draw a horizontal line across the center of the head circle to place the eyes, then sketch two smaller circles centered on that line. Remember that an owl's eyes are fixed in their sockets, so they must always face forward. Use these steps to ensure your proportions remain accurate:
- Sketch a vertical center line to maintain symmetry for the facial disc.
- Place the eyes close together to mimic the predatory focus of the bird.
- Draw a small, downward-pointing triangle between the eyes for the beak.
Best drawing techniques for feathers
Feathers are the most defining feature of an owl’s appearance, providing both insulation and silent flight capabilities. Rather than drawing every individual feather, focus on the "feather tracts" or groups of feathers that follow the contours of the body. Use short, overlapping "U" or "V" shapes to suggest texture, varying the size of the marks to reflect the transition from the soft, downy feathers on the chest to the stiffer flight feathers on the wings.
Pay close attention to the direction of the feather growth. On the chest, feathers often look like overlapping scales, while on the wings, they become elongated and streamlined. To create a realistic depth, use a sharp pencil to apply darker values where feathers overlap, leaving the edges slightly lighter. This contrast creates a three-dimensional effect. Avoid drawing uniform lines, as natural plumage is irregular and layered. Instead, work in small clusters to build up the density of the coat, ensuring the texture follows the underlying muscle structure of the bird.
How to capture the owl’s eyes
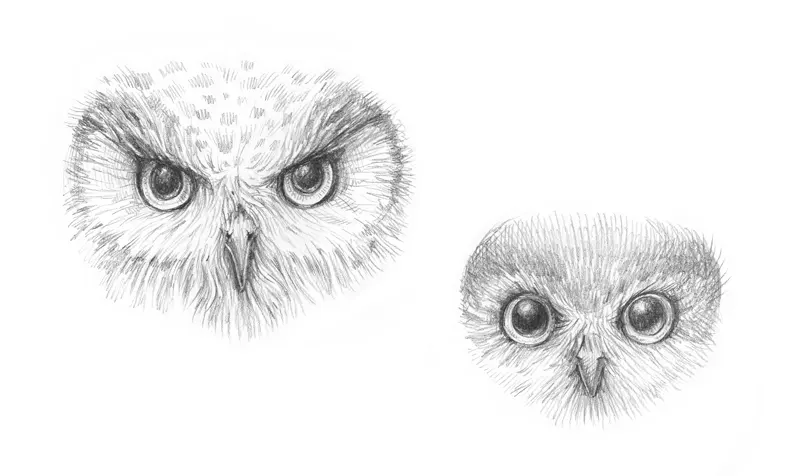
The eyes are the focal point of any realistic owl portrait. Because owls have large, tubular eyes, they possess a piercing, intense gaze that conveys intelligence and alertness. Start by defining the iris with a dark, circular ring, leaving a small white space for the highlight. This reflection is crucial, as it provides the "spark of life" that makes the drawing feel authentic. Use a soft blending stump or a kneaded eraser to create a gradient within the iris, moving from a darker outer edge to a lighter inner ring.
Surrounding the eyes, the feathers form a dense, radial pattern known as the facial disc. Use fine, short pencil strokes that radiate outward from the beak and eyes to emphasize this structure. The contrast between the dark, deep-set eyes and the lighter, intricate feathers of the disc creates the classic "wise" expression associated with these birds. Be careful not to make the eyes look too flat; by adding a subtle shadow on the upper part of the eyeball, you can suggest the curvature of the sphere and add significant depth.
Common mistakes when drawing owls
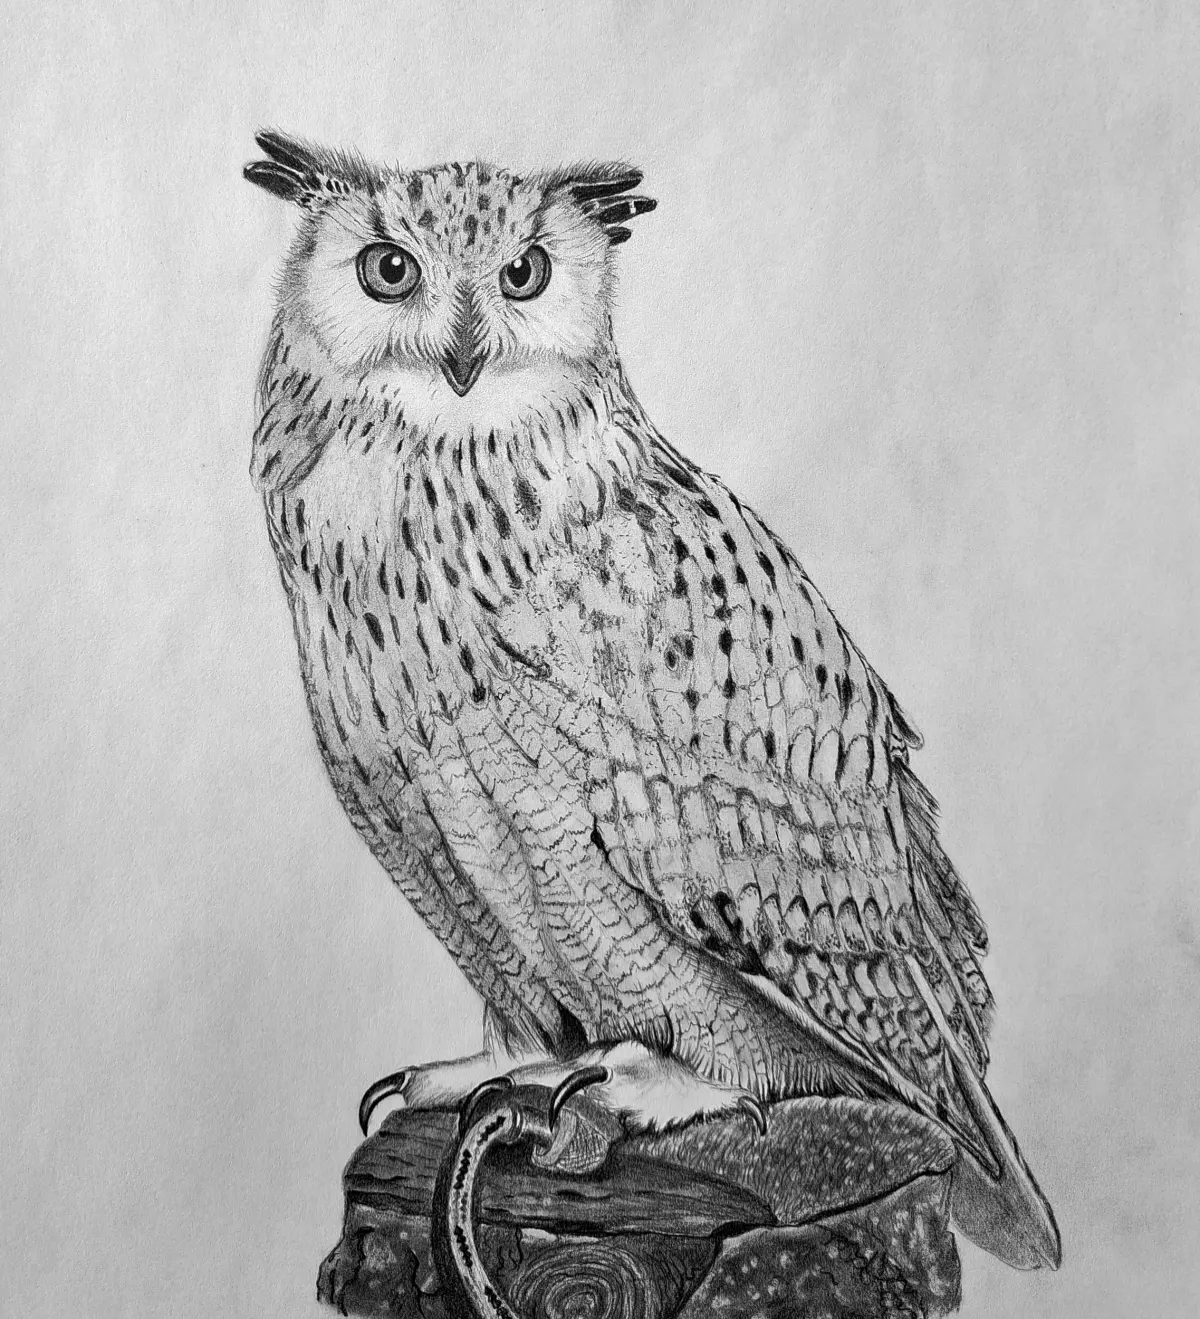
One of the most frequent errors is giving the owl a human-like neck. Owls are essentially "all head and body," with their necks hidden beneath thick layers of plumage. If you draw a visible neck, the bird will look more like a cartoon character than a predator. Another mistake is drawing the ears too high or too large. While species like the Great Horned Owl have "ear tufts," these are merely decorative feathers, not actual ears. Keep them subtle and integrated into the head shape rather than drawing them as distinct, separate appendages.
Another common pitfall involves the beak. Beginners often draw the beak too large or too far down the face. The beak should be small, hooked, and partially obscured by the facial feathers. If the beak is too prominent, it disrupts the balance of the face and ruins the owl’s characteristic silhouette. To avoid these issues, frequently step back from your drawing to check the overall proportions. If the bird looks awkward, check the alignment of the eyes and the compactness of the body against your reference photos to ensure the anatomy remains grounded in reality.
How to add realistic details and shading
Refining your drawing requires a focus on light and shadow, which brings the two-dimensional sketch into the realm of realism. Identify where the light source is coming from and apply shadows accordingly. The feathers under the chin, the underside of the wings, and the far side of the facial disc should all be in shadow. Use a range of graphite pencils, from 2H for light initial sketching to 4B or 6B for the deepest, darkest shadows in the pupils and under the wings.
Finally, add the fine details that distinguish an owl, such as the talons and the subtle patterns on the wings. Owls have powerful, curved talons that should look sharp and sturdy. Use cross-hatching to suggest the texture of the legs and feet, which are often covered in small, bristly feathers. By layering these final details over your established form, you complete the transition from a simple shape to a lifelike portrait. Take your time with the final highlights, ensuring they are placed consistently to match your light source, and your owl will appear ready to take flight from the page.
Key facts
- Owls have forward-facing eyes fixed in their sockets, meaning they must rotate their entire heads to look around.
- The facial disk, a concave arrangement of feathers, acts like a satellite dish to funnel sound toward the ears.
- Use a 2H pencil for light initial outlines to ensure you can easily erase or adjust the proportions.
- Focus on the "plumage texture" by drawing short, overlapping V-shaped marks rather than solid lines.
- Always draw the eyes first, as they are the focal point and define the owl's intense expression.
- Use a kneaded eraser to lift graphite and create highlights in the feathers and the pupils.
The bottom line
Drawing a realistic owl requires careful observation of its unique anatomy, particularly the large, forward-facing eyes and the concave facial disk. By starting with a light structural sketch and building texture through short, overlapping strokes, you can capture the bird's lifelike appearance. Focus on the interplay of light and shadow to define the volume of the feathers, ensuring the final result feels both organic and grounded.
People also ask
What is the most common mistake when drawing an owl?
Beginners often draw the eyes too far apart or too small. Owls have large, prominent eyes that occupy a significant portion of the facial disk, so ensure they are centered and closely spaced.
How do I make the feathers look soft instead of scratchy?
Avoid drawing long, continuous lines for feathers. Instead, use short, rhythmic strokes that follow the contour of the owl’s body to mimic the layered look of real plumage.
Should I use charcoal or graphite for a realistic owl?
Graphite pencils are better for fine detail work, such as the iris and beak textures. Charcoal is excellent for deep, velvety blacks in the shadows but can be harder to control for intricate feather patterns.
How do I draw the owl's talons accurately?
Talons are curved and sharp, often gripping a branch. Draw them as thick, segmented cylinders that taper to a point, and remember to add heavy shadows where the talons meet the wood.
Is it necessary to draw every single feather?
No, drawing every feather will make the image look cluttered. Focus on the main feather groups and suggest the rest with subtle shading and texture lines.
How do I capture the "wisdom" or intensity in an owl's gaze?
Leave a small, bright white circle or crescent in the pupil to represent a light reflection. This "catchlight" provides the eye with depth and life, making the owl appear alert and realistic.
This answer was created with the help of AI research tools and reference sources. Spotted an error? Let us know — we correct mistakes quickly. See our editorial policy.