How do you draw a ladder?
Short answer
Drawing a ladder requires establishing two parallel vertical lines for the rails and evenly spaced horizontal lines for the rungs. By applying simple linear perspective, you can create the illusion of depth by angling the rails toward a vanishing point. This technique transforms a basic two-dimensional shape into a realistic structure.
On this page
How to draw a basic ladder
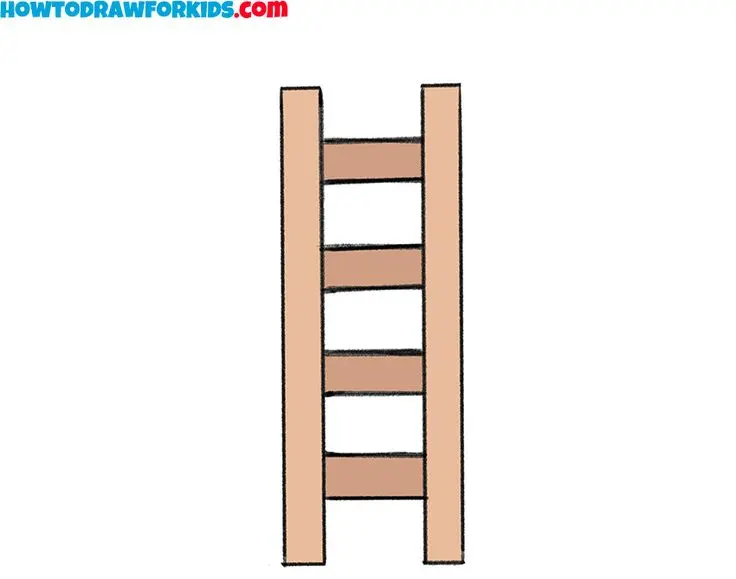
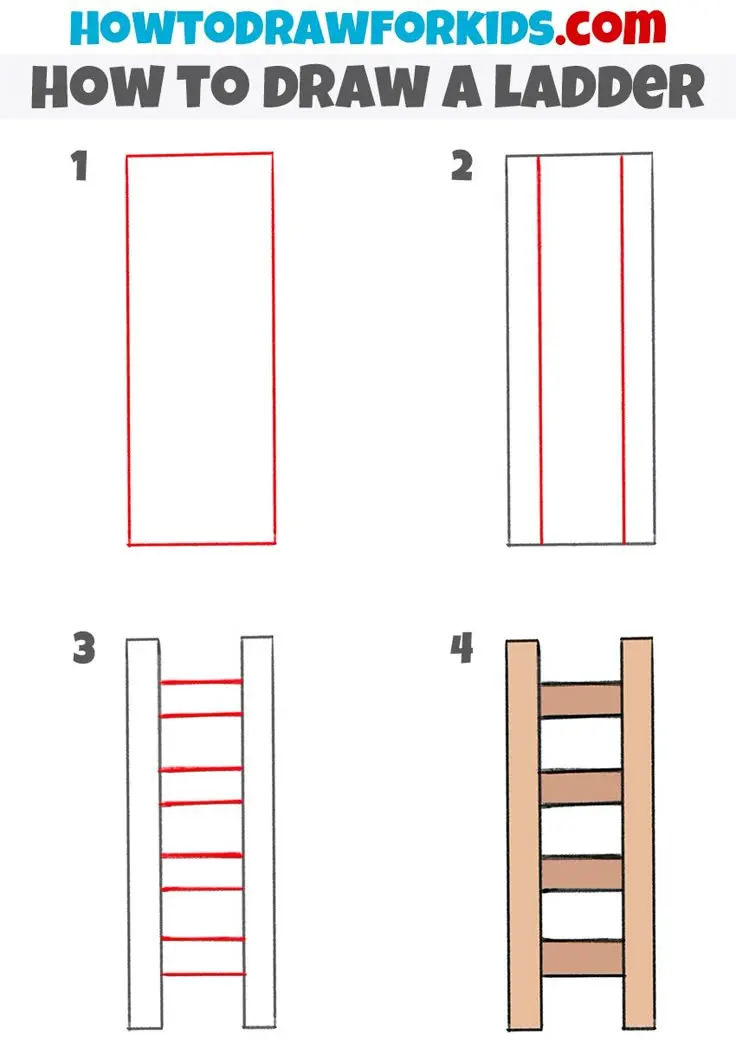
To draw a simple, flat ladder, begin by sketching two long, parallel vertical lines. These represent the side rails. Use a ruler if you need perfectly straight edges, though a freehand approach works well for a rustic look. Once the rails are in place, draw short horizontal lines connecting them at regular intervals to create the rungs.
Maintain consistent spacing between each rung to ensure the ladder looks functional and balanced. If the rungs are too close or too far apart, the drawing will lose its structural credibility. After drawing the rungs, you can add thickness by drawing a second, slightly offset line for each rung and rail. This simple technique gives the ladder a three-dimensional appearance without requiring complex perspective rules or advanced shading techniques.
- Draw two vertical lines of equal length.
- Place small tick marks at equal intervals along both lines.
- Connect the marks with horizontal lines to form rungs.
- Add a second line to each rung to show thickness.
- Erase any overlapping sketch lines for a clean finish.
How to draw a ladder in perspective
Drawing a ladder in perspective requires a vanishing point to simulate how objects appear smaller as they move away from the viewer. Start by drawing a horizon line and placing a single point on it. Draw two lines originating from this point; these will serve as the guide for your rails. As the rails move toward the vanishing point, they will naturally converge, creating the illusion of depth.
Once the rails are established, draw the rungs between them. Because of the perspective, the rungs must also align with the vanishing point. This means that as the rungs get closer to the horizon, they should appear shorter and closer together. This compression is essential for realistic depth. If you keep the rungs perfectly parallel to the bottom of your page, the ladder will look flat and disjointed.
- Use a light pencil for your initial perspective guidelines.
- Ensure the rungs are slightly curved if the ladder is leaning against a wall.
- Keep the rails closer together at the top than at the bottom.
- Use a vanishing point to guide the angle of every horizontal rung.
Best tools for drawing ladders
For beginners, a standard graphite pencil (HB or 2B) and a high-quality eraser are the most essential tools. A graphite pencil allows you to sketch lightly and make adjustments without leaving heavy indentations on the paper. A ruler or a straight edge is also highly recommended to ensure the rails remain perfectly parallel, which is the most common challenge in early drawing attempts.
If you prefer a more professional look, consider using fine-liner pens for the final outline. Once you have finished your pencil sketch, you can trace over the lines with a pen to create sharp, clean edges. For those interested in adding depth, a set of blending stumps or a soft charcoal pencil can help you create shadows underneath the rungs. These shadows are vital for making the ladder appear as if it is standing away from a wall.
Why perspective errors happen
Perspective errors usually occur when the artist fails to account for the angle of the viewer. If you draw a ladder leaning against a wall, the top of the ladder will appear smaller than the bottom. Many beginners mistakenly draw the rails as perfectly vertical, which makes the ladder look like it is floating or defying gravity. To fix this, always visualize where the ladder touches the ground and where it rests against the support.
Another common issue is the "foreshortening" of the rungs. When a ladder is viewed from an angle, the rungs should not look like simple rectangles. Instead, they should appear as thin, flattened ellipses or trapezoids. If you draw them as flat bars, the ladder will look like a paper cutout rather than a physical object. Always observe how real objects behave in space before committing to your final lines.
Common mistakes when drawing ladders
One frequent error is failing to make the rails symmetrical. Even a slight variation in the width of the rails can make the ladder look warped or unsafe. Always measure the distance between your rails at the top, middle, and bottom to ensure they remain consistent. Another mistake is drawing too many rungs, which can make the ladder look crowded and cluttered rather than functional and sturdy.
Finally, avoid neglecting the connection points where the rungs meet the rails. In a real ladder, the rungs are either inserted into the rails or attached with brackets. Adding small details like bolts or joints where these parts meet adds a layer of realism that elevates a simple sketch. By focusing on these small mechanical details, you transform a generic drawing into a believable representation of a tool, ensuring your final work is both accurate and visually compelling.
Key facts
- A ladder is defined by two parallel vertical rails connected by evenly spaced horizontal rungs.
- Use a ruler to ensure the two side rails remain perfectly parallel throughout the drawing.
- Perspective drawing requires the rungs to appear closer together as they recede toward a vanishing point.
- Rungs should be drawn as short horizontal lines that connect the two rails at identical intervals.
- Adding depth to the rails by drawing a second parallel line creates a 3D rectangular shape.
- A common mistake is drawing rungs at an angle, which makes the ladder appear unstable or distorted.
The bottom line
Drawing a convincing ladder relies on maintaining geometric consistency. By keeping your vertical side rails parallel and spacing your horizontal rungs at precise, equal intervals, you establish structural integrity. Whether you are sketching a simple 2D icon or a complex 3D object in perspective, focus on the relationship between the rails and the rungs to create a clear, functional representation of this essential tool.
People also ask
How do I make a ladder look like it is leaning against a wall?
Draw the ladder at a diagonal angle rather than straight up and down. Ensure the top of the ladder touches a horizontal line representing the wall while the base sits on the ground line.
Should the rungs be drawn on the front or the side of the rails?
In a standard front-facing view, draw the rungs between the two rails. If drawing a 3D perspective, connect the inner edges of the rails to give the rungs visible thickness.
How can I draw a rope ladder instead of a wooden one?
Replace the rigid side rails with two wavy, vertical lines representing ropes. Draw the rungs as curved lines that sag slightly in the middle to suggest weight and flexibility.
What is the best way to draw the rungs evenly?
Mark small dots on one rail at equal intervals before drawing the rungs. Use these marks as guides to ensure every rung is perfectly aligned with the opposite side.
How do I show that the ladder is made of metal?
Use thin, sharp lines and add small highlights or reflections on the surface of the rails. Metal ladders often have tubular, rounded ends rather than the flat edges seen on wood.
Can I draw a ladder without using a ruler?
You can, but it is difficult to keep the rails parallel. If you prefer a hand-drawn aesthetic, focus on maintaining a consistent width between the rails from top to bottom.
This answer was created with the help of AI research tools and reference sources. Spotted an error? Let us know — we correct mistakes quickly. See our editorial policy.