How do you draw landscapes?
Short answer
Drawing landscapes involves observing the natural world, establishing a strong composition, and using perspective to create depth. By breaking complex scenes into basic geometric shapes and layering values from light to dark, you can translate three-dimensional vistas onto a two-dimensional surface with clarity, balance, and a sense of atmospheric realism.
On this page
How to start drawing landscapes for beginners
Beginners should start by selecting a simple subject, such as a single tree, a rolling hill, or a distant mountain range. Avoid overly complex scenes with excessive detail, as these can become overwhelming. Focus on capturing the large, primary shapes of the landscape rather than individual blades of grass or leaves. Use a soft graphite pencil, such as a 2B or 4B, to lightly sketch the horizon line and the main masses of the composition.
Establishing a clear focal point is essential for a successful drawing. Decide what the most important element in your scene is and ensure it draws the viewer's eye. You can achieve this by placing the subject slightly off-center according to the rule of thirds. Remember to keep your initial marks very light so you can easily adjust proportions before committing to darker, permanent lines.
- Find a quiet spot with a clear view of the horizon.
- Sketch the horizon line, ensuring it is not perfectly centered to avoid splitting the image.
- Outline the major shapes, such as mountains or clusters of trees, using simple geometric forms.
- Check your proportions against the actual scene to ensure the scale feels correct.
How to create depth in landscape drawings
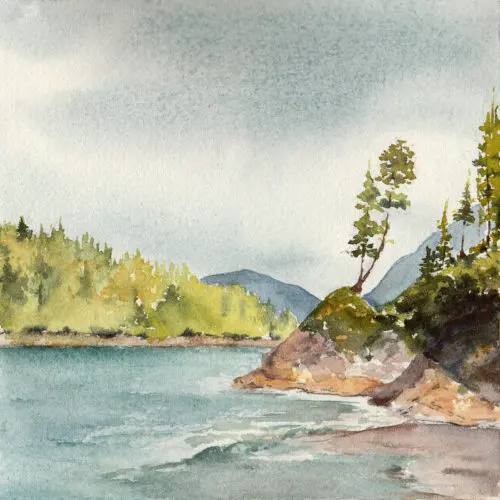
Creating the illusion of three-dimensional space on a flat page requires an understanding of atmospheric and linear perspective. Objects that are closer to the viewer should be drawn with more detail, higher contrast, and darker values. As elements recede into the background, they should become lighter, less detailed, and closer in value to the sky. This technique mimics how air particles scatter light over long distances.
Linear perspective also plays a vital role in grounding your landscape. If you are drawing man-made structures like fences or buildings, ensure their lines converge toward a vanishing point on the horizon. For natural landscapes, the overlapping of forms—where a closer hill hides part of a distant one—is the most effective way to signal depth. By layering these shapes, you create a clear path for the viewer’s eye to travel from the foreground to the horizon.
- Use overlapping shapes to define distance between objects.
- Reduce the contrast in background elements to simulate atmospheric haze.
- Keep foreground textures sharp and distinct to emphasize proximity.
- Vary the size of recurring elements, such as trees, to show scale.
Best tools for landscape sketching
The choice of materials significantly impacts the final quality and texture of your landscape. Graphite pencils are the standard for most artists because they allow for a wide range of values, from delicate silver grays to deep, rich blacks. A set ranging from 2H for light sketching to 6B for dark shadows provides the versatility needed to capture various textures, such as rugged stone or soft clouds.
Paper selection is equally important for achieving professional results. A medium-tooth drawing paper is ideal because it holds graphite well and allows for blending without becoming overly slick. For those interested in adding color, toned paper can be a game-changer. Using a neutral gray or tan background allows you to use white charcoal for highlights and black charcoal for shadows, which helps you understand light and value relationships much faster than working on white paper alone.
- Graphite pencils (2H, HB, 2B, 4B, 6B) for varied line weight.
- Kneaded erasers for lifting graphite and creating soft highlights.
- Blending stumps or chamois for smoothing out large areas like skies.
- A sketchbook with at least 80lb paper weight to prevent buckling.
Why perspective and proportions fail
Common issues in landscape drawing often stem from a misunderstanding of the horizon line. If your horizon is tilted, the entire landscape will appear to slide off the page. Always ensure your horizon is level unless you are intentionally depicting a steep incline. Furthermore, beginners often struggle with the scale of objects, such as drawing a distant house the same size as a nearby tree, which destroys the sense of space.
Another frequent mistake is "symbol drawing," where the artist draws what they think a tree looks like rather than what they actually see. This leads to repetitive, unnatural shapes. To avoid this, spend more time observing the specific contours of the landscape. If you find your drawing looks flat, it is likely because you are using too narrow a range of values. Ensure your darkest darks and lightest lights are present to provide the necessary contrast for a professional finish.
- Check the horizon line with a straight edge to ensure it is level.
- Compare the height of foreground objects to background objects frequently.
- Avoid drawing repetitive patterns for foliage, which look unnatural.
- Squint at your subject to simplify complex details into simple value shapes.
How to finish and refine a landscape
Refining a drawing is about balancing the composition and adding the final touches that bring the scene to life. Once your basic values are established, use a kneaded eraser to pull out highlights, such as the sun hitting the top of a mountain or the glint of light on water. These small, high-contrast details provide a sense of energy and realism that makes the landscape feel authentic and complete.
Finally, step back from your work periodically to view it from a distance. This helps you see the drawing as a whole rather than focusing on individual marks. If the drawing feels disjointed, use a blending tool to soften transitions between areas. A well-finished landscape should have a clear focal point, a logical progression of depth, and a consistent light source that ties all the elements together into a cohesive, harmonious image.
Key facts
- Establish a horizon line early to define the eye level and spatial depth of the scene.
- Use atmospheric perspective by drawing distant objects lighter, cooler in tone, and with less detail.
- Divide your composition into three distinct planes: the foreground, middle ground, and background.
- Overlap shapes to create a sense of three-dimensional space and distance on a flat surface.
- Vary your line weights, using thicker, darker marks for objects closer to the viewer.
- Anchor your drawing with a clear focal point, such as a large tree, a mountain peak, or a building.
The bottom line
Drawing a successful landscape requires balancing technical structure with artistic observation. By establishing a clear horizon, utilizing atmospheric perspective, and varying your tonal values, you can transform a flat surface into a deep, immersive environment. Focus on the interplay of light and shadow rather than minute details. With consistent practice and careful study of your surroundings, you will develop the ability to capture nature’s vast complexity effectively.
People also ask
How do I choose a good landscape composition?
Follow the rule of thirds by placing your horizon line one-third of the way up or down the page. Avoid placing the horizon exactly in the center, as this can make the image feel static or split in half.
What pencils are best for landscape sketching?
Use a range of pencils, typically from 2H for light initial outlines to 6B for deep, dark shadows. Harder leads are better for fine details in the background, while softer leads create rich textures in the foreground.
How do I draw realistic clouds?
Observe the light source and shade the undersides of clouds to give them volume. Keep the edges soft and avoid drawing hard outlines, as clouds are gaseous and shift constantly in the sky.
Why does my landscape look flat?
Your drawing likely lacks a full range of values or clear overlapping elements. Ensure you have deep blacks, bright whites, and a variety of mid-tones to define the depth of the terrain.
How do I draw trees without detailing every leaf?
Focus on the overall silhouette and the structure of the branches rather than individual foliage. Use clusters of marks to suggest density and light patterns, letting the viewer’s eye fill in the rest.
Should I draw outdoors or from a photograph?
Drawing outdoors, or "en plein air," helps you understand how light changes in real time. Photographs are useful for practice, but they often flatten colors and distort the true scale of a landscape.
This answer was created with the help of AI research tools and reference sources. Spotted an error? Let us know — we correct mistakes quickly. See our editorial policy.