How do you draw symmetrical objects?
Short answer
Drawing symmetrical objects requires establishing a central axis to serve as a mirror line. By measuring distances from this guide to key points on both sides, you ensure balance. Consistent observation and frequent flipping of your work help maintain alignment, allowing you to replicate shapes accurately across the vertical or horizontal plane.
On this page
How to draw symmetrical objects step by step
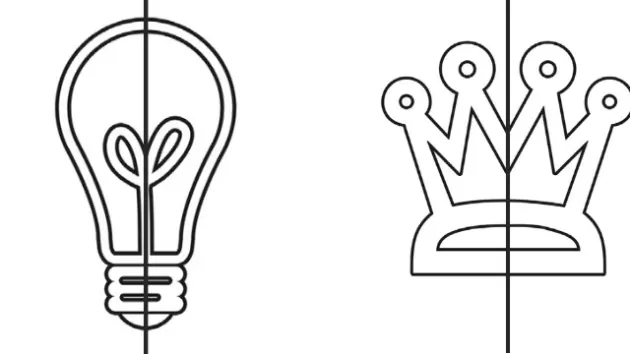
Achieving perfect symmetry begins with the construction of a center line, known as the axis of symmetry. This vertical or horizontal guide acts as the anchor for your drawing, ensuring that both halves share the same spatial relationship. Without this reference, the human eye often perceives subtle shifts in proportion that make an object appear lopsided or distorted.
- Draw a light, straight vertical line down the center of your paper to serve as your axis.
- Identify the widest points of your object and mark their distance from the center line using a ruler or a pair of calipers.
- Sketch the basic geometric shapes on one side of the axis, then immediately replicate those marks on the opposite side.
- Connect these points with fluid lines, constantly checking the distance between your marks and the center line to ensure they mirror each other exactly.
Best tools for symmetrical drawing
While freehand sketching is a valuable skill, certain tools significantly improve accuracy when precision is required. A ruler is the most fundamental instrument, allowing for exact measurements of width and height. For more complex organic shapes, a pair of drafting dividers or calipers can be used to "pick up" a measurement from one side of the drawing and transfer it precisely to the other side.
- Transparent tracing paper: Allows you to draw one half, flip the paper, and trace the reflection to check for errors.
- Drafting compass: Essential for creating perfect circular or elliptical components that must be centered on an axis.
- Graph paper: Provides a built-in grid system that makes counting squares for balanced placement incredibly easy.
- Erasable blue pencils: Useful for initial layout lines that can be easily removed once the final, darker lines are established.
Why symmetry is difficult to master
The human brain is naturally biased toward seeing symmetry, yet our hands often struggle to replicate it due to physical limitations. When drawing, we tend to favor our dominant side, which leads to a slight curvature or tilt in lines that should be perfectly straight. This phenomenon, often called "handedness bias," causes the right side of a right-handed artist’s drawing to often be more accurate or fluid than the left side.
Furthermore, our eyes often play tricks on us by focusing on details rather than the overall silhouette. When you focus too intently on a single feature, such as an eye or a leaf, you lose track of the object's total proportions. To overcome this, you must periodically step back from your work. Viewing your drawing from a distance or looking at it in a mirror reveals the imbalances that your brain ignores while you are working in close proximity.
Common mistakes when drawing symmetry
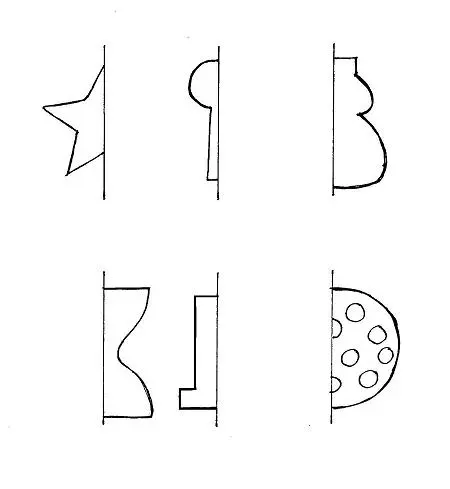
One of the most frequent errors is failing to establish the center axis early enough in the process. Many beginners start by drawing the outline of an object and attempting to match the second side by eye, which almost always results in a lopsided final product. Another common mistake is neglecting to check the negative space between the object and the axis. If the empty space on the left does not perfectly mirror the empty space on the right, the entire object will appear skewed.
- Do not rely solely on your eyes; always use a measuring tool to verify the distance of key points from the center.
- Avoid drawing the entire object on one side before starting the other, as this makes it difficult to correct major structural errors later.
- Stop rushing the initial layout, as a crooked foundation makes it impossible to achieve a symmetrical result regardless of how well you shade or detail the final piece.
How to fix asymmetrical drawings
If you realize your drawing is asymmetrical, the best approach is to identify the "anchor point" where the deviation began. Often, a single misplaced line early in the process creates a ripple effect that forces the rest of the drawing to be off-balance. By erasing back to that specific point and re-measuring the distance from the center line, you can salvage the structure without redrawing the entire piece from scratch.
When you are unsure if your drawing is truly symmetrical, turn the paper upside down. This simple technique forces your brain to stop recognizing the object as a familiar shape and instead view it as a collection of abstract lines and angles. In this inverted state, any inconsistencies in width, height, or curvature become immediately obvious. Once identified, you can make the necessary adjustments to bring the two sides into harmony, ensuring a balanced and professional final result that satisfies the viewer’s natural expectation for order.
Key facts
- Symmetry relies on an axis of reflection, an imaginary line where one side mirrors the other.
- Use a light pencil to draw a center guideline before sketching the main forms.
- Measure distances from the center line to the edges using a ruler or your fingers to ensure balance.
- Flip your paper upside down periodically to spot lopsided proportions that your brain might otherwise ignore.
- Work on both sides of the object simultaneously rather than finishing one half before starting the other.
- Practice with simple geometric shapes like circles or squares to build muscle memory for bilateral balance.
The bottom line
Drawing symmetry is a skill built on structural planning rather than freehand guessing. By establishing a central axis and measuring distances from that line, you maintain consistent proportions across both sides. Regularly flipping your work and working on both halves simultaneously helps identify errors early. While mathematical perfection is helpful for design, remember that slight organic variations often create more visually engaging and realistic artistic results.
People also ask
Can I use tracing paper to help with symmetry?
Yes, tracing paper is an excellent tool for checking symmetry. You can draw one half, fold the paper along the center axis, and trace the reflection onto the other side.
Why does my drawing look asymmetrical even when I measure carefully?
Minor inconsistencies often arise from the natural curvature of the human hand. Even with measurements, subtle variations in line weight or pressure can disrupt the illusion of perfect symmetry.
Is absolute symmetry necessary for a realistic drawing?
Most natural objects, such as human faces or trees, are rarely perfectly symmetrical. Aiming for "dynamic symmetry" often results in a more organic and lifelike appearance than mathematical precision.
How do I draw symmetrical objects on a computer?
Most digital illustration software features a symmetry or mirror tool. These tools automatically duplicate your brush strokes across a predefined axis, ensuring perfect alignment instantly.
What is radial symmetry?
Radial symmetry occurs when parts are arranged around a central point, like the petals of a flower or a snowflake. To draw this, divide your canvas into pie-shaped wedges using a protractor.
Should I start with the outline or the details?
Always establish the basic outline and center axis first. Adding details before the overall shape is balanced makes it difficult to correct fundamental errors later in the process.
This answer was created with the help of AI research tools and reference sources. Spotted an error? Let us know — we correct mistakes quickly. See our editorial policy.